4.2L
Generator
Special tools, testers and auxiliary items required
• Hose Clamp Pliers (VAS 6340)
Observe notes on contact corrosion. Refer to=> [ Contact Corrosion ] Contact Corrosion.
Removing
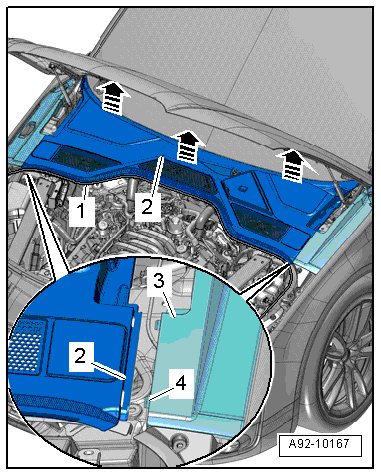
- Turn off the ignition and disconnect the ground cable from the battery. Refer to => [ Battery, Disconnecting and Connecting ] Battery, Disconnecting and Connecting.
- Remove the windshield wiper arms. Refer to => [ Windshield Wiper Arms ] Removal and Replacement.
- Remove the seal - 1 - near the plenum chamber cover.
Danger of damaging the plenum chamber cover.
• Coat the space between the windshield and the plenum chamber cover with some soapy water.
- Carefully remove the plenum chamber cover - 2 - starting at the edge of the glass vertically from the windshield - arrows B -.
- Disengage the plenum chamber cover on the outside of the cover - 3 -. To do this, lift the cover in the center and disengage it from the guides - 4 -.
- Unlock the cover - 2 - and swivel it to the side - arrow -.
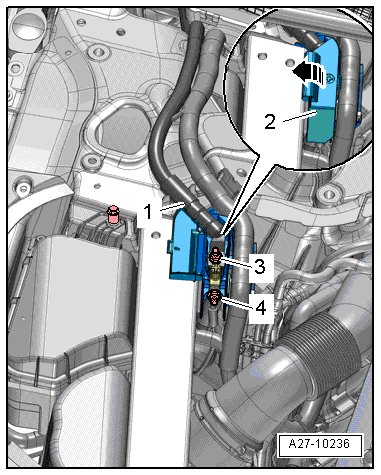
- Disconnect the positive cable - 4 -.
- Remove the nut - 3 - on the positive cable - 1 -.
- Remove the positive cable - 1 - from the threaded pin.
- Open the tabs - 1 - and - 3 - and remove the positive terminal grip - 2 - from the bracket.
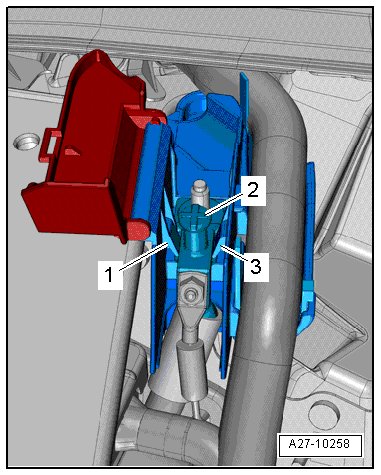
- Drain the coolant.
- Remove the ribbed belt tensioner.
- Loosen the generator bolts - arrows - approximately 6 turns.
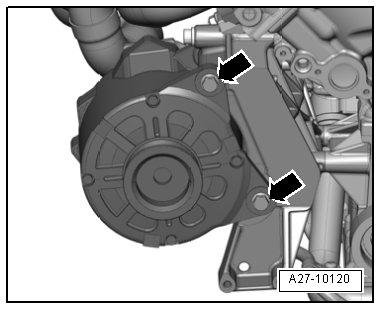
- Using a hammer, carefully tap the bolt heads to loosen the generator mount bushings.
- Remove the bolts completely.
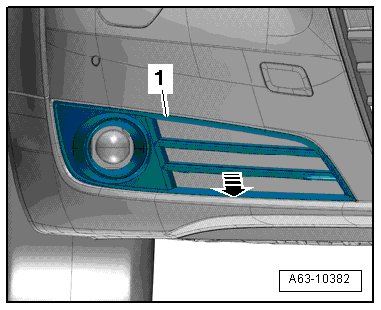
- Remove the air intake grille - 1 - from the bumper cover - arrow -.
- Release the tab - arrow - and open the cover - 4 -.
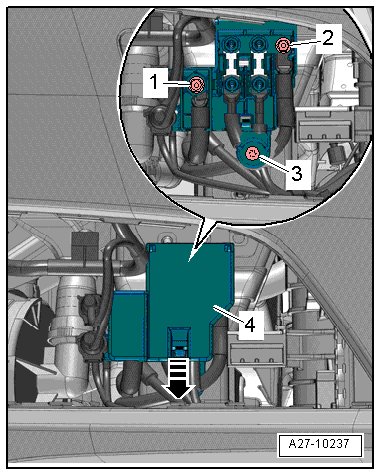
- Remove the electrical wires - 1 - and - 2 -.
- Remove bolt - 3 -.
- Push the fuse panel on the front end upward and disengage it from the lock carrier.
- Free up the electrical wire.
- Remove the bolts - 1 - and remove the deflector plate forward - arrow -.
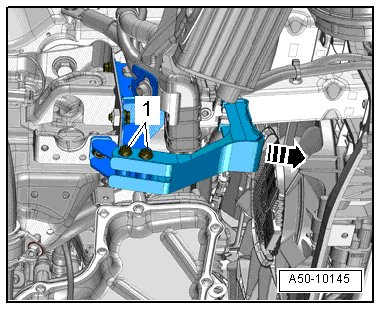
- Free up the windshield washer fluid hose - 3 - and free up the electrical wires - 4 -.
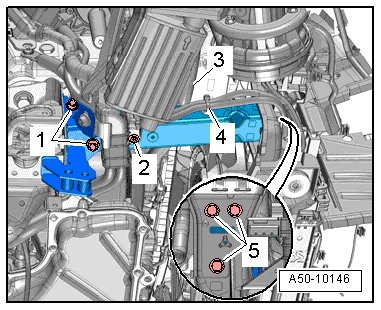
- Remove the bolts - 1, 2 and 5 - and remove the right lower longitudinal member.
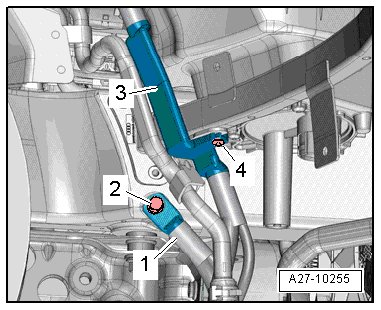
- Remove the bolt - 4 - for the positive cable - 3 - and the bolt - 2 - from the negative cable - 1 - and free up the cables.
- Disconnect the connector - 3 - from the Oil level thermal sensor (G266).
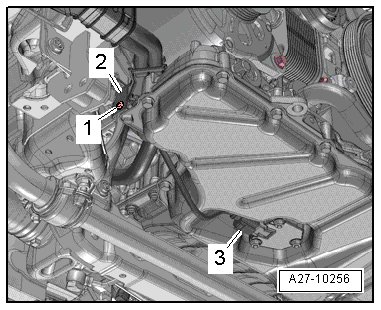
- Remove the bolt - 1 - from the wiring bracket - 2 -.
- Free up the wire - 2 - on the coolant hoses.
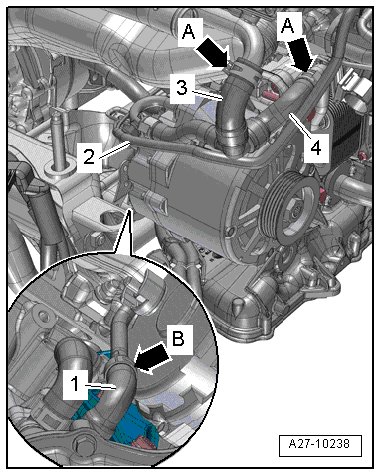
- Loosen the clamps - arrows A - and remove the coolant hoses - 3 -and - 4 -.
- Loosen the clamp - arrow B - and remove the coolant hose - 1 - from the generator.
- Move the generator - 4 - forward as far as possible.
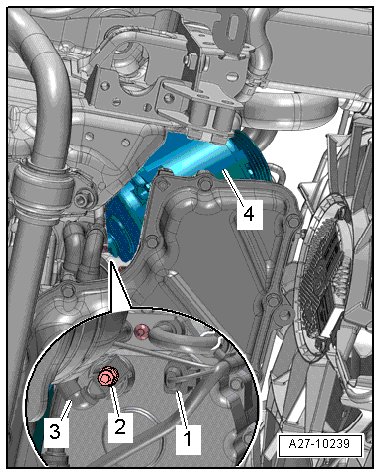
- Remove the nut - 2 - and remove the B+ wire - 3 -.
- Disconnect the electrical connector - 1 -.
- Remove the generator to the right.
Installing
• Tightening specifications. Refer to=> [ Generator with Bushings Overview ] Generator with Bushings Overview.
Install in reverse order of removal. Note the following:
• Secure all hose connections using standard hose clamps. Refer to Electronic Parts Catalog (ETKA).
• Because the clamping force of a tight bushing is too low despite correct torque, bushings must be loosened.
- Move the bushings for the bolts slightly toward the back to make is easier to install the generator.
- Connect the coolant hoses.
- Install the ribbed belt tensioner.
- Make sure the ribbed belt is on securely and is routed correctly.
- Install the lower longitudinal member and the deflector plate.
- Install the front end fuse panel. Refer to=> [ Fuse Holder, Front End ] Fuse Holder, Front End.
- Install the positive terminal grip. Refer to => [ Battery Jump Start Terminal (U6) ] Battery Jump Start Terminal (U6).
- Connect the battery. Required actions, refer to=> [ Connecting ] Battery, Disconnecting and Connecting.
- Start engine and check belt routing.