Lower Timing Chain Cover
Lower Timing Chain Cover
Special tools, testers and auxiliary items required
• Bits (T10099)
• Silicone Sealant (D 174 003 A3)
• Flat Scraper
• Hand Drill with Plastic Brush Attachment
• Protective Eyewear
• Feeler Gauge
Removing
- Remove the noise insulation..
- Remove the right front wheel.
- Remove the right front wheel housing liner..
- Drain the engine oil. Refer to Maintenance Procedures.
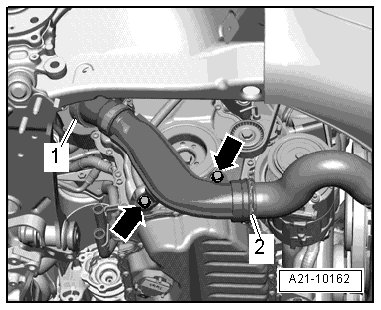
- Remove the bolts - arrows -.
- Remove the charge air pipe by lifting the clamps - 1 and 2 -.
- Remove the ribbed belt. Refer to => [ Ribbed Belt ] Ribbed Belt.
- Rotate the vibration damper to the Top Dead Center (TDC) position - arrow - using the counter hold tool (T10355) :
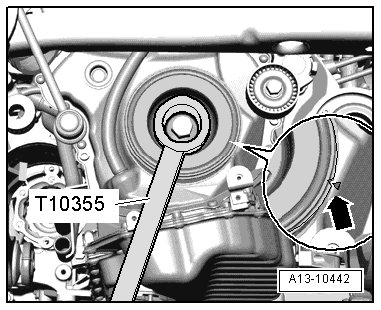
• The notch on the vibration damper must line up with the arrow mark on the lower timing chain cover.
The engine could be destroyed:
• In order NOT to change the valve timing, the crankshaft must not be moved out of the TDC position when the vibration damper bolt is removed.
- Remove the vibration damper bolt using the counter hold tool (T10355).
- Remove the vibration damper.
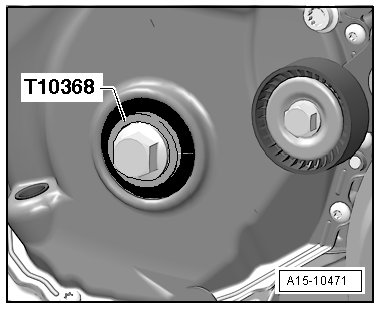
To avoid damaging the splines, only use thrust piece (T10368) to install the vibration damper bolt.
- Install the vibration damper bolt with the thrust piece (T10368).
- Hold the engine in its installed position and remove the engine mount. Refer to => [ Engine Mount ] Engine Mount.
- Lift the engine approximately 50 mm and loosen the engine mount bracket upper bolt.
- Now, lower the engine approximately 100 mm.
- Free up the wiring harness - arrow -.
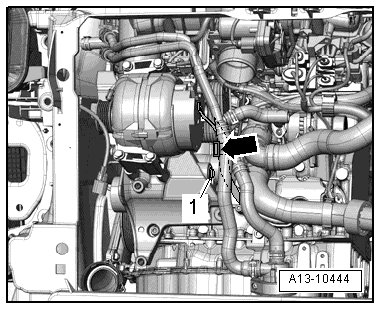
- Remove the bolt - 1 - and remove the ribbed belt tensioner from the accessory bracket.
- Remove the engine mount bracket lower bolts using the bits (T10099).
- Remove the engine mount bracket and the bolts.
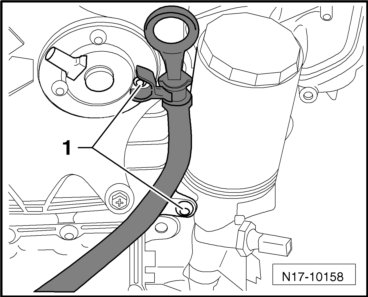
- Remove the bolts - 1 - and pull the oil dipstick guide tube out of the lower timing chain cover.
- Disconnect the wastegate bypass regulator valve from the turbocharger - arrows -.
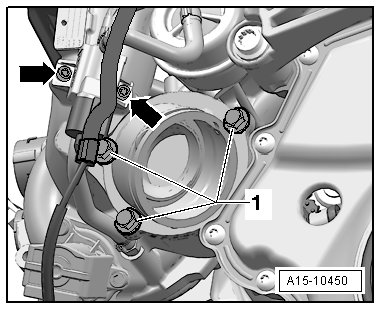
- Remove the turbocharger connection bolts - 1 - and the connection.
- Remove the lower timing chain cover bolts - 1 through 15 -.
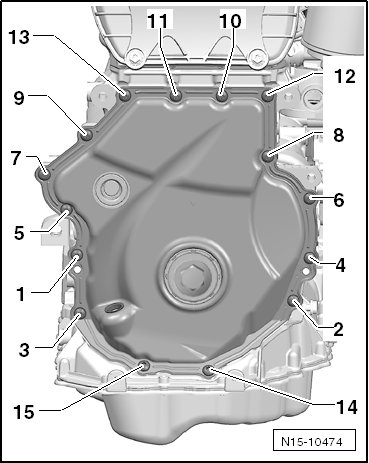
The lower timing chain cover could be damaged. To avoid deformation, do not hold between the bolting points.
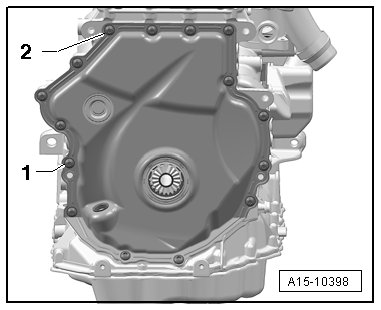
- Pry off the lower timing chain cover; when doing this, begin at - 1 and 2 -.
Installing
- Lower timing chain cover bolt tightening sequence and specification. Refer to => [ Lower Timing Chain Cover Bolt Tightening Sequence and Specification ] Timing Chain Cover Overview.
- For additional tightening specifications, refer to the following:
• => [ Timing Chain Cover Overview ] Timing Chain Cover Overview.
• => [ Turbocharger Component Overview ] Turbocharger Component Overview.
• => [ Ribbed Belt Drive Overview ] Ribbed Belt Drive Overview.
• => [ Engine and Transmission Mount Overview ] Engine and Transmission Mount Overview.
- Use silicone sealant (D 174 003 A3).
• The sealing surfaces must be completely free of oil and grease.
• Note the expiration date of the silicone sealant.
• The cover must be installed within 5 minutes after applying the silicone sealant.
• Replace the bolts which have been tightened to an additional torque angle.
• Replace O-rings, seals and self-locking nuts.
- Remove any sealant residue on the cylinder block using a flat blade scraper.
Danger of eye injury.
• Wear protective eyewear.
- Seal off both sides of the seal with tape to prevent contamination.
- Using a rotating plastic brush, remove any remaining sealing on the cover.
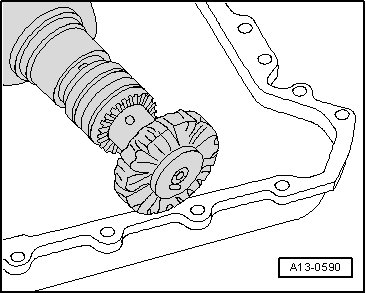
- Clean the sealing surfaces, they must be free of oil and grease.
- Install the cover with the old bolts and tighten them to specification:
• Tightening specification: 8 Nm.
- Check the gap between the cover and the cylinder block using a feel gauge.
• It must not exceed 0.2 mm.
• If the gap exceeds 0.2 mm, replace the cover.
• It is not possible to measure between the cover the upper oil pan, however check the sealing surface for evenness.
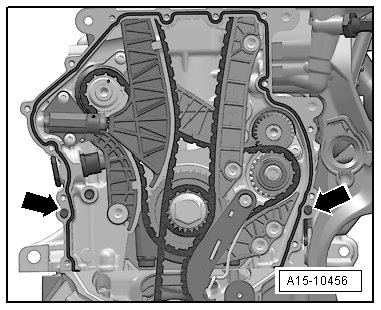
- Make sure both alignment pins - arrows - are present.
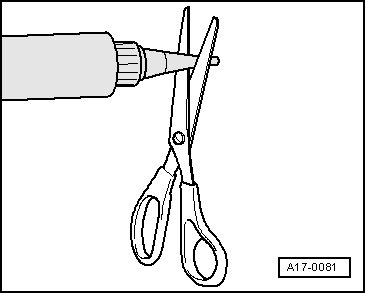
- Cut the sealant tube nozzle at the front mark (nozzle diameter: approximately 0.12 in).
- Apply the silicone sealant to the clean sealing surface of the cover as shown.
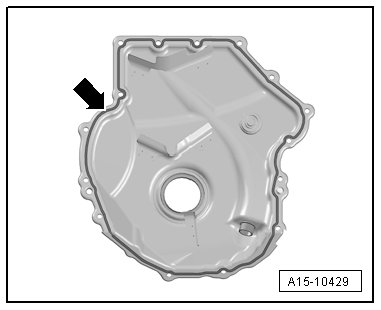
• Thickness of sealant bead: 2 to 3 mm.
• The cover must be installed within 5 minutes after applying the silicone sealant.
• The sealant bead may not be thicker than specified, otherwise the excess sealant could enter the oil pan and clog the oil intake tube strainer.
• Note the expiration date of the silicone sealant.
- Install the cover immediately and tighten the new bolts:
- Tighten the new bolts in 2 passes in sequence - 1 through 15 -:
1 - Tighten the bolts to 8 Nm
2 - Tighten the bolts an additional 45° (1/8) turn.
• After installing the cover, allow the sealant to dry for approximately 30 minutes. Only after then may the engine oil be added.
- Fill the engine oil. Refer to Maintenance Procedures.
- Check the oil level. Refer to => [ Oil Level, Checking ] Testing and Inspection.
Further installation is in the reverse order of removal.