Input Shaft
Input Shaft
Special tools, testers and auxiliary items required
• Punch (VW 407)
• Thrust Pad (VW 447 H)
• Thrust Disc (VW 412)
• Tube Split (VW 422)
• Thrust Plate (VW 401)
• Thrust Plate (VW 402)
• Punch (VW 408 A)
• Tube 28 mm Dia 100 mm (VW 421)
• Thrust Tube (VW 454)
• Thrust Pad (VW 447 i)
• Thrust Pad (VW 510)
• Mounting Universal Joint (41-501)
• Kukko Separating Tool 12-75 mm (17/1)
• Inductive Heater (VAS 6414)
• When installing new gears or a new input shaft, refer to => [ Codes Letters, Transmission Allocation and Capacities ] Codes Letters, Transmission Allocation and Capacities and the Parts Catalog.
• The input shaft must be adjusted because the position of the tapered roller bearing is affected when parts are replaced. Pay attention to the adjustment overview, refer to => [ Adjustment Overview ] Adjustment Overview.
• Replace both tapered roller bearings together.
• Wearing safety gloves, warm the bearing inner races, the gears and the synchronizer hubs to approximately 100 °C (212 °F) using the (VAS 6414) before installing them.
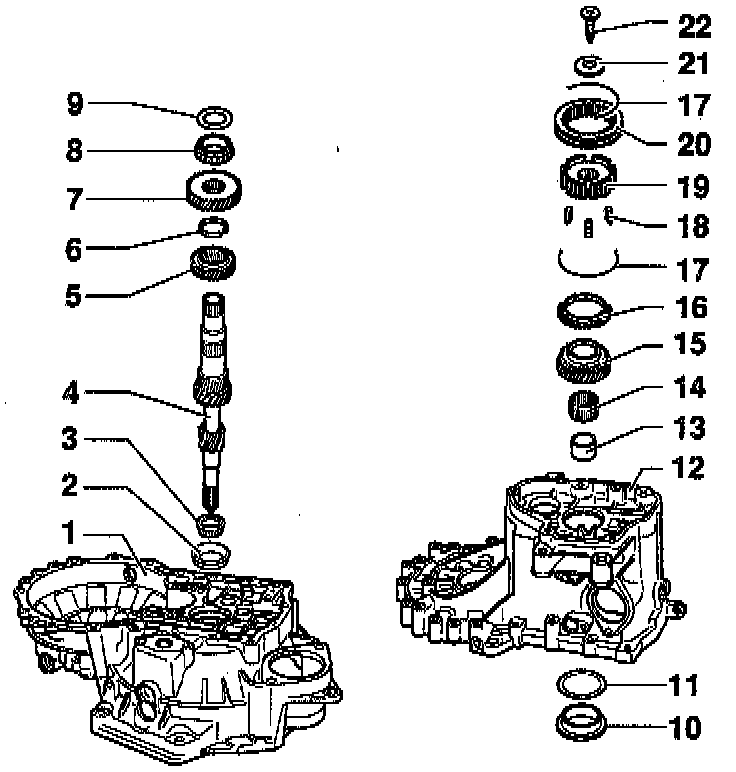
1 Clutch Housing
2 Outer Race/Tapered Roller Bearing
• Removing, refer to.
• Installing, refer to.
3 Bearing Inner Race/Taper Roller Bearing
• Removing, refer to.
• Installing, refer to.
4 Input Shaft
• Adjusting, refer to => [ Input Shaft, Adjusting ] Input Shaft, Adjusting.
5 3rd Gear
• Installed position: The shoulder faces 4th gear.
• Removing, refer to.
• Installing, refer to.
6 Lock Ring
• Always replace.
7 4th Gear
• Remove with the bearing inner race/tapered roller bearing and sleeve, refer to.
• Installing, refer to.
• The shoulder faces 3rd gear.
8 Bearing Inner Race/Taper Roller Bearing
• Remove with 4th gear and sleeve, refer to.
• Installing, refer to.
9 Thrust Washer
10 Outer Race/Tapered Roller Bearing
• Removing, refer to.
• Installing, refer to.
11 Adjusting Shim
• Determining thickness, refer to => [ Input Shaft, Adjusting ] Input Shaft, Adjusting.
12 Transmission Housing
13 Sleeve
• For the needle bearing.
• Pressing off with 4th gear drive gear and tapered roller bearing inner race, refer to.
• Installing, refer to.
• Mount before installing the thrust washer - item 9 -.
14 Needle Bearing
• For 5th gear.
15 5th Gear
16 5th Gear Synchronizer Ring
• With cast locking pieces, refer to => [ 5th Gear Synchronizer
Ring with Cast Locking Pieces ] Transmission.
• Checking for wear, refer to => [ 5th Gear Synchronizer
Ring, Checking ] Transmission.
17 Spring
• Installed position, refer to.
• Offset springs are used as of transmission build date 05 November 2001.
18 Locking Pieces
• Quantity: 3
• Installed position, refer to.
19 5th Gear Synchronizer Hub
• Removing individually, refer to => [ Transmission Housing Cover and 5th Gear ] Transmission Housing Cover and 5th Gear.
• Remove with the transmission housing. Refer to => [ Transmission ] Transmission.
20 5th Gear Locking Collar
• Remove with the 5th gear synchronizer hub - item 19 -.
21 Plate Spring
• Installed position, refer to => [ Installed Position
of Plate Springs for 5th Gear Synchronizer Hub and Drive Gear Bolts ] Transmission.
22 Bolt
• See - item 4 -=> [ Bolt ] Transmission Component Overviews.
• Always replace.
• Holds in position with the adapter on the plate spring bolt head, refer to => [ Installed Position
of Plate Springs for 5th Gear Synchronizer Hub and Drive Gear Bolts ] Transmission.
Removing the Outer Race/Tapered Roller Bearing
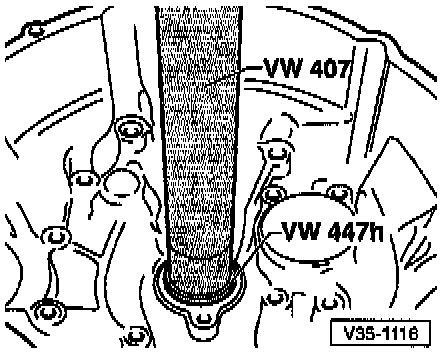
Installing the Outer Race/Tapered Roller Bearing
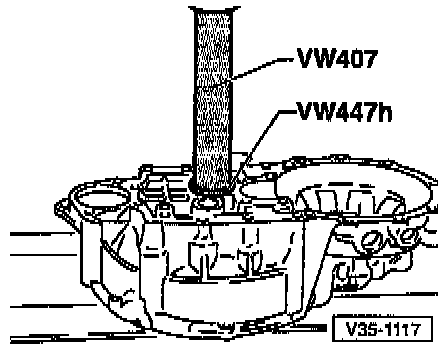
Removing the Bearing Inner Race/Taper Roller Bearing
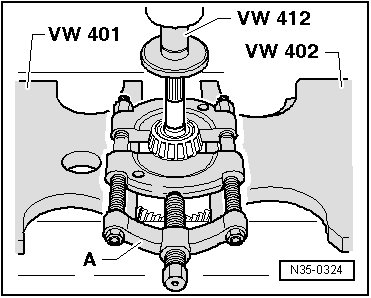
A Separating device 12 to 75 mm (17/1)
Installing the Bearing Inner Race/Taper Roller Bearing
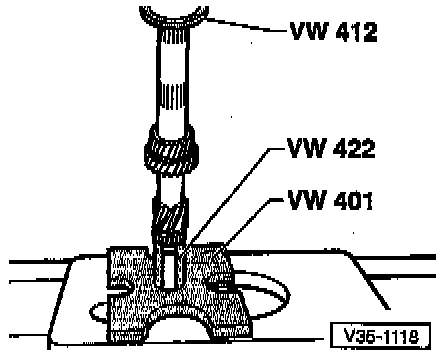
Removing the 4th Gear with the Tapered Roller Bearing and Sleeve
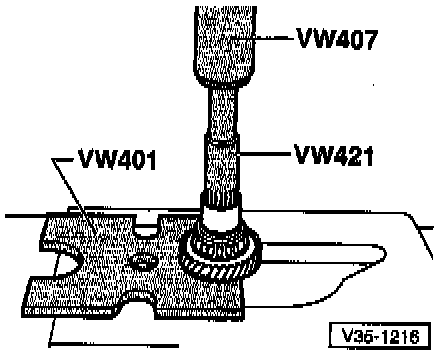
Removing the 3rd Gear
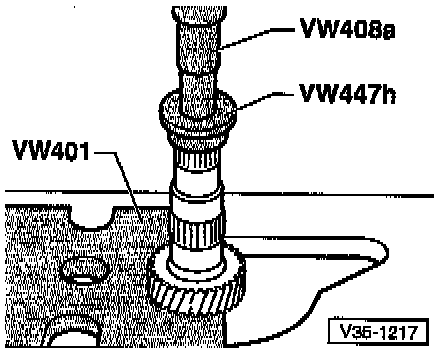
- Remove the lock ring first.
Installing 3rd Gear
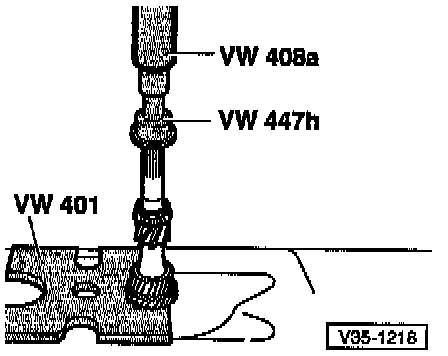
Installed position: The shoulder faces 4th gear.
Removing the 4th Gear
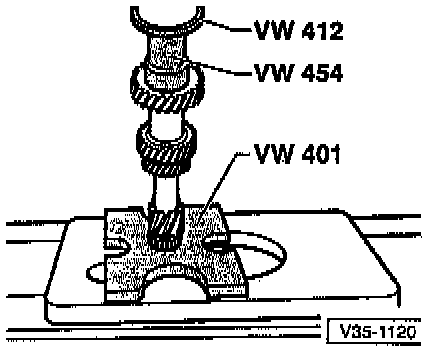
Installed position: The shoulder faces 3rd gear.
Installing the Bearing Inner Race/Taper Roller Bearing
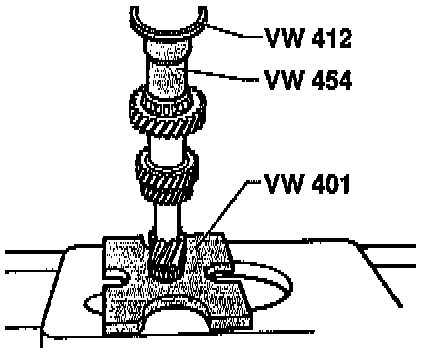
Pressing on Sleeve for 5th Gear Needle Bearing
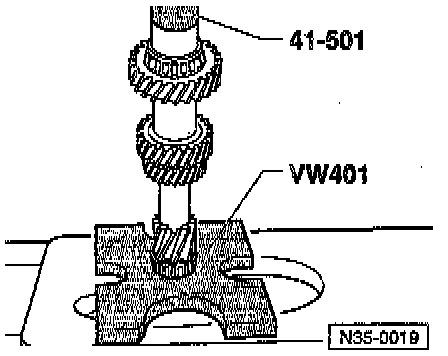
Removing the Outer Race/Tapered Roller Bearing
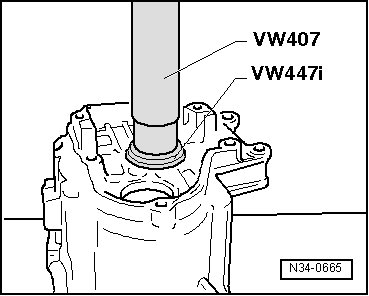
Installing the Outer Race/Tapered Roller Bearing
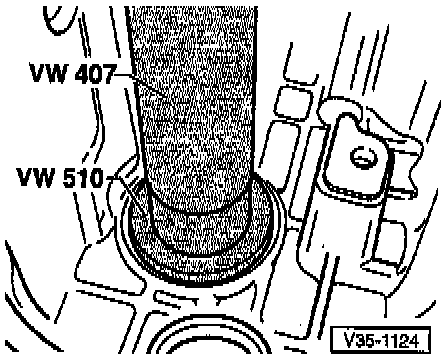
- Install with shim after adjusting input shaft.
5th Gear Synchronizer
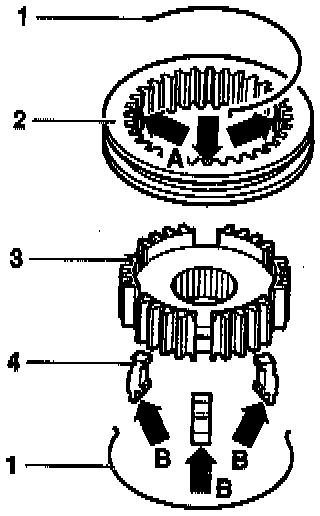
1. Springs for the locking pieces
2. Locking collar with 3 notches - arrow A - for the locking pieces - 4 -
3. Synchronizer hub
4. Locking pieces - installed position: the extension - arrow B - faces toward the pointed teeth of the locking collar - item 2 -
Assembling 5th Gear Locking Collar/Synchronizer Hub
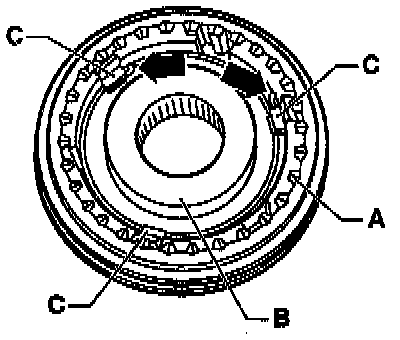
- Slide the locking collar over the synchronizer hub.
The pointed teeth - A - and the shoulder - B - on the synchronizer hub face in the same direction. Recesses for locking pieces in locking collar and synchronizer hub must line up (refer to).
- Insert locking pieces (Location: refer to).
- Install the springs offset by 120° under the tabs - C -. The angled end of the spring must be positioned in front of the locking pieces - arrows -.
• Note the location of the springs when using locking pieces with hollow interiors, refer to.
Installation of Offset Springs - A -
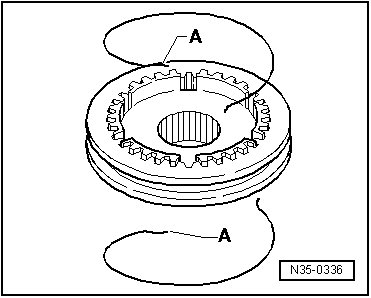
These springs are installed on both sides.
- Springs are only installed in conjunction with hollow locking pieces.
- Insert locking pieces (Location: refer to).
Spring installed position:
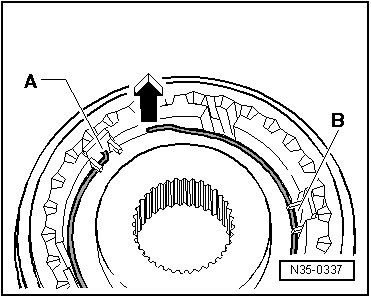
- Install the circlips 120° offset.
- Angled end - A - of spring must engage into the hollow locking piece.
It must be located below the tab - B - of the locking pieces.
The offset end always faces away from the synchronizer hub - direction of arrow -.