Battery, Disconnecting and Connecting
Battery, Disconnecting and Connecting
Special tools, testers and auxiliary items required
• Torque Wrench (V.A.G 1331)
Risk of injury. Observe warning notes and safety precautions. Refer to => [ Warnings and Safety Precautions ] Service Precautions!
• Always ensure the vehicle electrical system is protected by disconnecting the battery negative ( - ) terminal (interrupted current flow to ground) prior to servicing key areas of the electrical system as specified in this Repair Information. Disconnecting the battery positive ( B+) terminal must only be performed as required to remove battery from vehicle, and must only be carried out after the negative ( - ) terminal is disconnected. However, observe notes for connecting battery in any case.
Disconnecting
- Switch off ignition, switch off all electrical consumers and remove ignition key.
Vehicles with a battery housing
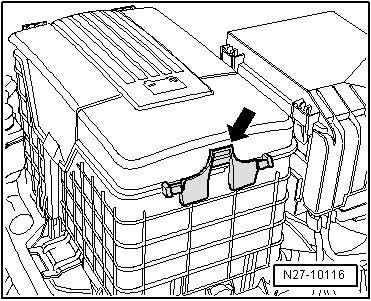
- Open locking mechanism - arrow - and remove battery box cover.
Vehicles with a battery jacket
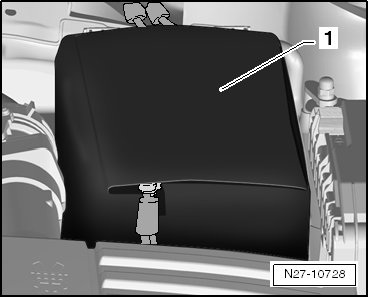
- Open the top - 1 - of the battery jacket.
- First, disconnect the battery terminal clamp of ground wire - 1 - from the battery negative terminal.
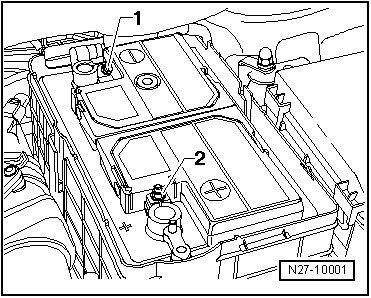
- Then, remove battery terminal clamp of positive wire - 2 - from battery positive terminal.
Connecting
Observe notes for threaded connections of battery terminals. Refer to => [ Battery Post/Terminal ] Battery Post/Terminal.
• After connecting the battery and switching on the ignition, the ASR/ESP Control Lamp (K155) and Electro-mechanical Power Steering Indicator Lamp come on and stay on. The indicator lamps go out automatically when vehicle is driven a distance straight ahead at 15 to 20 km/h (9 to 12 mph). This activates Steering Angle Sensor (G85).
- Connect the positive wire battery terminal clamp - 2 - to the battery positive terminal and tighten the mounting bolt to the specification shown in => [ Battery Overview ] Battery Overview.
- Connect the ground cable - 1 - to the battery negative terminal and tighten the mounting bolt to the specification shown in => [ Battery Overview ] Battery Overview.
- Perform the work procedures in the table.
Work steps required after connecting battery
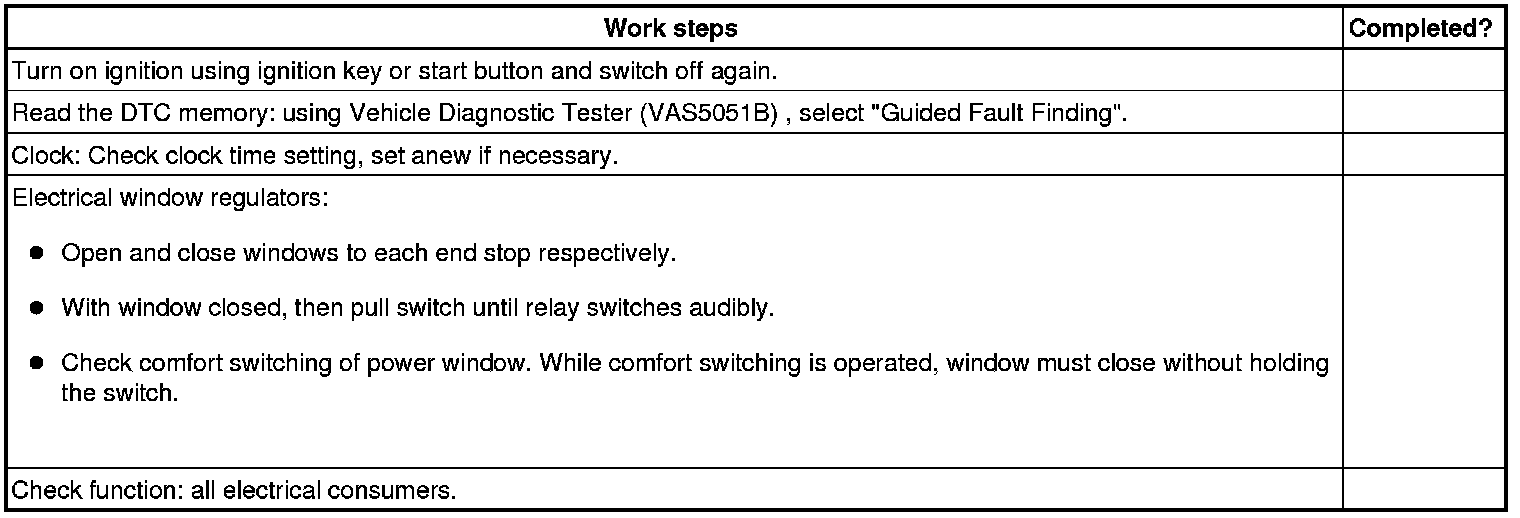
If necessary, the table can be printed out.
- Close the battery housing or jacket.