Variable Valve Timing Cover / Housing: Service and Repair
Sealing Flange, Transmission Side
Special tools, testers and auxiliary items required
• Torque Wrench (5-50 Nm) (V.A.G 1331)
• Torque Wrench (40-200 Nm) (V.A.G 1332)
• Hand Drill with Plastic Brush Attachment
• Protective Eyewear
• Silicone Sealant (D 174 003 A2)
Note the following whenever working inside the engine compartment due to limited space:
• Route all lines and wires in their original locations.
• Ensure sufficient clearance to all moving or hot components.
Removing
• The engine is removed, and the transmission is separated from the engine.
- Remove the timing chain cover. Refer to => [ Timing Chain Cover ] Service and Repair.
- Remove the flywheel or drive plate and then remove the sensor wheel for the engine speed sensor (G28) from the crankshaft.
- Remove the cylinder head. Refer to => [ Cylinder Head ] Cylinder Head.
- Disengage the wiring harness - arrow - and remove the engine speed sensor - 1 - and vacuum pump - 2 -.
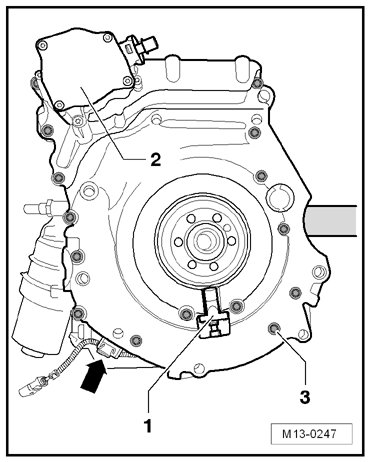
- Remove the bolts - 3 -.
- Remove the sealing flange - 1 - from the cylinder block - 2 - and from the lower oil pan - 3 - at the upper and lower marked locations using a screwdriver- A -.
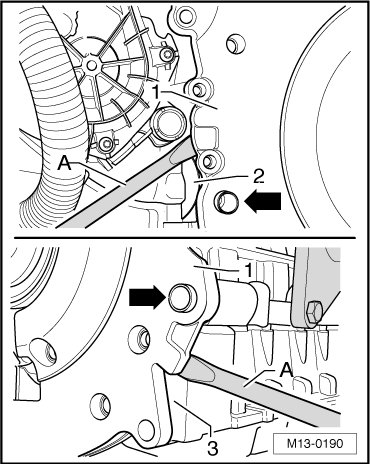
Start near the alignment sleeves - arrows -.
• Be careful not to damage the sealing surfaces.
- Remove the seal from the removed sealing flange.
Installing
To prevent injuries from shavings, wear protective goggles and protective clothing.
- Remove the sealant residue from the cylinder block, upper oil pan and sealing flange using a rotating plastic brush.
Make sure that no sealant residue gets into the engine.
- Clean the sealing surfaces on the cylinder block, the upper oil pan and on the sealing flange. There must not be any oil or grease on them.
- Replace the seals - 1 and 2 -.
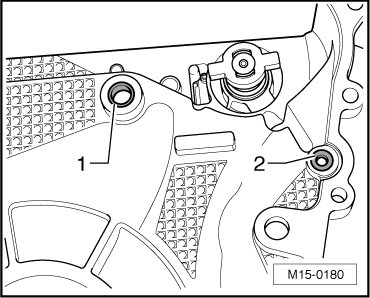
- Cut the sealant tube nozzle at the front mark (nozzle diameter: approximately 1 mm).
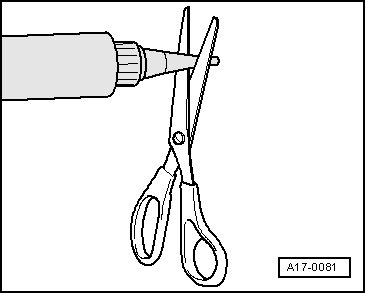
• The sealing flange must be installed within 5 minutes after application of the sealant.
- Apply the sealant bead - A - to the sealing flange as shown.
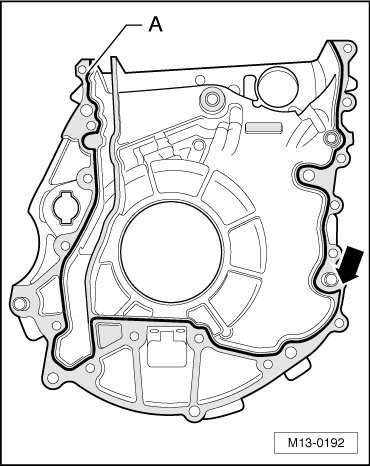
• The sealant bead must be 1.5 to 2.0 mm thick.
• Pay special attention to the course of the sealant bead in the area of the - arrow -.
- Install the sealing flange so that the alignment sleeve fit into the holes in the cylinder block.
- Install the bolts hand tight.
- Install the bolts - 3 - in the cylinder block and in the upper oil pan and tighten them to 10 Nm.
- Tighten the bolts in the cylinder block and upper oil pan to 25 Nm.
- Wipe off any sealant that leaks out.
- Install the alignment sleeves all the way.
- Install a new seal. Refer to => [ Seal, Transmission Side ] Seal, Transmission Side.
The rest of the installation follows the reverse of the removal procedure. Note the following:
• Install the brake booster vacuum pump. Refer to => [ Vacuum Pump ] Vacuum Pump.
• Install the cylinder head. Refer to => [ Cylinder Head ] Cylinder Head.
• Install the drive plate. Refer to => [ Drive Plate ] Drive Plate.
• Or, install the flywheel, Refer to => [ Flywheel ] Flywheel.
• Remove the locking pin (T40069) from the cylinder block and install the plug.
• Fill the coolant. Refer to => [ Coolant, Draining and Filling ] Service and Repair.
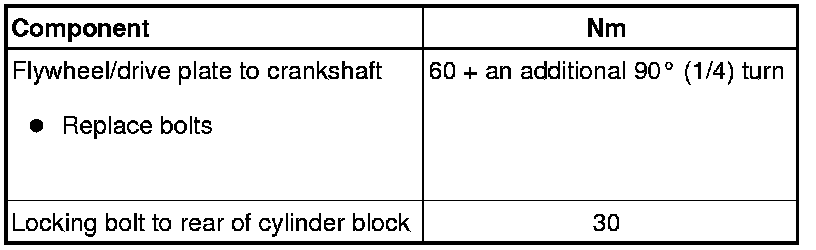
Tightening Specifications