EGR Temperature Sensor: Service and Repair
EGR Temperature Sensor G98
Special tools, testers and auxiliary items required
• Hose Clamps Up to 25 mm Dia. (3094)
• Torque Wrench (5-50 Nm) (V.A.G 1331)
• Drip Tray for VAS 6100 (VAS 6208)
• Hose Clip Pliers (VAS 6362)
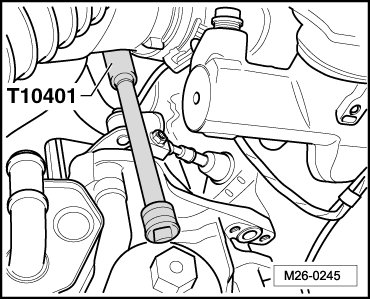
• 14 mm Socket (T10401)
Requirements
• The ignition is off.
• The engine must be cold.
Removing
- Remove the noise insulation.
- Drain the coolant. Refer to => [ Coolant, Draining and Filling ] Procedures.
• The coolant hoses indicated must be removed and moved to the side to perform this procedure.
- Disconnect the coolant hoses from both connections - arrows A and D -.
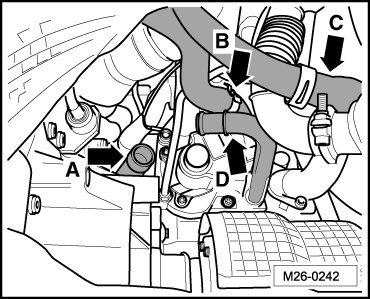
- Lay aside both coolant hoses - arrows B and C - as illustrated.
- Remove the engine cover. Refer to => [ Engine Cover ] Engine Cover.
Electronic components could be destroyed when the battery is disconnected:
• Follow the required steps when disconnecting the battery.
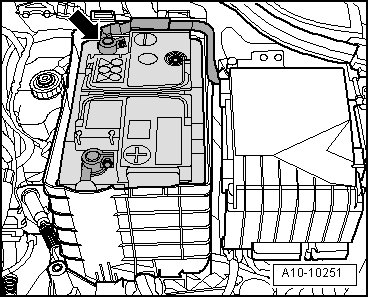
- With the ignition turned off, disconnect the ground wire - arrow - from the battery.
- Remove the air filter housing. Refer to => [ Air Filter Housing ] Air Filter Housing.
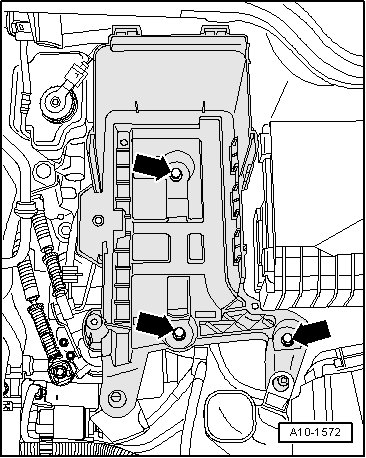
- Remove the battery, the battery tray bolts - arrows - and tray.
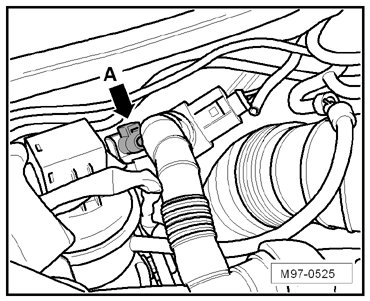
- Disconnect the connector from the Exhaust Gas Recirculation (EGR) temperature sensor - arrow A - and guide the wire out.
• Note the installed location of the wire and heat shielding.
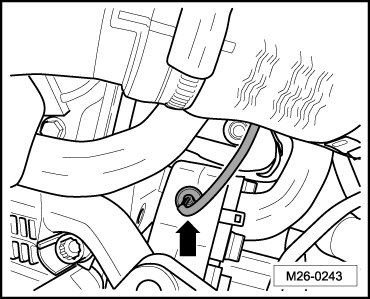
The illustration shows the EGR temperature sensor as seen from the engine compartment looking out from the transmission side - arrow - below the brake master cylinder.
- Carefully install the 14 mm socket (T10401) with an extension onto the EGR temperature sensor.
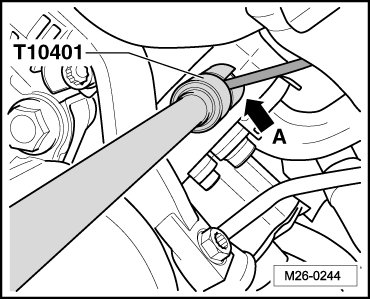
- Make sure the wire from the EGR temperature sensor is guided into the groove on the 14 mm socket (T10401) - arrow A -.
- Loosen the EGR temperature sensor and remove it.
Installing
- Install in the reverse order of removal. Note the following:
• EGR temperature sensor tightening specification: 20 Nm
• Cut off the seal and replace if it is damaged or leaks.
• Maintain the tightening specification.
Secure the heat shielding in their original installed position.
Make sure the entire connection is seated securely.
Replace the self-locking nuts, the seals, the gaskets and clamps.
Hoses are secured with spring type clamps.
hose clamp pliers (VAS 6362) or (VAS 6340) are recommended for installing spring clamps.