Left Engine Compartment E-Box
Left Engine Compartment E-Box
Special tools, testers and auxiliary items required
• Torque Wrench (V.A.G 1410)
When disconnecting and connecting the battery, always perform the work procedure as described in the repair information. Refer to=> [ Battery, Disconnecting and Connecting ] Service and Repair.
Removal
- Disconnect the battery. Refer to=> [ Battery, Disconnecting and Connecting ] Service and Repair.
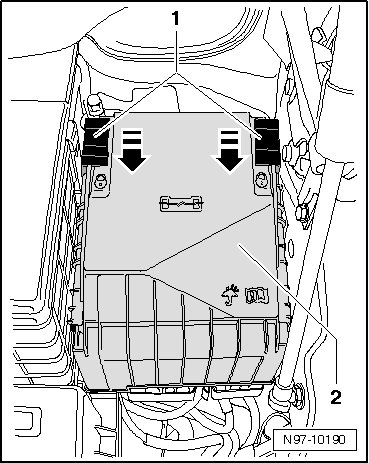
- Slide the securing bracket - 1 - in the - direction of the arrow - and remove the cover of the E-box - 2 - upward.
All vehicles
• Mark the allocation of the connected wires to the connection points on the E-box.
• Electrical components that are protected by the fuse block can fail, for example, the electro-mechanical power steering
• The fuse block can get damaged when loosening the nut on the wiring connections.
• Replace the fuse block each time after loosening the connections.
- Unscrew the hex nuts - 1 -.
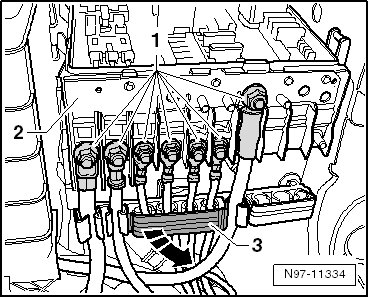
- Open the covers of the wire guides on the E-box - 3 - in the - direction of the arrow -.
- Remove the wires from the connecting pins.
- Unclip the wires from the wire guides.
- Replace the fuse block - 2 - each time the hex nuts - 1 - are loosened.
• Following illustration shows "High" E-box version. Removing and installing the "Low" version is performed in the same way.
- Unscrew the central bolt - arrow - of the E-box - 1 -.
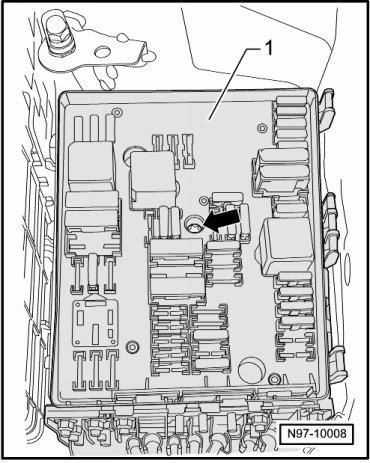
• Removing the central bolt - arrow - presses the E-box - 1 - up off the E-box bracket.
- Remove the E-box - 1 - upward from the E-box bracket.
• In order to be able to remove the flat terminal housing - 1 -, the battery, and the battery carrier must first be removed.
- If necessary, remove the air filter housing.
- Battery, removing, refer to=> [ Battery ] Battery.
- Unscrew the mounting bolts - arrows - of the battery carrier - 1 -.
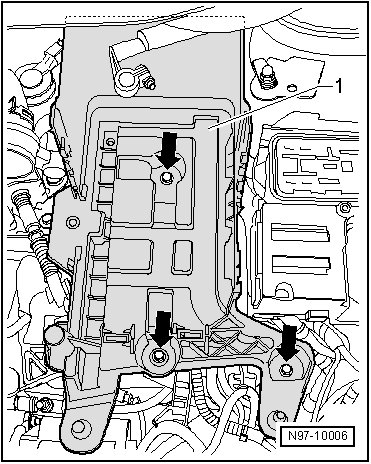
- Remove the battery carrier - 1 - from the vehicle.
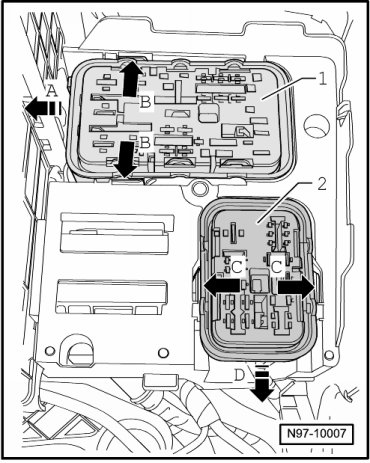
- Press the tabs on the E-box bracket apart - arrows B - and slide the flat terminal housing - 1 - sideways - arrow A - out of the E-box bracket.
Only vehicles with "High" E-box version
- Press the tabs on the E-box bracket apart - arrows C - and slide the flat terminal housing - 2 - forward - arrow D - out of the E-box bracket.
All vehicles
- Unscrew the mounting nuts - arrows - of the E-box bracket - 1 -.
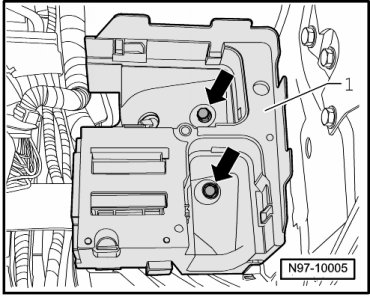
• It depends on the vehicle equipment whether an auxiliary relay carrier is installed.
- Pull the E-box bracket - 1 - up off the stud bolts. Be careful with the connected wires.
- Unclip the auxiliary relay carrier - 1 - sideways out of E-box bracket - 2 -.
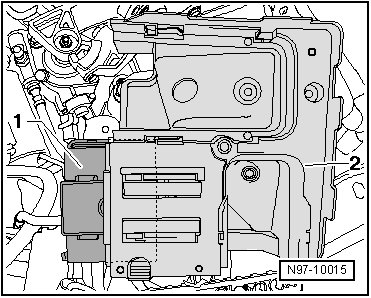
- Remove the E-box bracket - 2 - from the vehicle.
Installation
Install in reverse order of removal. Note the following:
• Electrical components that are protected by the fuse block can fail, for example, the electro-mechanical power steering
• The fuse block can get damaged when loosening the nut on the wiring connections.
• Replace the fuse block each time after loosening the connections.
- Reconnect the wires - 1 - to the E-box according to the allocation marked during removal.
- Tighten the mounting nuts - 1 - M5 (8 mm wrench) to 4 Nm
- Tighten the mounting nuts - 1 - M6 (10 mm wrench) to 6 Nm
- Tighten the central bolt of the E-box to 9 Nm.
- Place the cover - 2 - onto the E-box and slide the securing bracket - 1 - in the - direction of the arrow - until the cover - 2 - is engaged.
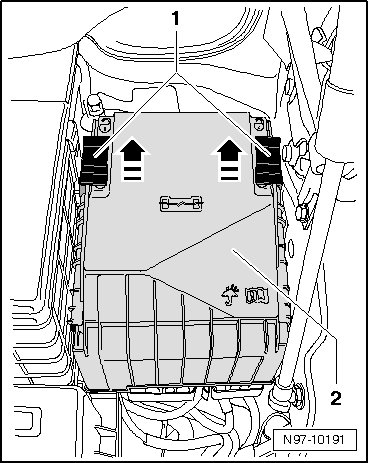
• Then check whether the cover - 2 - of the E-box is correctly engaged.