Rear Lid Motor Control Module
Rear Lid
Rear Lid Motor Control Module
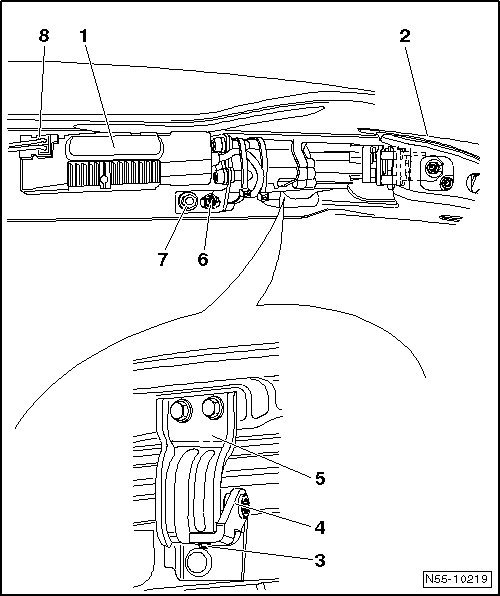
- Remove the headliner.
- Disconnect connector - 8 - at motor in rear lid control module - 1 -.
- Loosen hex nut - 2 -, do not turn under.
- Rotate screw - 7 - in picture and move motor - 1 - out of installation position to center of vehicle.
Bracket - 4 - is not removed.
Installation
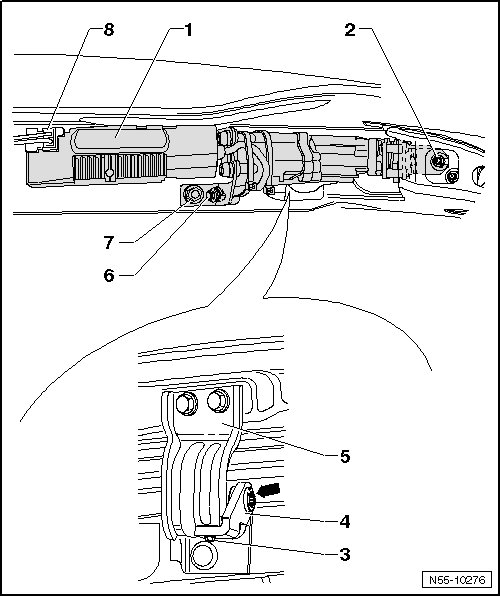
- Slide motor - 1 - into installation position under hex nut - 2 - and splines - arrow - in bracket - 4 -.
- Set screw - 7 - on but do not tighten.
- Align motor horizontally and free of tension.
- Tighten the screw - 7 -, tightening specification: 22 Nm.
- Tighten the nut - 2 -, tightening specification: 22 Nm.
- Secure connector - 8 - to motor - 1 -.
Installation of motor in rear lid control module
- Allow rear to completely open and close once via electric operation. This makes motor in rear lid control module ready for operation and activates the pinch protection.
Installing a new motor in rear lid control module
• Motor in rear lid control module is delivered in "closed" condition.
- Close the rear lid manually and then open it again but only half way up.
- At the same time press the inner and outer buttons.
- Release both buttons.
CAUTION!
The rear lid should now move without pinch protection.
• The rear lid goes all the way up and the motor in the control module is now adapted.
- Then perform a function test of electric operation.