Starter Motor: Service and Repair
Starter Removal and Installation
CAUTION!
Disconnect the Battery (A) before working on the electrical system. Refer to => [ Battery A, Disconnecting and Connecting ] Battery A, Disconnecting and Connecting.
• Get the radio anti-theft code before disconnecting the Battery (A)
• After connecting the Battery (A), check any affected system or component (radio, clock, comfort electrical connection etc.) according to the repair information and/or the operating instructions.
=> [ Starter, 5-Cylinder Fuel Injection Engine ]
Starter, 5-Cylinder Fuel Injection Engine
• The illustrations show removing and installing on a vehicle with an automatic transmission.
• There may be difference based on the vehicle equipment level.
Special tools, testers and auxiliary items required
• Torque Wrench (VAG 1331)
• Torque Wrench (VAG 1332)
• Get the radio anti-theft code before disconnecting the Battery (A)
• After connecting the Battery (A), check any affected system or component (radio, clock, comfort electrical connection etc.) according to the repair information and/or the operating instructions.
Removing
- Remove Battery (A). Refer to => [ Battery A ] Removal and Replacement.
- Remove the noise insulation and the left side panel.
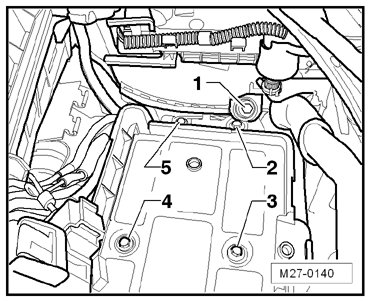
- Remove the screws - 1 through 5 - and remove the battery tray.
- Slide back the cap.
- Disconnect the terminal 50 connector - 1 - on the solenoid switch.
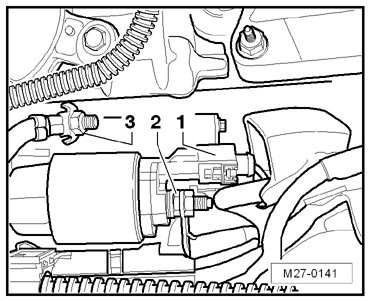
- Remove the nut - 2 - on the terminal 30 wire.
- Remove the nut - 3 - on the ground cable.
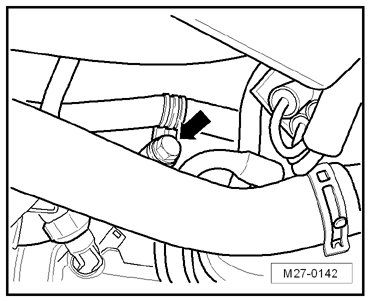
- Remove the screw - arrow - on the clamp.
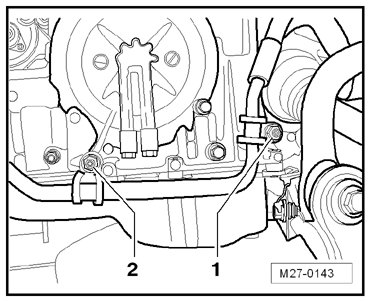
- Remove the nuts - 1 - and - 2 -.
- Remove the nut - arrow - from the screw on the starter (B).
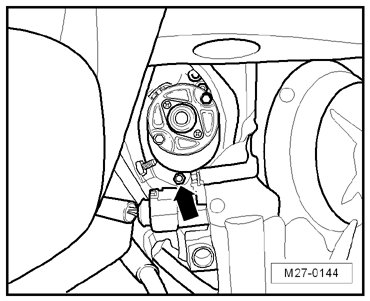
- Remove the bracket from the screw and move it to the side.
- Remove the bolt - arrows - on the starter (B).
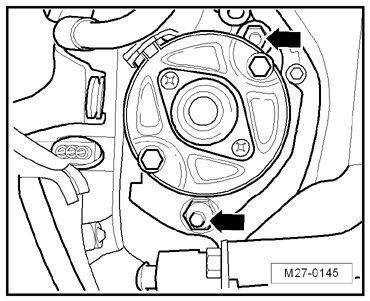
- Remove the starter (B) upward.
Installing
Install in reverse order of removal.
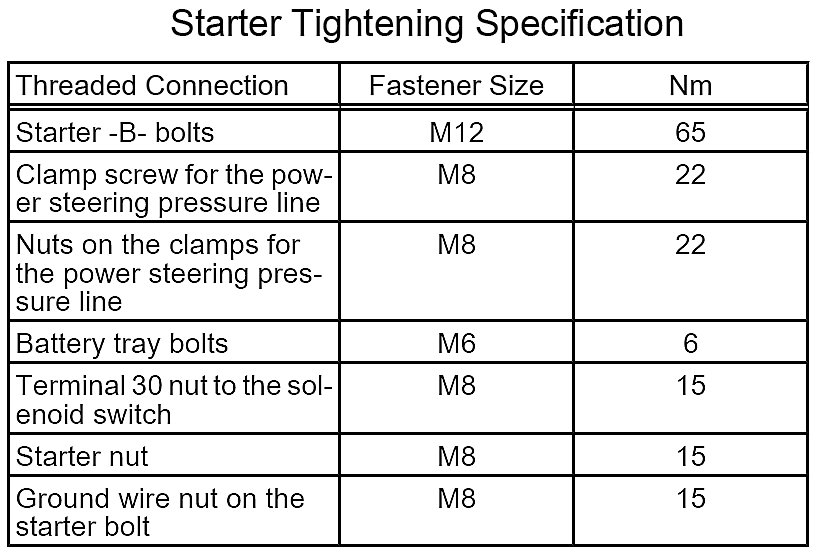
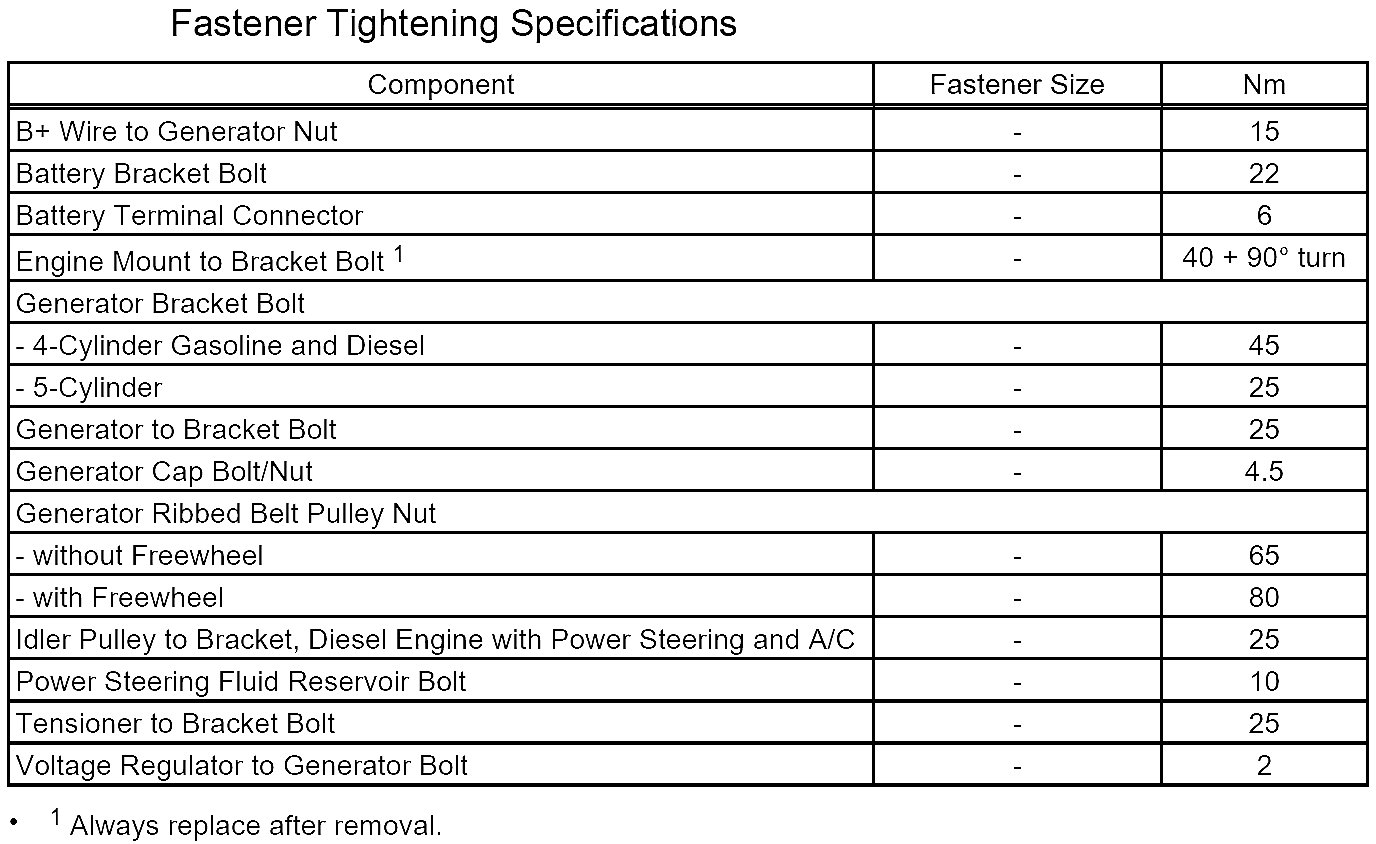
Tightening specifications