Fuel Pump, Checking
Fuel Pump, Checking
Special tools, testers and auxiliary items required
• Pressure Tester (VAS 6550)
• Remote Control (V.A.G 1348/3A)
• Test Instrument Adapter/DSO (5-pin) (VAS 5565)
• Multi-meter (V.A.G 1715)
• Wrench (T10202)
• Torque Wrench (40-200 Nm) (V.A.G 1332)
• Measuring Container, 2 Liter
Function and Voltage Supply, Checking
Conditions
• Battery voltage at least 11.5 volts.
• Fuel pump control module (J538) fuse is OK
• Fuel pump control module is OK
Sequence
• Fuel pump function is checked via output Diagnostic Test Mode (DTM).
- Connect the vehicle diagnostic tester - 1 - as follows:
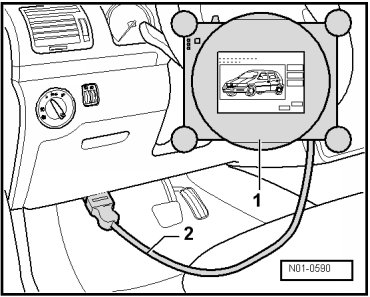
- Connect diagnostic cable - 2 - to the Data Link Connector (DLC) in the driver's footwell.
- Turn on the ignition.
- Press the Vehicle Self-Diagnosis, Engine Electronics and Output Diagnostic Test Mode buttons on the display.
- Press the right arrow button on the display until output Diagnostic Test Mode (DTM) of fuel pump electronics.
Fuel pump must now accelerate slowly up to maximum RPM.
• Fuel pump runs quietly.
- Turn off the ignition.
If the Fuel Pump Does Not Start
- Remove the rear seat bench.
- Disconnect the connector from the fuel pump control module (J538).
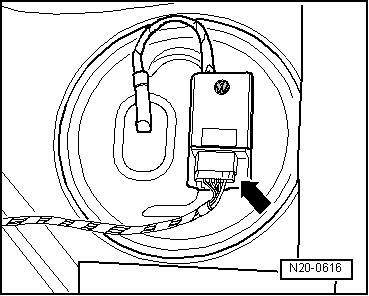
- Check the voltage supply between terminals - 1 and 6 - using (V.A.G 1715).
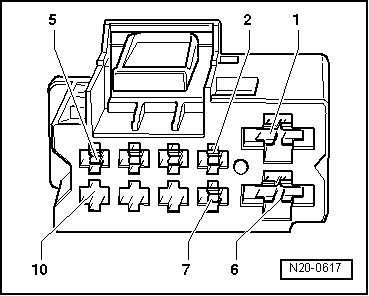
• Specified value: approximately battery voltage
Voltage Supply Not OK
- Locate and repair the open circuit in the wiring, refer to the.
Voltage Supply OK
- Remove the cover - 1 - with the fuel pump control module (J538) - 2 - from the fuel delivery unit.
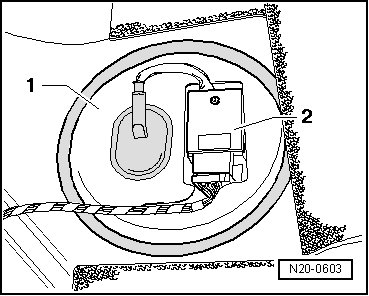
- First gently pull on the connector - arrow - without pressing the retainer to make sure it is securely connected. If the connector was not connected correctly, check the fuel pump function again.
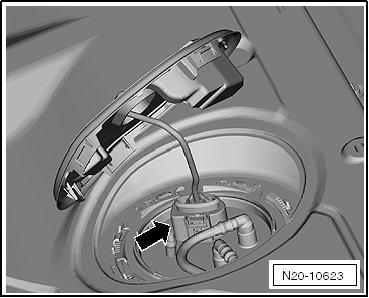
- Disconnect the connector.
- Check the contacts on the connector and the fuel delivery unit for damage.
CAUTION!
The fuel system is under pressure!
• Wear protective goggles and protective clothing to prevent injuries and contact with skin.
• Before disconnecting the connection, place a cloth around the connection. Then release pressure by carefully disconnecting the connection.
- Remove the fuel lines - 1 and 2 - from the flange.
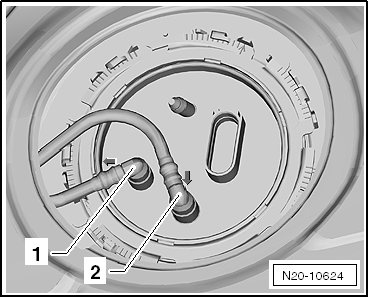
• Press in the securing ring to disengage the fuel lines.
- Remove the locking ring using (T10202).
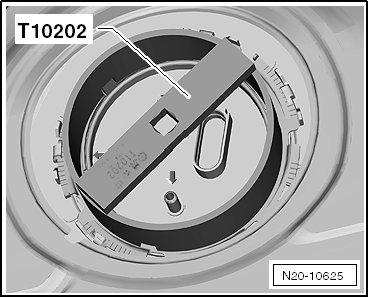
- Check whether the electrical wires between the flange and fuel pump are connected.
If No Open Circuits are Found
- Replace the fuel delivery unit if the fuel pump is faulty. Refer to => [ Fuel Delivery Unit ] Fuel System Components.