Lock Cable Removing/Installing
LOCK CABLE, REMOVING/INSTALLINGNote
^ lock cable must not be kinked
^ after installing, adjust cable
REMOVING
- remove selector lever handle
- remove cover, cover strip, and program switch if so equipped
- loosen bolt for cable anchor, withdraw lock cable from lock lever and pull out of anchor
- remove trim from center console left side, in floor outlet see Repair Group 70
- remove trim from ignition switch
- remove lock cable from clip (arrow)
- press out lock cable clip from ignition switch and remove lock cable from cable head
- pull out lock cable
INSTALLING
CAUTION
During installation, be sure that cable:
^ is routed correctly
^ does not bend or kink
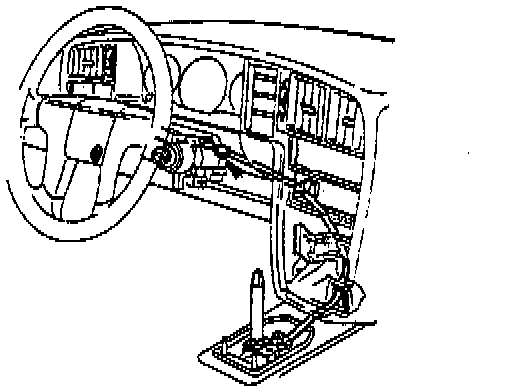
- lock cable, installed position
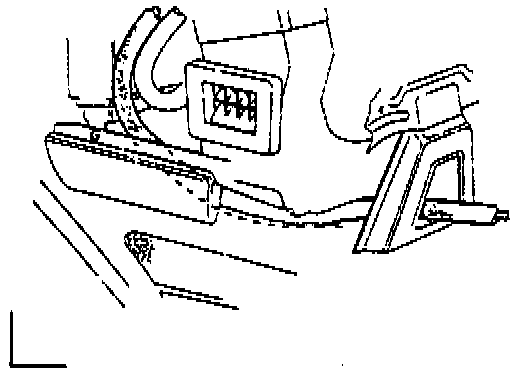
- routed cable at center console next to floor outlet, as shown
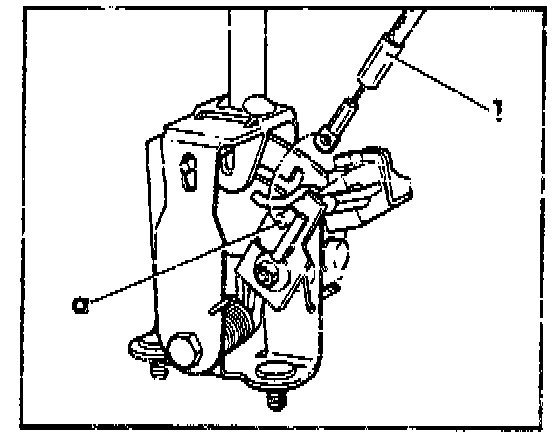
- position eye of lock cable 1 on lock lever a
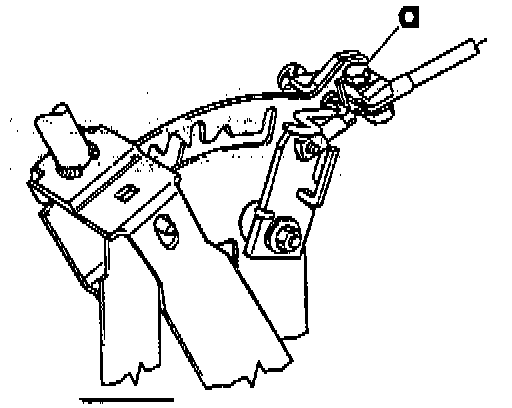
- position lock cable in cable anchor, as shown
^ do not tighten bolt a for anchor until lock cable has been adjusted in installed position.
Note
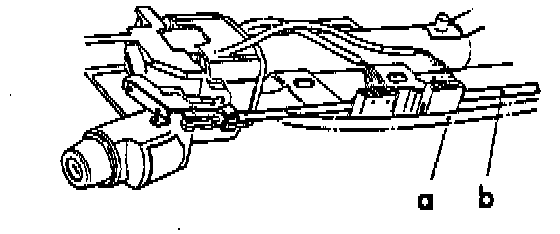
There are two lock cable routing variations at the steering wheel:
a) vehicles with height-adjustable steering wheel - route cable in front of multi-pin connector
b) vehicles without height-adjustable steering wheel - route cable behind multi-pin connector
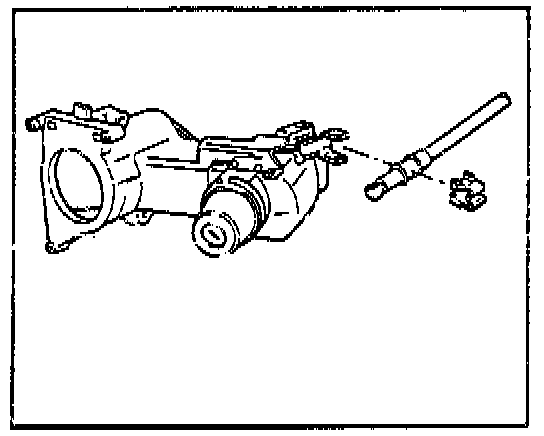
- attach lock cable clip to lock cable first
- press lock cable onto ball head
- push lock cable with clip attached, into ignition switch
- adjust lock cable in anchor at selector lever.
- install cover with gear selector scale
- install gearshift handle
- install ignition switch trim
- install trim for center console