Removal
HYBRID / BATTERY CONTROL: ELECTRIC VEHICLE CHARGER ASSEMBLY: REMOVAL
1. PRECAUTION
Service Precautions
2. REMOVE SERVICE PLUG GRIP
Removal
3. REMOVE INVERTER COVER Removal
4. CHECK TERMINAL VOLTAGE Removal
5. INSTALL INVERTER COVER Installation
6. REMOVE REAR NO. 2 FLOOR BOARD Removal
7. REMOVE REAR NO. 4 FLOOR BOARD SUB-ASSEMBLY Removal
8. REMOVE DECK FLOOR BOX LH
HINT
Use the same procedure described for the RH side Removal.
9. REMOVE DECK TRIM SERVICE HOLE COVER Removal
10. REMOVE REAR DECK TRIM COVER Removal
11. REMOVE BATTERY COOLING BLOWER ASSEMBLY (for RH Side) Removal
12. REMOVE BATTERY COOLING BLOWER ASSEMBLY (for LH Side) Removal
13. REMOVE HYBRID BATTERY HOSE ASSEMBLY Removal
14. REMOVE ELECTRIC VEHICLE CHARGE CONNECTOR BRACKET
CAUTION:
Wear insulated gloves.
(a) Disconnect the 2 connectors and clamp.
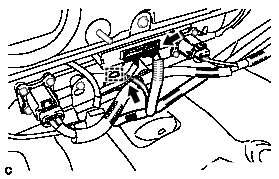
(b) Disconnect the clamp.
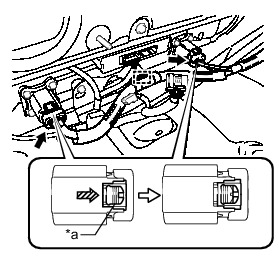
Text in Illustration

(c) Using a screwdriver, slide the 2 green-colored locks of the connectors in the direction indicated by the arrow in the illustration to release them and disconnect the 2 connectors.
CAUTION:
Wear insulated gloves.
(d) Disconnect the 2 clamps.
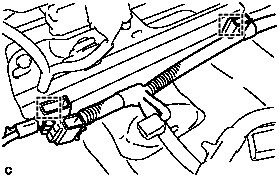
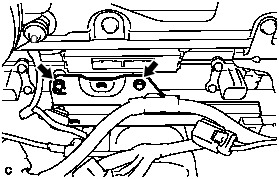
(e) Remove the 2 bolts and electric vehicle charge connector bracket.
15. REMOVE ELECTRIC VEHICLE CHARGER SUB-ASSEMBLY
CAUTION:
Wear insulated gloves.
(a) Remove the 4 bolts.
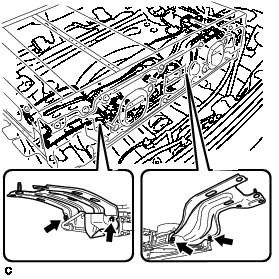
(b) Remove the electric vehicle charger sub-assembly as shown in the illustration.
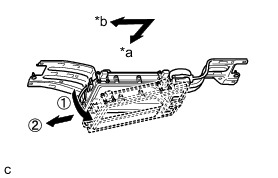
NOTICE:
* Do not drop the electric vehicle charger sub-assembly.
* Support the electric vehicle charger sub-assembly using an attachment or similar item to ensure that it does not fall.
* Do not damage the wire harness of the electric vehicle charger sub-assembly using the electric vehicle charger bracket.
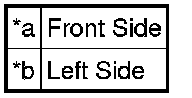
Text in Illustration
(c) Disconnect the connector.
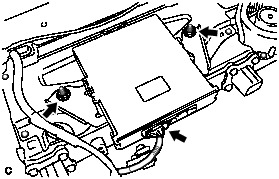
(d) Remove the 2 nuts and plug-in charge control ECU assembly from the electric vehicle charger sub-assembly.