Disassembly
HEATING / AIR CONDITIONING: AIR CONDITIONING UNIT: DISASSEMBLY
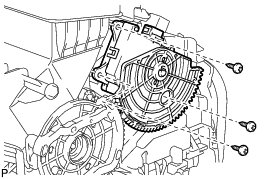
1. REMOVE AIR OUTLET CONTROL SERVO MOTOR SUB-ASSEMBLY
(a) Remove the 3 screws and air outlet control servo motor sub-assembly.
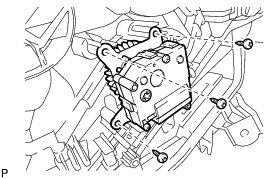
2. REMOVE AIR MIX CONTROL SERVO MOTOR SUB-ASSEMBLY
(a) Remove the 3 screws and air mix control servo motor sub-assembly.
3. REMOVE QUICK HEATER ASSEMBLY Removal
4. REMOVE HEATER RADIATOR UNIT SUB-ASSEMBLY
(a) Remove the screw and clamp.
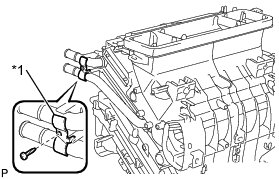
Text in Illustration
(b) Remove the heater radiator unit sub-assembly as shown in the illustration.
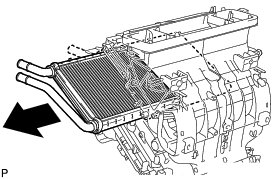
NOTICE:
Prepare a drain pan or cloth in case the cooling water leaks.
5. REMOVE CONSOLE MOUNTING BRACKET LH
(a) Remove the screw and console mounting bracket LH.
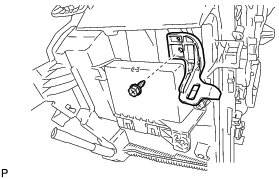
6. REMOVE AIR CONDITIONING AMPLIFIER ASSEMBLY
(a) Remove the screw.
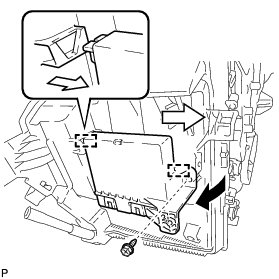
(b) Disengage the 2 guides and remove the air conditioning amplifier assembly as shown in the illustration.
7. REMOVE CONSOLE MOUNTING BRACKET RH
(a) Disengage the 2 claws and remove the console mounting bracket RH.
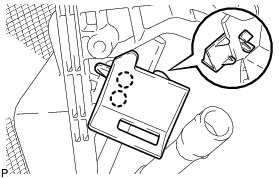
8. REMOVE DRAIN COOLER HOSE
(a) Remove the drain cooler hose as shown in the illustration.
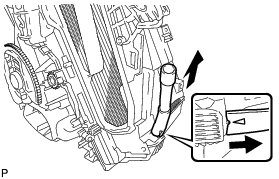
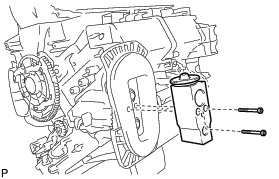
9. REMOVE COOLER EXPANSION VALVE
(a) Using a 4 mm hexagon wrench, remove the 2 hexagon bolts and cooler expansion valve.
10. REMOVE NO. 1 COOLER EVAPORATOR SUB-ASSEMBLY
(a) Remove the packing.
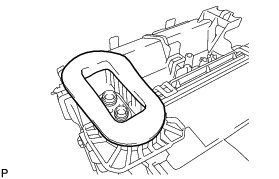
NOTICE:
Remove the packing carefully because it will be reused.
(b) Remove the 4 screws.
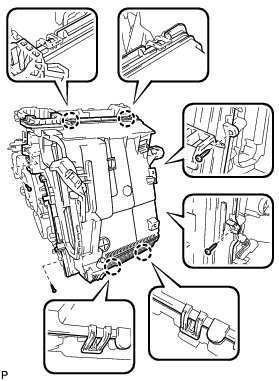
(c) Disengage the 4 claws and remove the lower heater case.
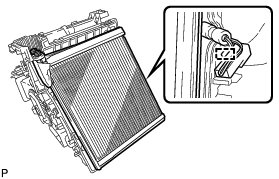
(d) Disengage the clamp and remove the No. 1 cooler evaporator sub-assembly with the No. 1 cooler thermistor.
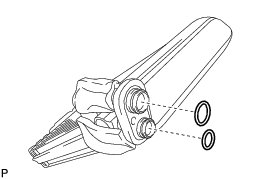
(e) Remove the 2 O-rings from the No. 1 cooler evaporator sub-assembly.
11. REMOVE NO. 1 COOLER THERMISTOR Removal