Ignition Coil: Service and Repair
Ignition Coil:
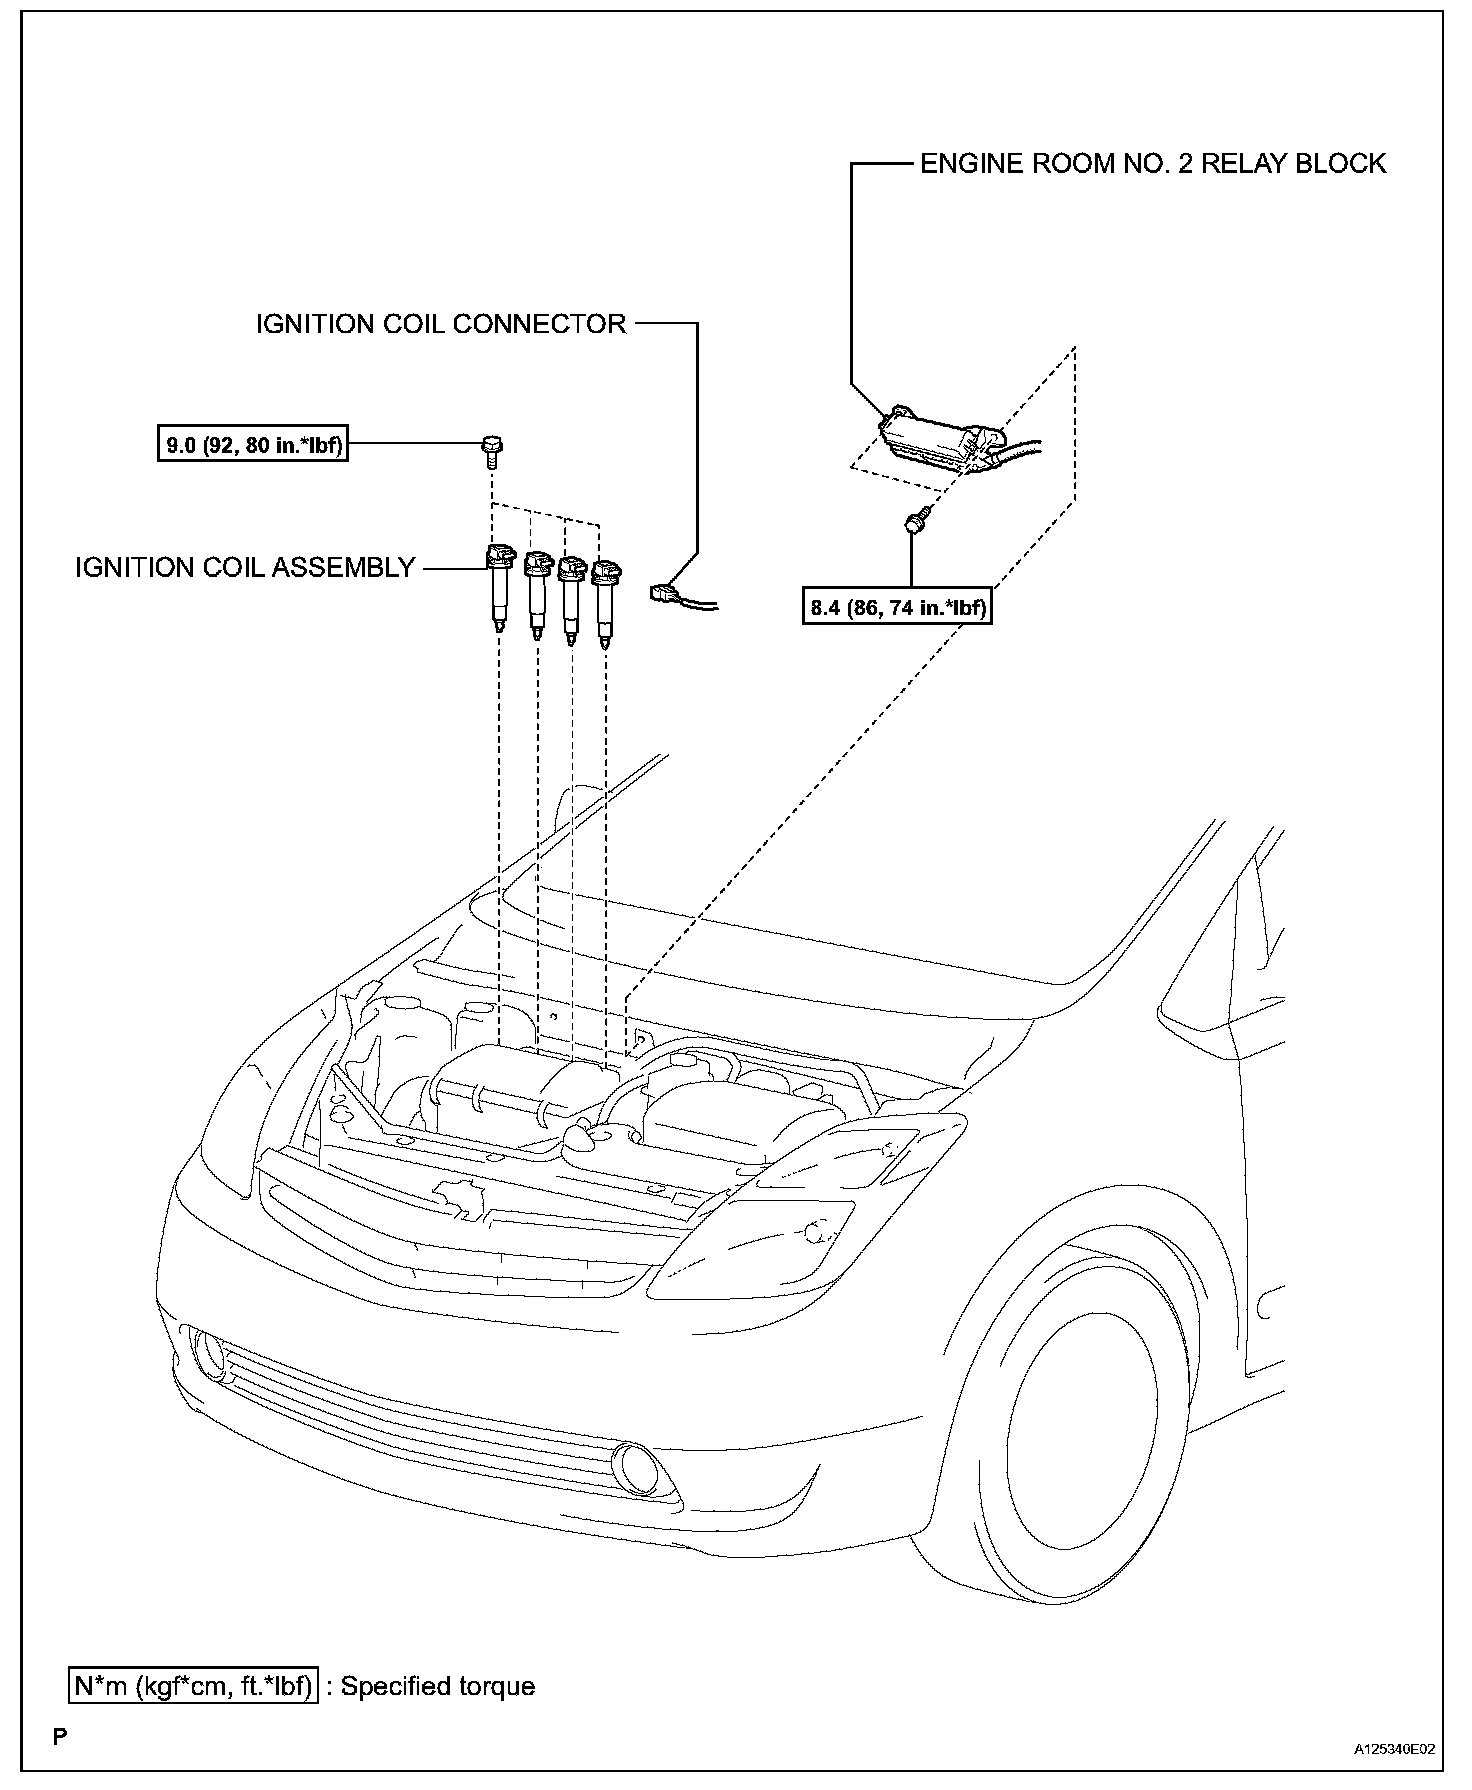
REMOVAL
1. REMOVE REAR NO. 2 FLOOR BOARD
2. REMOVE REAR DECK FLOOR BOX
3. REMOVE REAR NO. 3 FLOOR BOARD
4. DISCONNECT CABLE FROM NEGATIVE BATTERY TERMINAL
CAUTION: Wait at least 90 seconds after disconnecting the cable from the negative (-) battery terminal to prevent airbag and seat belt pretensioner activation.
5. DISCONNECT ENGINE ROOM NO. 2 RELAY BLOCK
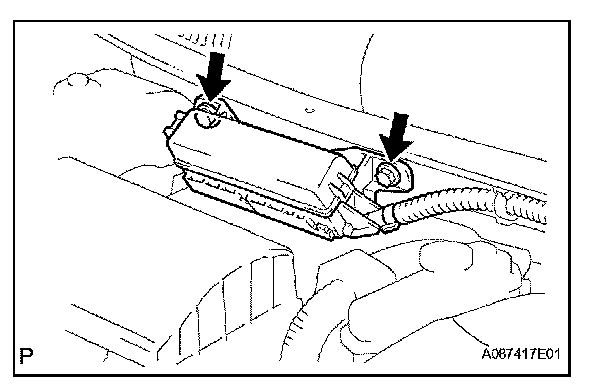
a. Remove the 2 bolts and disconnect the relay block.
6. REMOVE IGNITION COIL ASSEMBLY
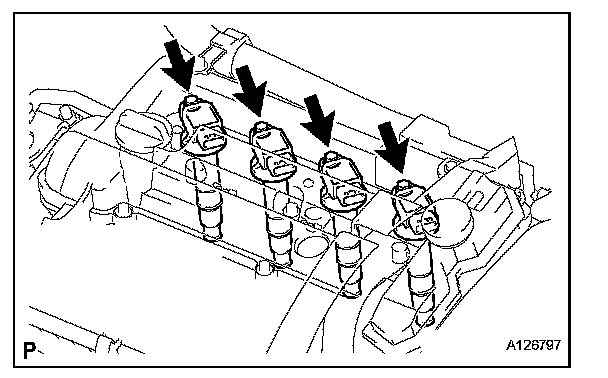
a. Disconnect the 4 ignition coil connectors.
b. Remove the 4 bolts and pull out the 4 ignition coils.
INSTALLATION
1. INSTALL IGNITION COIL ASSEMBLY
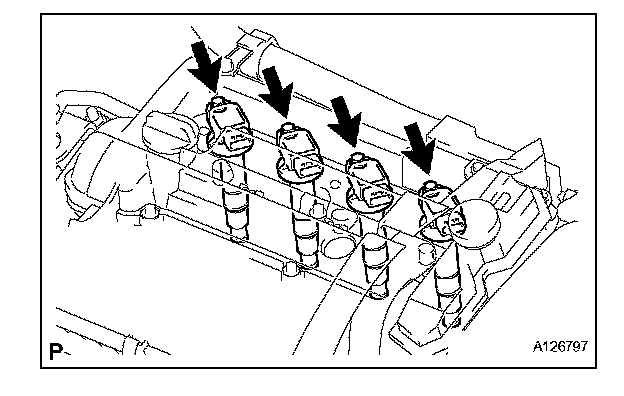
a. Install the 4 ignition coils with the 4 bolts.
Torque: 9.0 N.m (92 kgf.cm, 80 in.lbf)
b. Connect the 4 ignition coil connectors.
2. INSTALL ENGINE ROOM NO. 2 RELAY BLOCK
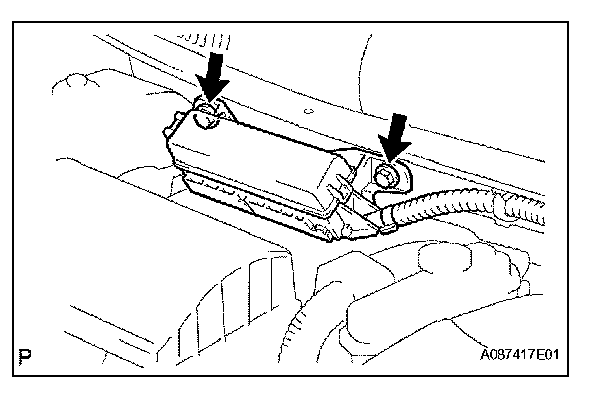
a. Install the relay block with the 2 bolts.
Torque: 8.4 N.m (86 kgf.cm, 74 in.lbf)
3. CONNECT CABLE TO NEGATIVE BATTERY TERMINAL
4. INSTALL REAR NO. 3 FLOOR BOARD
5. INSTALL REAR DECK FLOOR BOX
6. INSTALL REAR NO. 2 FLOOR BOARD
7. PERFORM INITIALIZATION
a. Perform initialization.
NOTE: Certain systems need to be initialized after disconnecting and reconnecting the cable from the negative (-) battery terminal.