Overhaul
DISASSEMBLY1. REMOVE AIR FILTER CASE
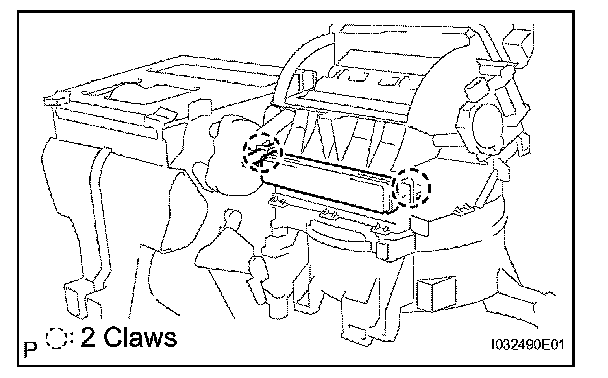
a. Release the 2 fitting claws, remove the air filter case.
2. REMOVE CLEAN AIR FILTER
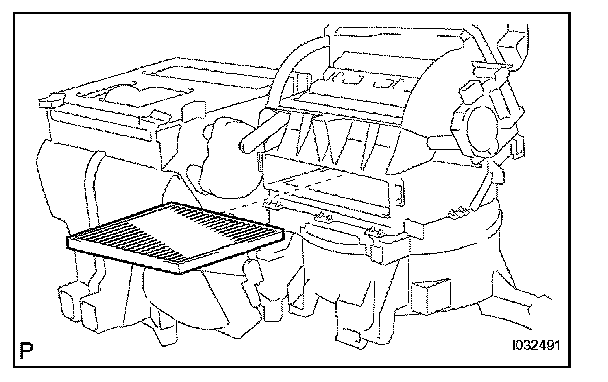
a. Remove the air filter from the air conditioner unit assembly.
HINT: Removing only the glove compartment door assembly makes it possible and install the air filter.
3. REMOVE DAMPER SERVO SUB-ASSEMBLY
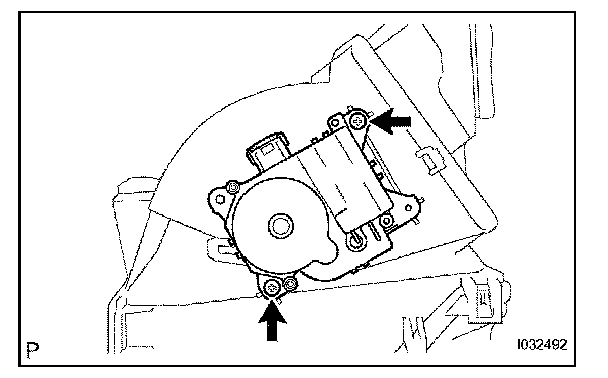
a. Remove the 2 screws and damper servo sub-assembly.
HINT: Removing only instrument panel sub-assembly upper and heater to register duct No. 1 makes it possible and install the damper servo sub-assembly.
4. REMOVE BLOWER WITH FAN MOTOR SUB-ASSEMBLY
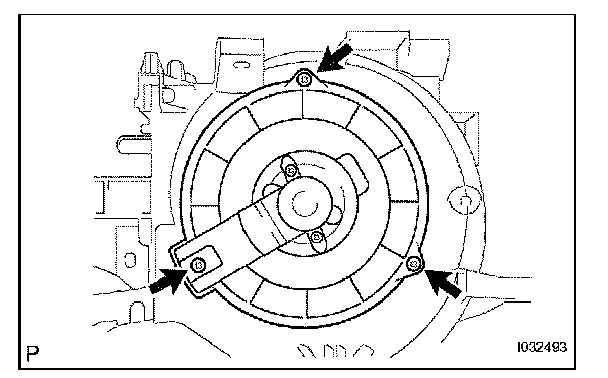
a. Remove the 3 screws and blower with fan motor sub-assembly.
HINT: Removing only the ECM makes it possible and install the blower with fan motor sub-assembly.
5. REMOVE BLOWER RESISTOR
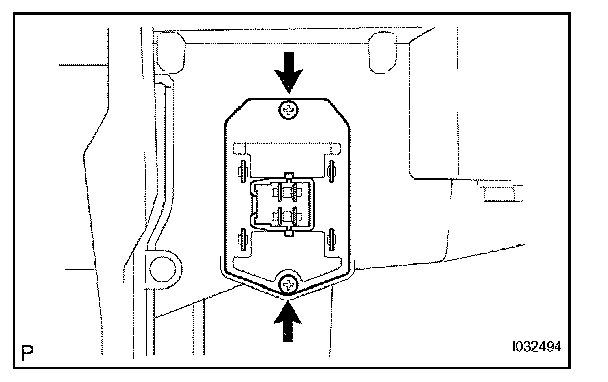
a. Disconnect the connector.
b. Remove the 2 screws and blower resistor.
HINT: Removing only the ECM makes it possible and install the blower resistor.
6. REMOVE HEATER PIPING COVER
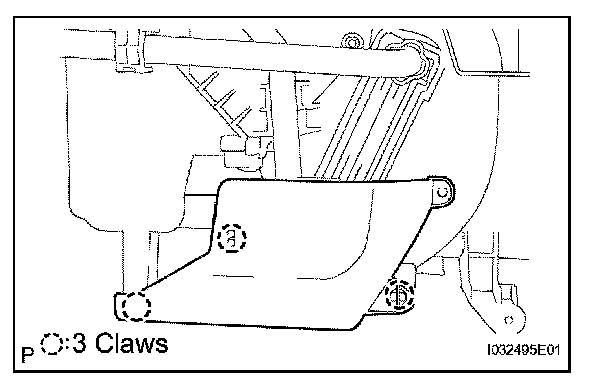
a. Release the 3 fitting claws, remove the heater piping cover.
7. REMOVE HEATER RADIATOR UNIT SUB-ASSEMBLY
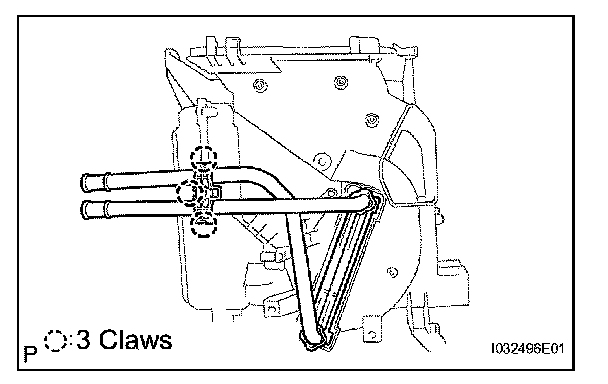
a. Release the 3 fitting claws, remove the heater piping clamp and heater radiator unit sub-assembly.
8. REMOVE COOLER THERMISTOR NO. 1
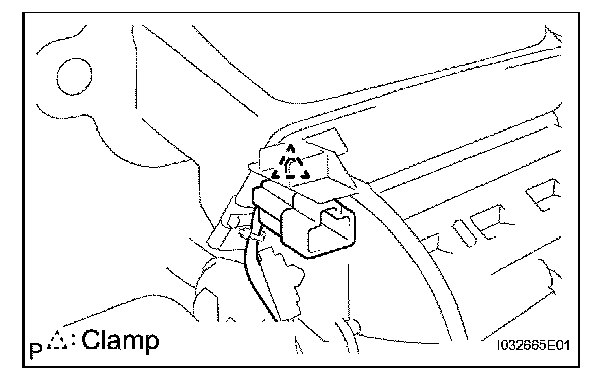
a. Remove the clamp.
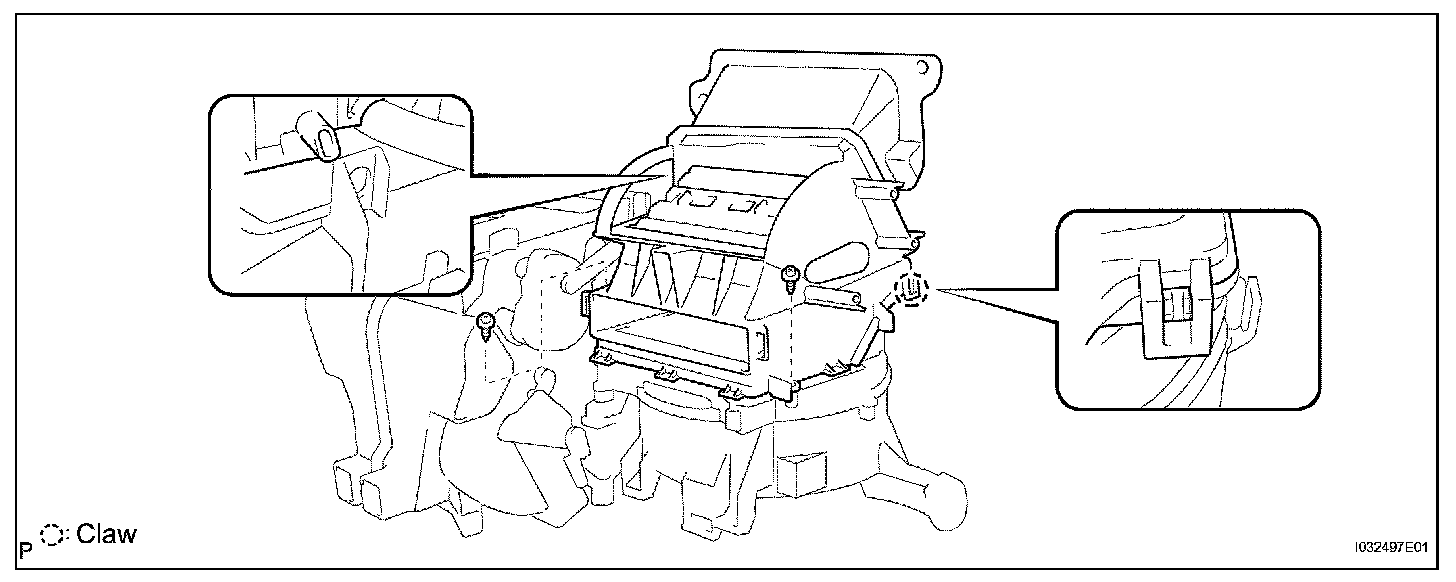
b. Release the fitting claw, remove the 2 screws and heater case.
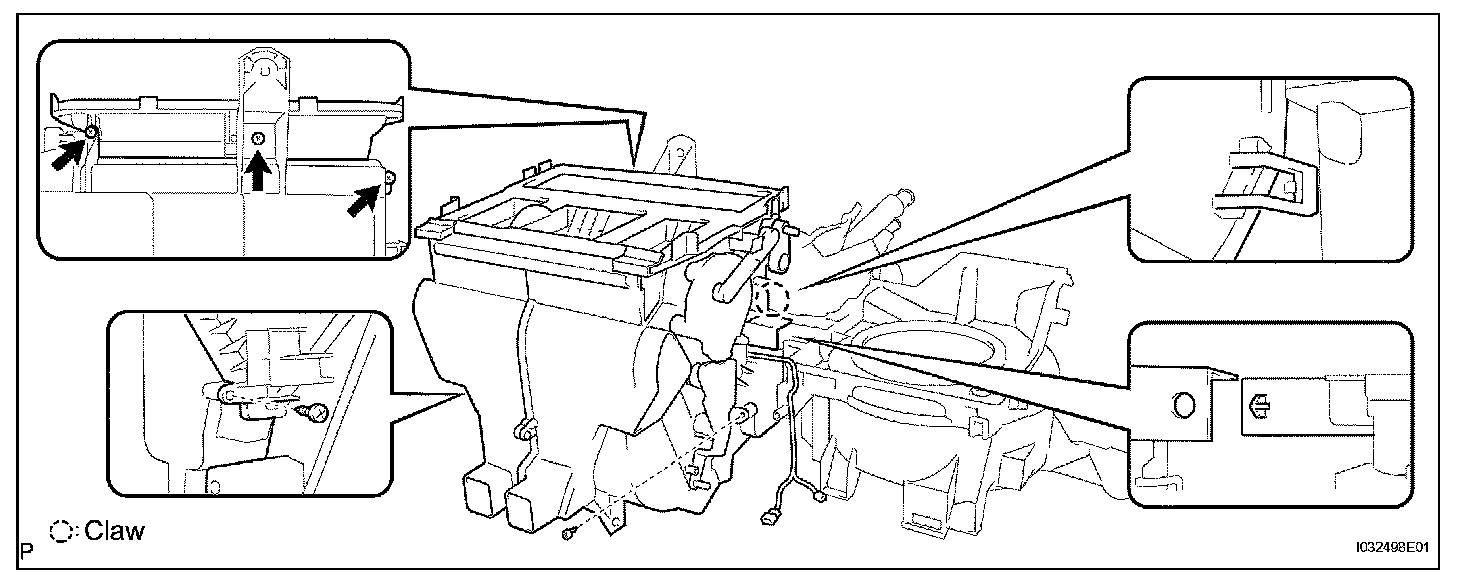
c. Release the fitting claw, remove the 5 screws and heater case.
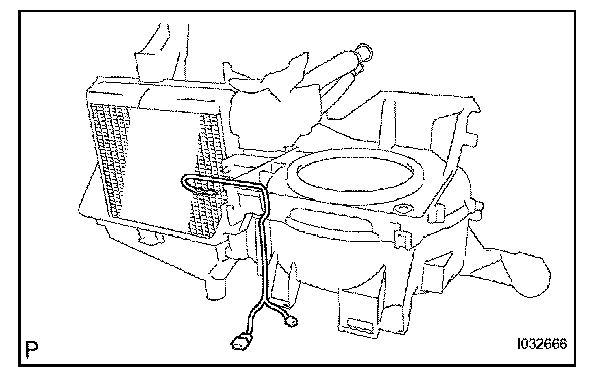
d. Remove the cooler thermistor No. 1 from the cooler evaporator sub-assembly No. 1.
9. REMOVE AIR CONDITIONING TUBE ASSEMBLY
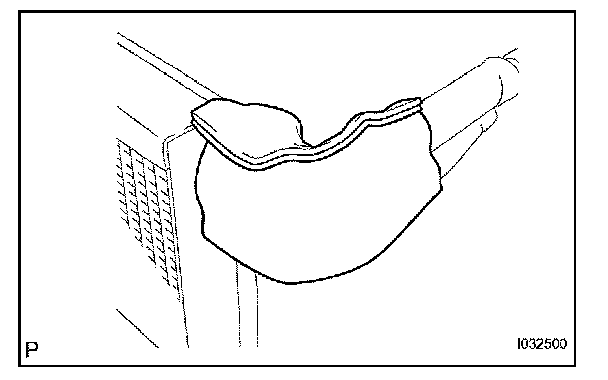
a. Remove the cooler evaporator assembly from the heater case.
b. Remove the packing.
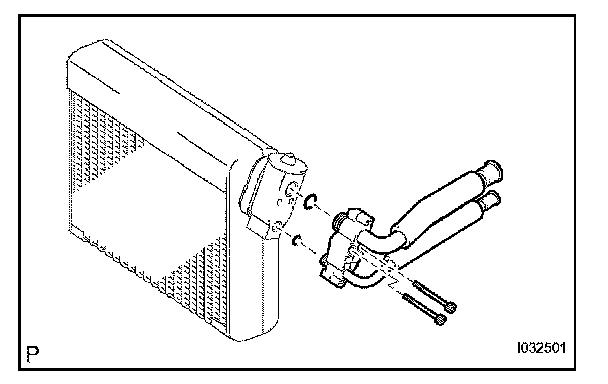
c. Using a hexagon wrench 5.0 mm (0.20 in.), remove the 2 hexagon bolts and air conditioning tube assembly.
d. Remove the 2 O-rings from the air conditioning tube assembly.
10. REMOVE COOLER EXPANSION VALVE
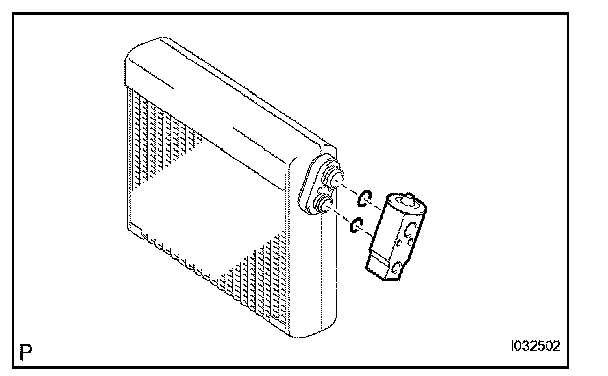
a. Remove the cooler expansion valve from the cooler evaporator sub-assembly No. 1.
b. Remove the 2 O-rings from the cooler evaporator sub-assembly No. 1.
HINT: Removing only instrument panel sub-assembly upper, heater to register duct No. 1 and heater case makes it possible and install the cooler expansion valve.
11. REMOVE COOLER EVAPORATOR SUB-ASSEMBLY NO. 1
12. REMOVE COOLER UNIT DRAIN HOSE NO. 1
REASSEMBLY
1. INSTALL COOLER EXPANSION VALVE
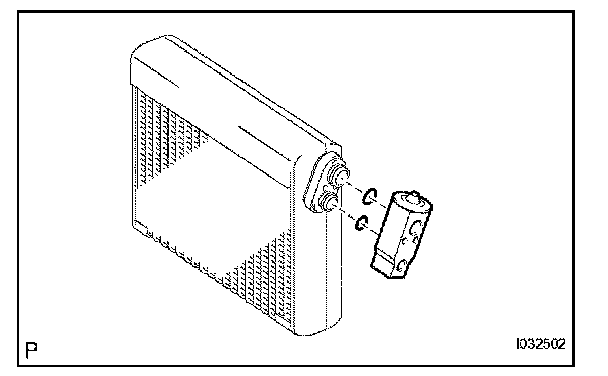
a. Lubricate 2 new O-rings with compressor oil and install them to the cooler expansion valve.
Compressor oil: ND-OIL 8 or equivalent
b. Install the cooler expansion valve from cooler evaporator sub-assembly No. 1.
2. INSTALL AIR CONDITIONING TUBE ASSEMBLY
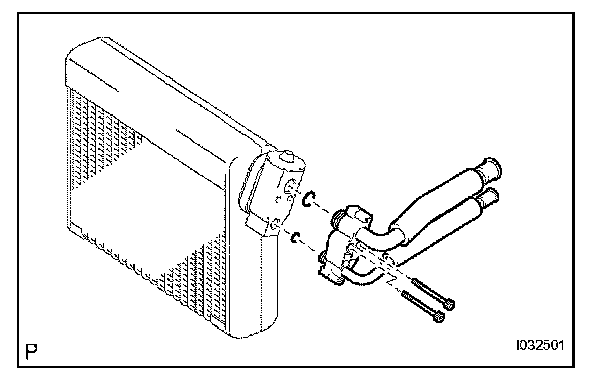
a. Lubricate 2 new O-rings with compressor oil and install them to the air conditioning tube assembly.
Compressor oil: ND-OIL 8 or equivalent
b. Using a hexagon wrench 5.0 mm (0.20 in.), install the air conditioning tube assembly with the 2 hexagon bolts.
Torque: 3.5 N.m (35 kgf.cm, 30 in.lbf)
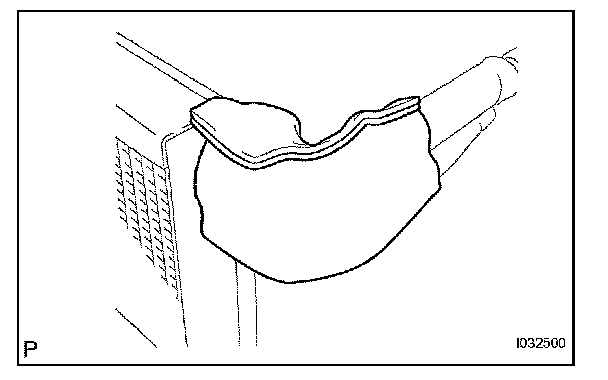
c. Install the packing.
HINT: Securely attach so that the gap in the packing will not be mode.
d. Install the cooler evaporator assembly to the heater case.
3. INSTALL COOLER THERMISTOR NO. 1
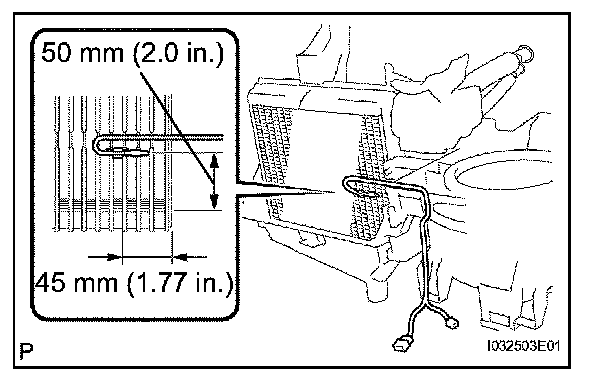
a. Install the cooler thermistor No. 1 at the shown position on the illustration.
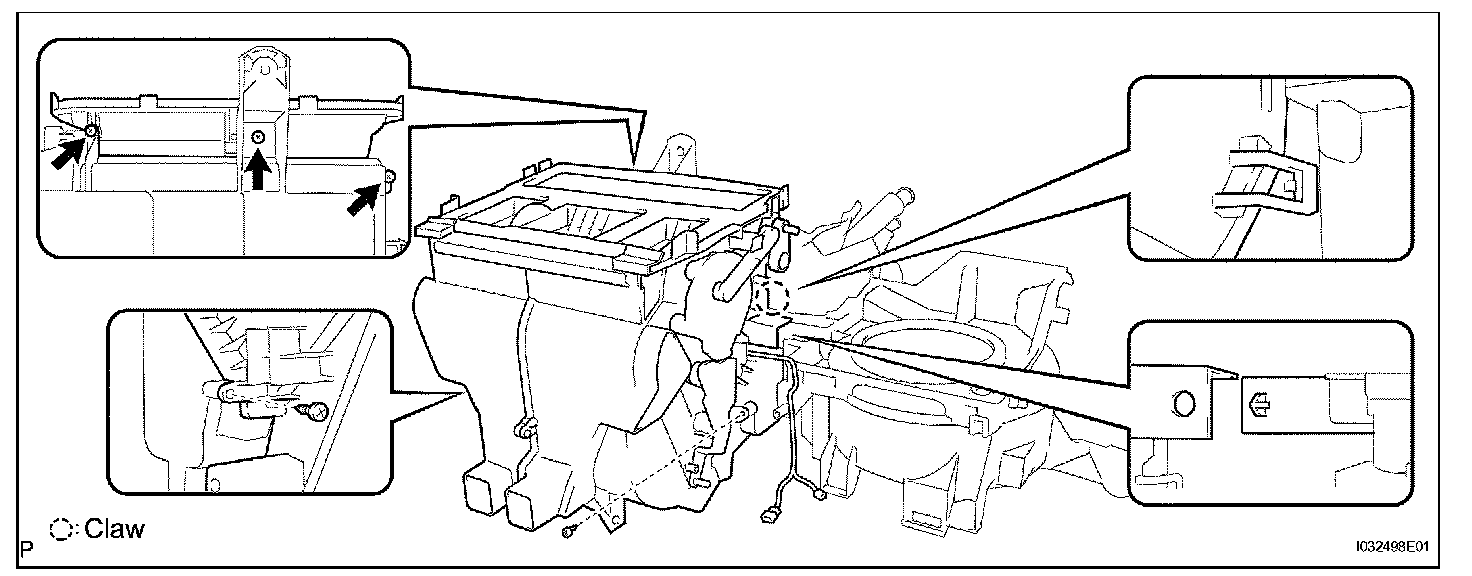
b. Install the heater case with the claw and 5 screws.
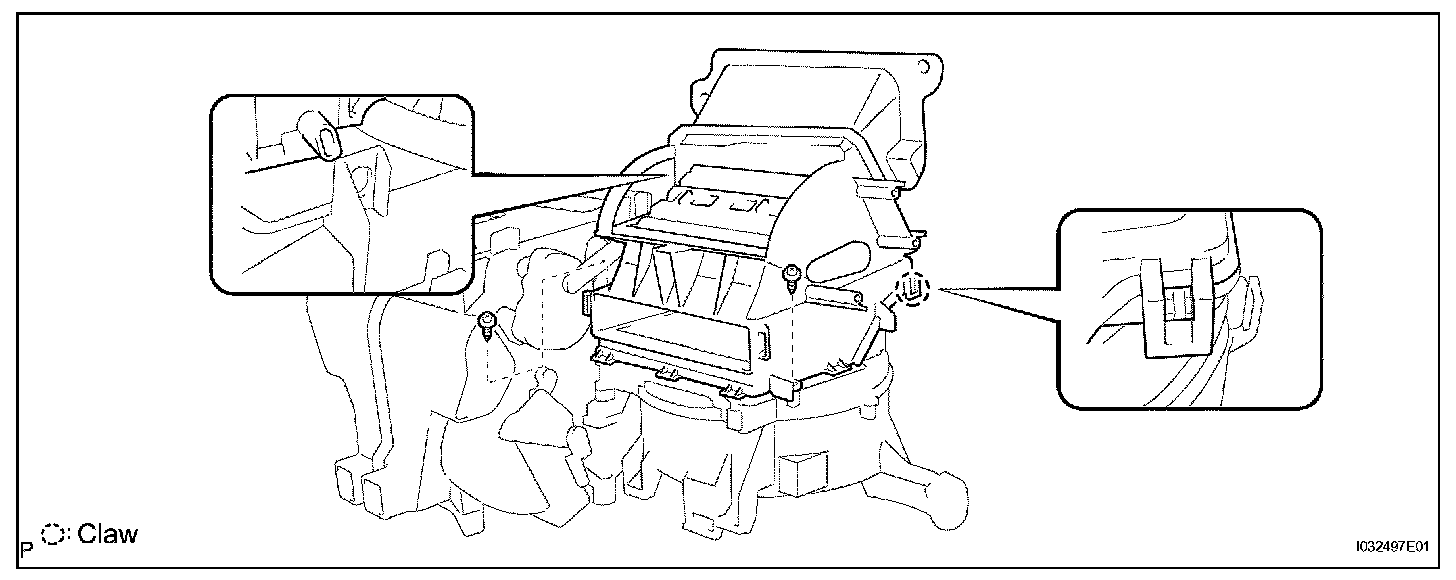
c. Install the heater case with the claw and 2 screws.
4. INSTALL CLEAN AIR FILTER
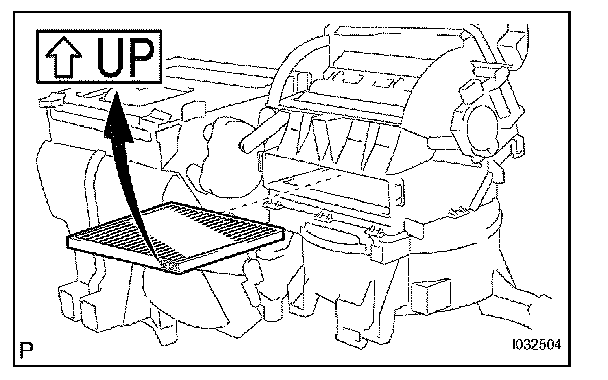
a. Install the air filter to the air conditioner unit assembly.