Blower Unit
DISASSEMBLY1. REMOVE EVAPORATOR TEMPERATURE SENSOR
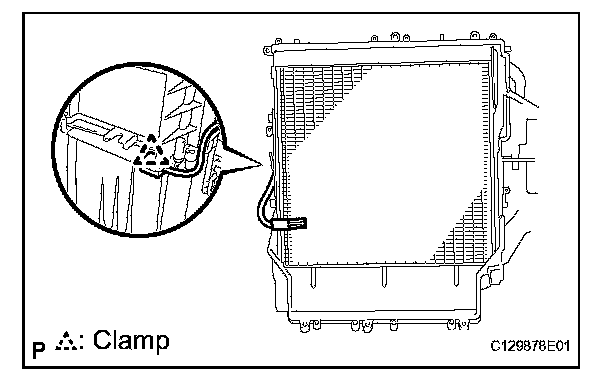
a. Remove the clamp and evaporator temperature sensor.
2. REMOVE COOLER EXPANSION VALVE
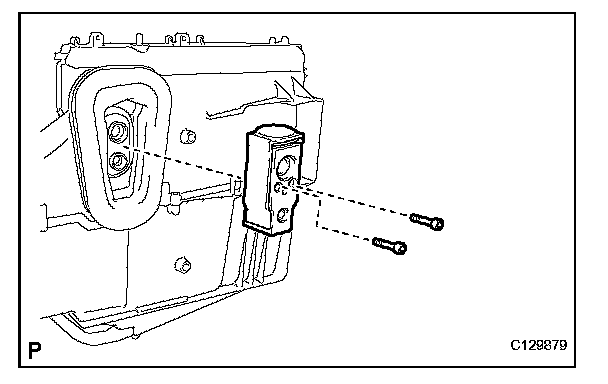
a. Using a hexagon wrench 4 mm, remove the 2 hexagon bolts and cooler expansion valve.
3. REMOVE COOLER EVAPORATOR SUB-ASSEMBLY NO.1
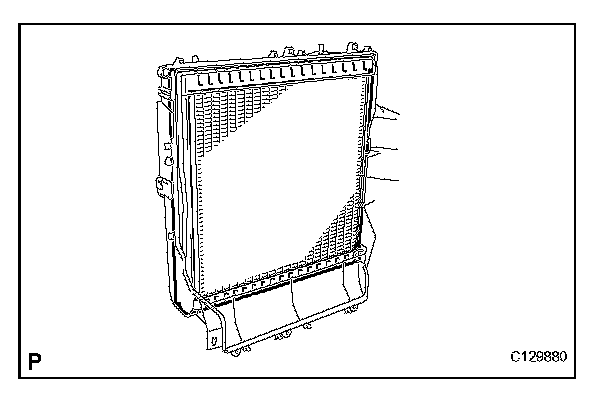
a. Remove the cooler evaporator sub-assembly No.1.
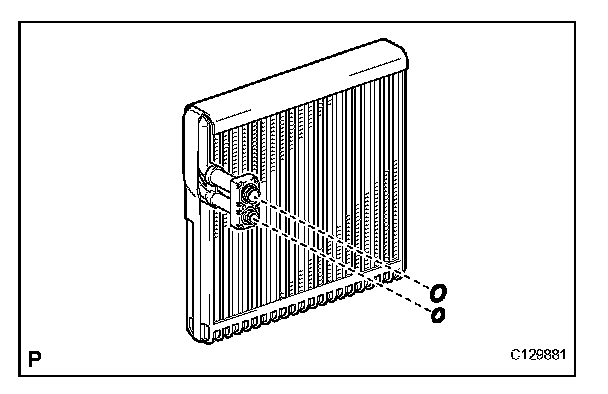
b. Remove the 2 O-rings from the cooler evaporator sub-assembly No.1.
4. REMOVE AIR FILTER COVER PLATE
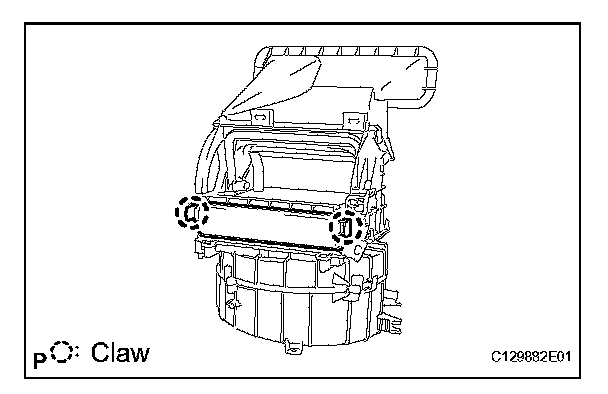
a. Release the 2 claws and remove the air filter cover plate.
5. REMOVE CLEAN AIR FILTER
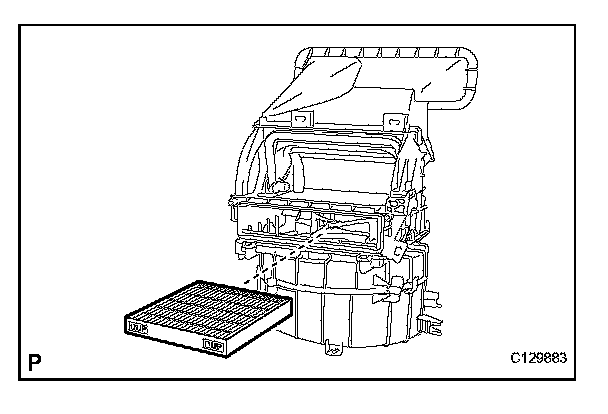
a. Remove the clean air filter.
6. REMOVE AIR INLET SERVO MOTOR
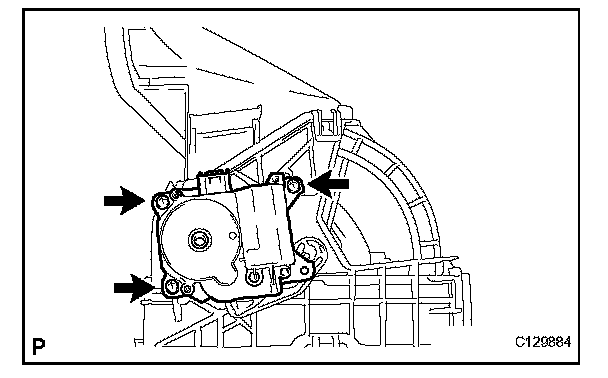
a. Remove the 3 screws and air inlet servo motor.
7. REMOVE AIR DUCT SUB-ASSEMBLY NO.3
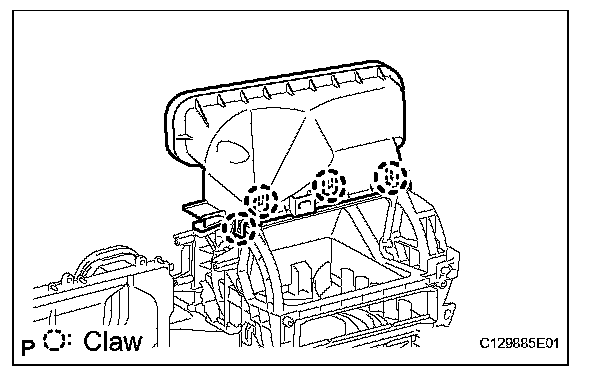
a. Disengage the 4 claws and then remove the air duct sub-assembly No.3.
8. REMOVE COOLING UNIT MOTOR SUB-ASSEMBLY
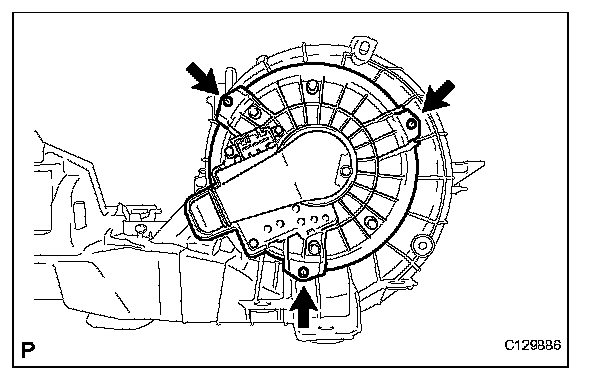
a. Remove the 3 screws and cooling unit motor sub-assembly w/ fan.
REASSEMBLY
1. INSTALL COOLER EVAPORATOR SUB-ASSEMBLY NO.1
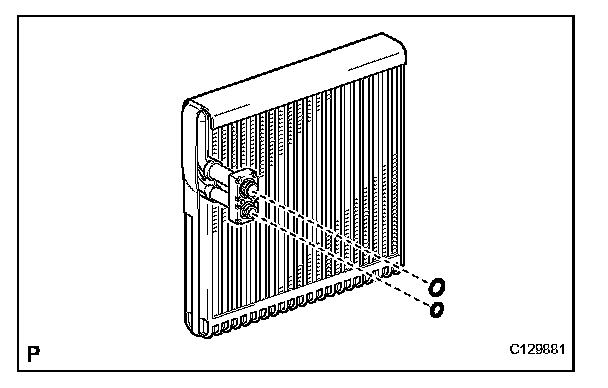
a. sufficiently apply compressor oil (ND-OIL 8) to 2 new O-rings and the fitting surface. Install the 2 O-rings to the cooler evaporator No.1.
Compressor oil: ND-OIL 8 or equivalent
2. INSTALL COOLER EXPANSION VALVE
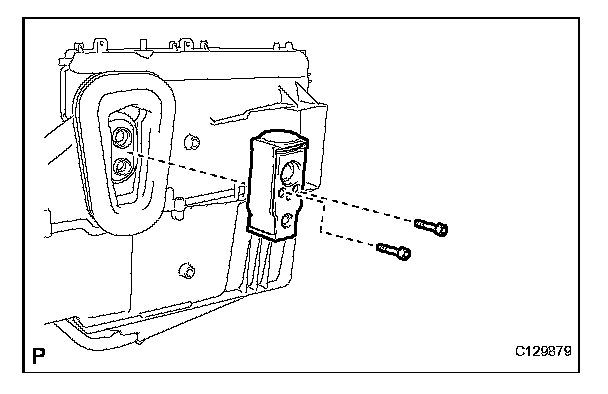
a. Using a hexagon wrench 4 mm, install the cooler expansion valve with the 2 hexagon bolts.
Torque: 3.5 N.m (35 kgf.cm, 30 in.lbf)
3. INSTALL EVAPORATOR TEMPERATURE SENSOR
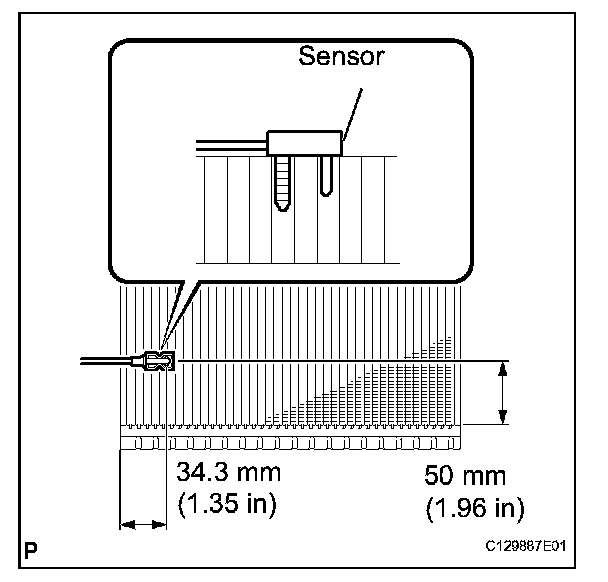
a. If using a mew evaporator:
Install the sensor to the evaporator as shown in the illustration.
b. If reusing the evaporator:
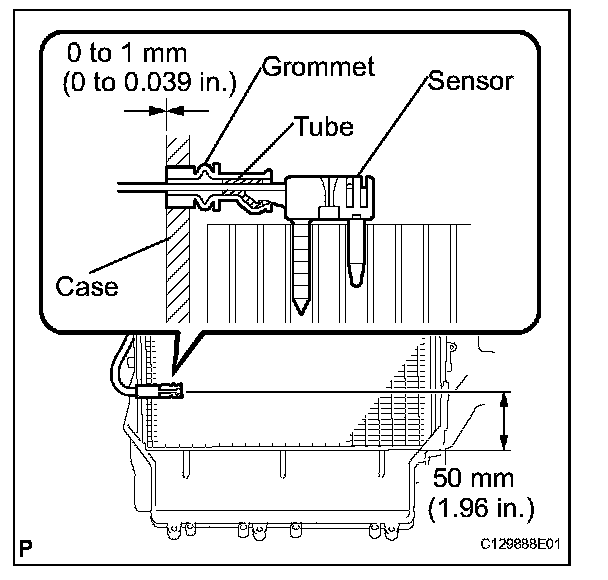
1. Install the sensor to the evaporator as shown in the illustration.
HINT: Completely cover the tube with the grommet.