Generator Cable
GENERATOR CABLEREMOVAL
CAUTION:
^ When working on the high voltage systems, always wear insulated gloves.
^ Keep the removed service plug in your pocket to prevent other technicians from reconnecting it while you are servicing the vehicle.
^ After removing the service plug grip, do not touch the high voltage connectors and terminals for 5 minutes.
NOTICE: After removing the service plug grip, do not operate the power switch as it may damage the hybrid vehicle control ECU.
1. DISCONNECT CABLE FROM NEGATIVE BATTERY TERMINAL
CAUTION: Wait at least 90 seconds after disconnecting the cable from the negative (-) battery terminal to prevent airbag and seat belt pretensioner activation.
2. REMOVE SERVICE PLUG GRIP
a. Remove the service plug grip.
3. REMOVE ENGINE UNDER COVER LH
4. REMOVE ENGINE UNDER COVER RH
5. DRAIN COOLANT
a. Drain coolant.
6. REMOVE FRONT COWL TOP PANEL OUTER SUB ASSEMBLY
a. Remove the cowl top front panel.
7. REMOVE INVERTER WITH CONVERTER ASSEMBLY
a. Remove the inverter with converter.
8. REMOVE GENERATOR CABLE
a. Check that there is no voltage.
CAUTION: Ensure that insulated gloves are worn when carrying out this procedure.
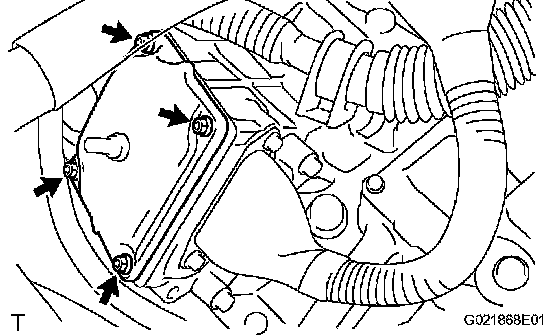
1 Remove the 4 bolts and power cable cover.
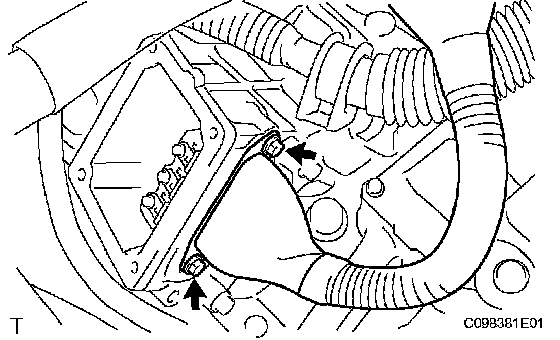
2 Remove the 2 bolts from the generator cable.
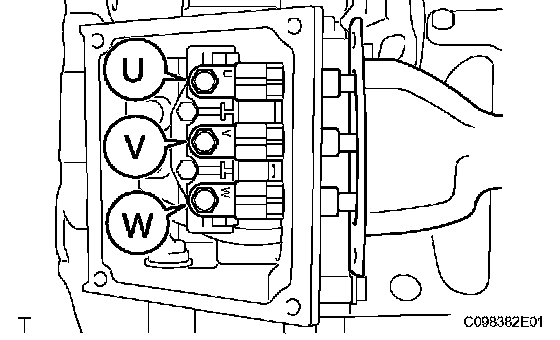
3 Inspect the voltage between each of the 3 phase AC terminals (U to V, V to W, U to W) and body ground using the Toyota electrical tester.
Standard value: 0 V
HINT: Use the Toyota Electrical Tester on measured ranges of DC 400 volts or more.
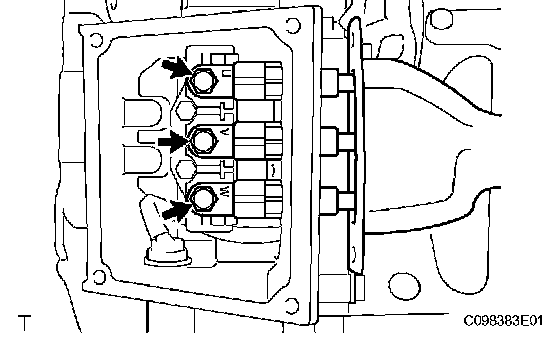
b. Remove the 3 bolts and generator cable.
INSTALLATION
1. INSTALL GENERATOR CABLE
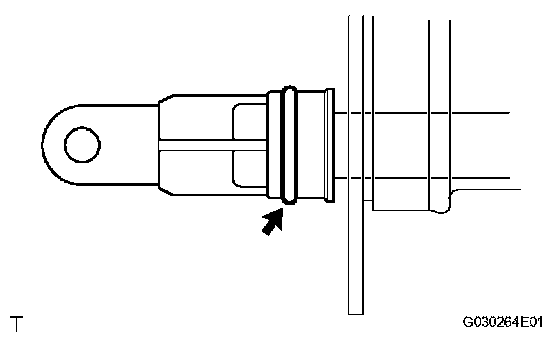
a. Apply a small amount of ATF WS to the generator cable's O-ring.
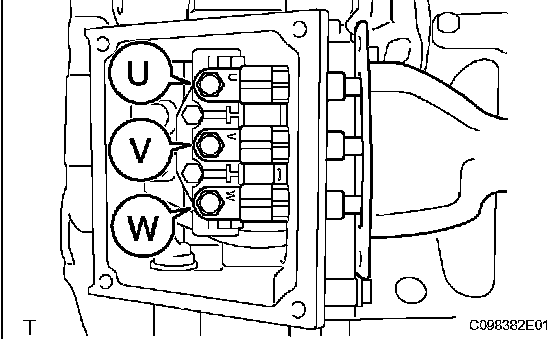
b. Connect the generator cable as shown in the illustration.
NOTICE:
^ Align the letters U, V and W, and connect the cable.
^ Ensure that no foreign objects are attached to the O-ring when connecting the cables.
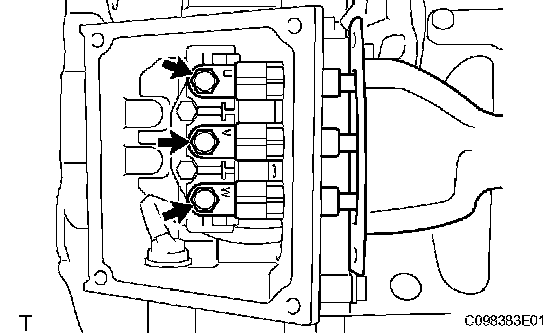
c. Install the generator cable (terminals) with the 3 bolts.
Torque: 8.5 Nm (87 kgf-cm, 71 inch lbs.)
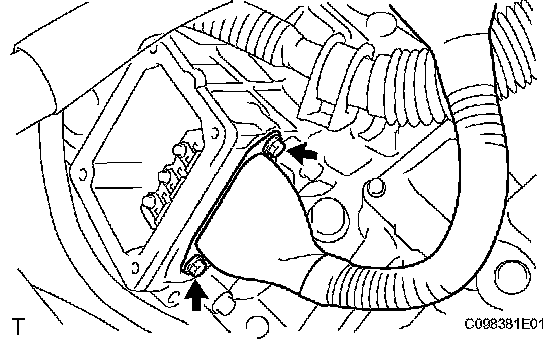
d. Install the generator cable with the 2 bolts.
Torque: 5.8 Nm (59 kgf-cm, 51 inch lbs.)
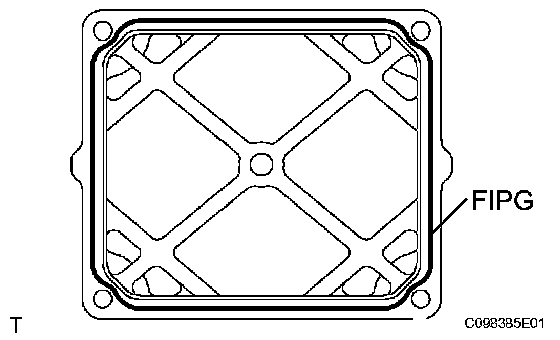
e. Apply seal packing in a continuous line of beads (diameter 1.5 mm (0.059 inch) to the power cable cover.
Seal packing: Toyota Genuine Seal Packing 1281, Three Bond 1281 or Equivalent
NOTICE:
^ Clean and degrease the installation surfaces.
^ Install within 10 minutes of applying seal packing.
^ Ensure that no foreign objects are inserted when the power cable cover is attached.
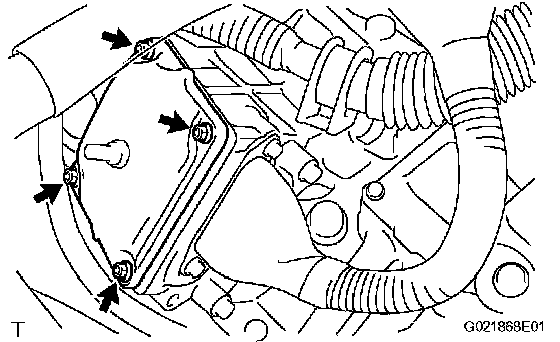
f. Install the power cable cover with the 4 bolts.
Torque: 4.8 Nm (49 kgf-cm, 42 inch lbs.)
2. INSTALL INVERTER WITH CONVERTER ASSEMBLY
a. Install the inverter with converter.
3. INSTALL FRONT COWL TOP PANEL OUTER SUB-ASSEMBLY
a. Install the cowl top front panel.
4. INSTALL ENGINE UNDER COVER RH
5. INSTALL ENGINE UNDER COVER LH
6. INSTALL SERVICE PLUG GRIP
a. Install the service plug grip.
7. CONNECT CABLE TO NEGATIVE BATTERY TERMINAL
8. ADD COOLANT
a. Add coolant.
9. CHECK FOR ENGINE COOLANT LEAKS
a. Check for engine coolant leaks.
10. PERFORM INITIALIZATION
a. Perform initialization.
NOTICE: Certain systems need to be initialized after disconnecting and reconnecting the cable from the negative (-) battery terminal.