Removal and Installation
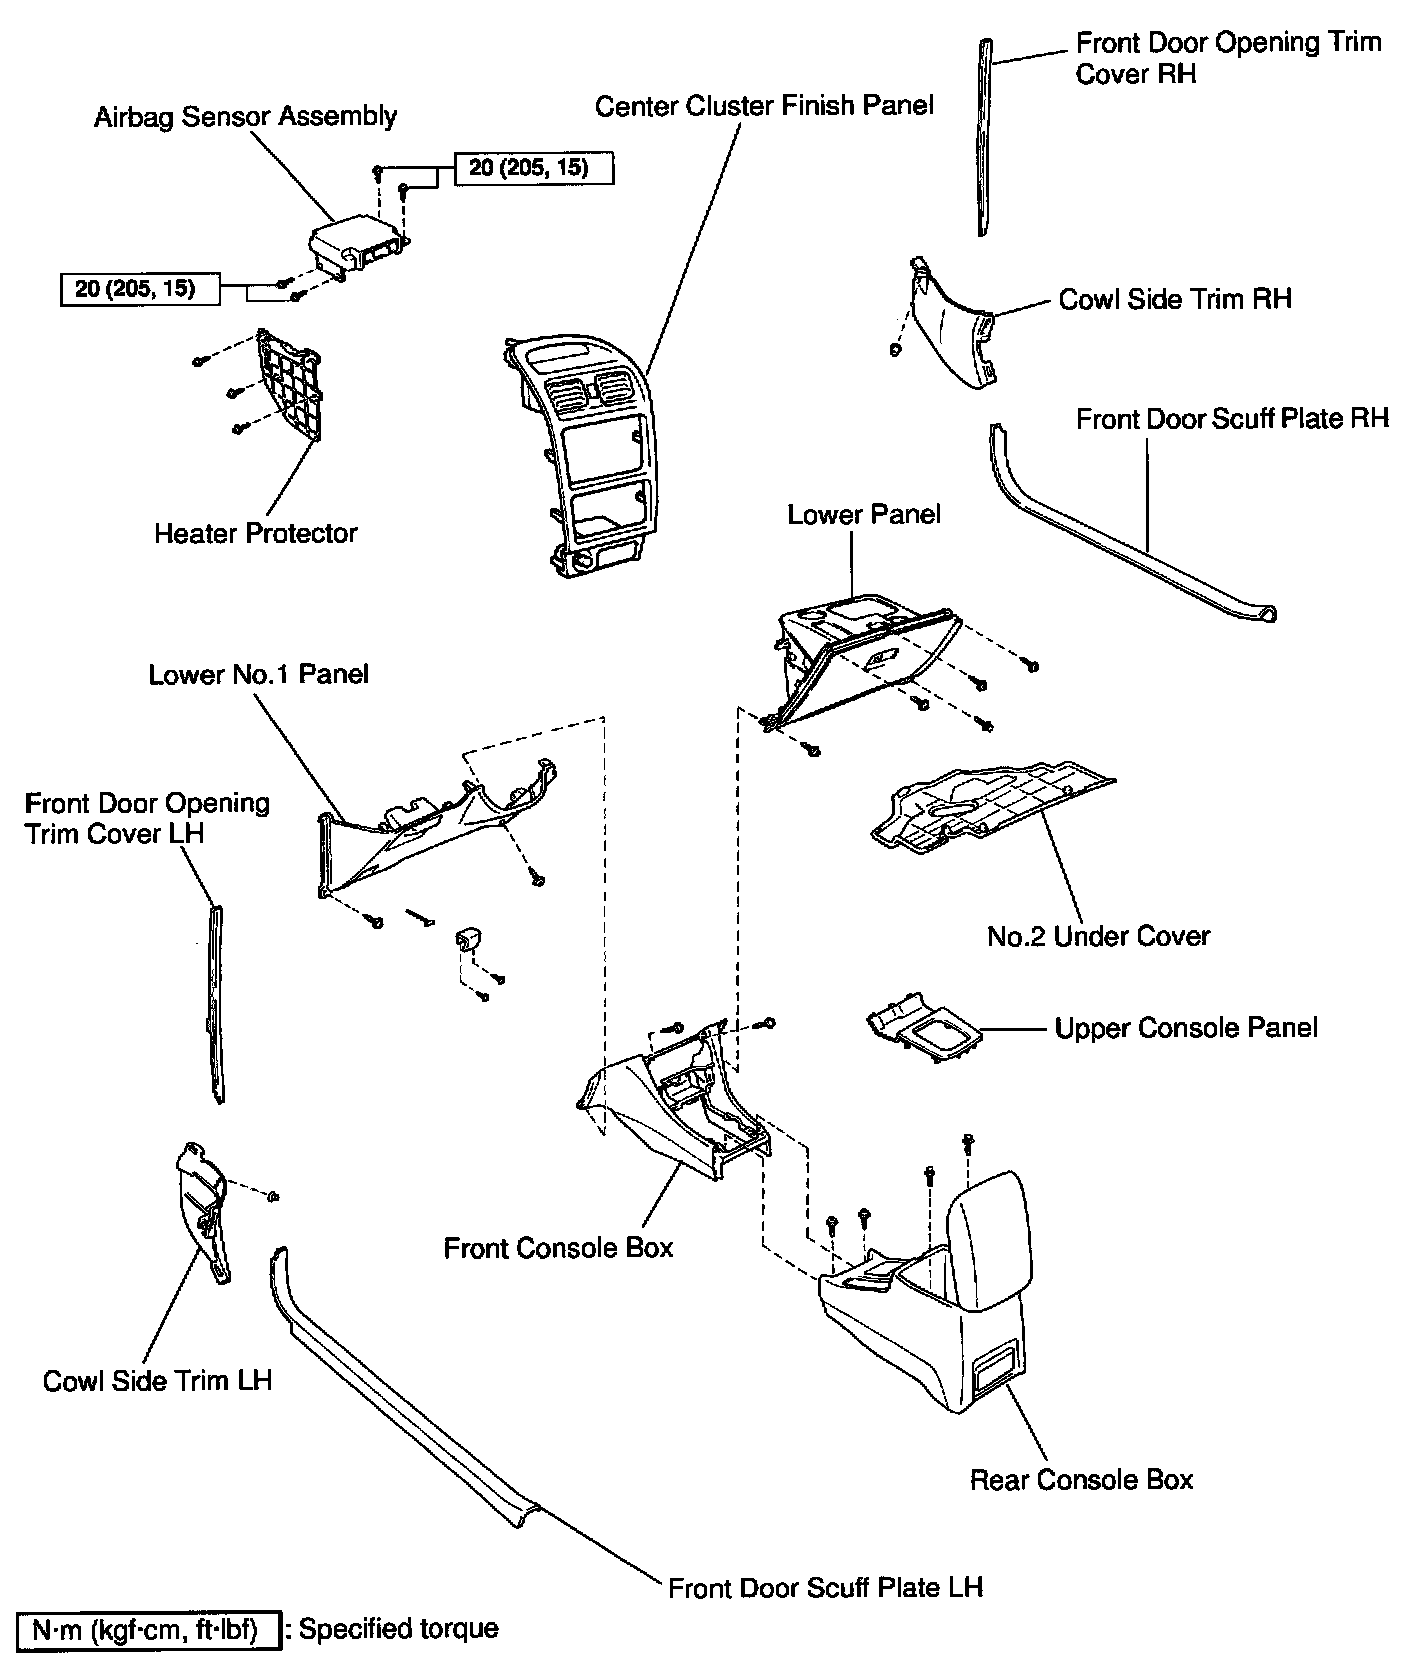
COMPONENTS
REMOVAL
NOTE: Do not open the cover or the case of the ECU and various
electrical devices unless absolutely necessary.
(If the IC terminals are touched, the IC may be destroyed by
static electricity.)
1. REMOVE LOWER NO.1 PANEL
a. Front door scuff plate LH.
b. Clip and cowl side trim LH.
c. Front door opening trim cover LH.
d. Bolt, nut and lower No.1 panel.
e. 2 screws and disconnect the hood lock control cable.
2. REMOVE LOWER PANEL
a. Front door scuff plate RH.
b. Clip and cowl side trim RH.
c. Front door opening trim cover RH
d. No.2 under cover.
e. Bolt, 4 screws and lower panel.
3. REMOVE FRONT CONSOLE BOX
a. Remove the upper console panel.
b. Remove the 2 bolts, 2 screws and rear console box.
c. Pry off the center cluster finish panel and disconnect the connector.
d. Remove the center cluster finish panel.
e. Remove the 2 screws and front console box.
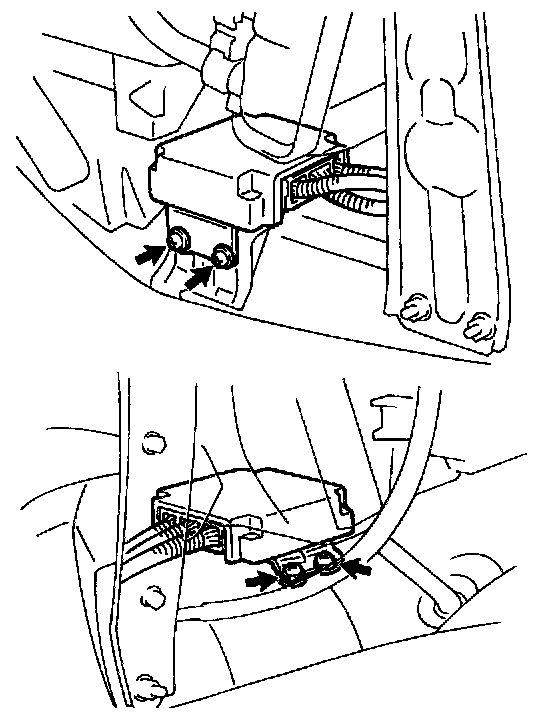
4. REMOVE AIRBAG SENSOR ASSEMBLY
a. Remove the heater protector.
b. Disconnect the airbag sensor connectors.
NOTE: Disconnect the connectors with the airbag sensor assembly installed.
c. Using a torx wrench, remove the 4 screws and airbag sensor assembly.
Torx wrench: T40 (Part No. 09042-00020 or locally manufactured tool)
INSTALLATION
NOTE:
- Never use SRS parts from another vehicle. When replacing parts, replace them with new parts. Never reuse the airbag sensor assembly involved in a collision when the airbag has deployed.
- Never repair a sensor in order to reuse it.
1. INSTALL AIRBAG SENSOR ASSEMBLY
a. Using a torx wrench, install the airbag sensor assembly with the 3 screws.
Torx wrench: T40 (Part No. 09042-00020 or locally manufactured tool)
Torque: 20 Nm (205 kg.cm, 15 ft.lb)
b. Connect the airbag sensor connectors.
NOTE:
- Connection of the connector is done after the sensor assembly has been installed.
- Make sure the sensor assembly is installed with the specified torque.
- If the sensor assembly has been dropped, or there are cracks, dents or other defects in the case, bracket or connector, replace the sensor assembly with a new one.
- When installing the sensor assembly, take care that the SRS wiring does not interfere with other parts and is not pinched between other parts.
- After installing, shake the sensor assembly to check that there is no looseness.
c. Install the heater protector.
2. INSTALL FRONT CONSOLE BOX
a. Install the front console box with the 2 screws.
b. Connect the connector and install the center cluster finish panel.
c. Install the rear console box with the 2 bolts and 2 screws.
d. Install the upper console panel.
3. INSTALL LOWER PANEL
a. Install the lower panel with the bolt and 4 screws.
b. Install the No.2 under cover.
c. Install the front door opening trim cover RH.
d. Install the cowl side trim RH with the clip.
e. Install front door scuff plate RH.
4. INSTALL LOWER NO.1 PANEL
a. Connect the hood lock control cable and install the 2 screws.
b. Install the lower finish panel with the bolt and nut.
c. Install the front door opening trim cover LH.
d. Install the cowl side trim LH with the clip.
e. Install the front door scuff plate LH.