Rear
Rear Disc Brake AssemblyREMOVAL
CAUTION: Do not allow brake fluid to come in contact with vehicle body. If it does, wash off with water and wipe away completely.
1. Lift-up the vehicle, and then remove the rear wheels.
2. Disconnect the brake hose from caliper body assembly.
3. Remove the caliper lower bolt.
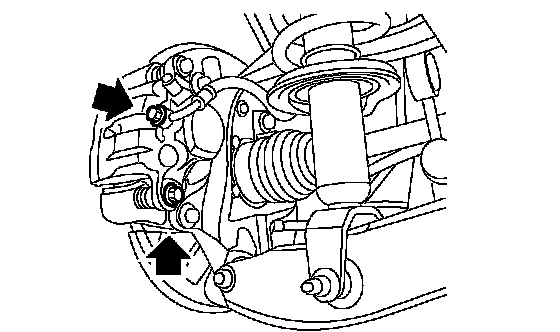
4. Raise the caliper body, and then move it toward vehicle center to separate it from the support.
5. Remove the support from housing.
NOTE: Remove the support only when replacing the rotor or support. It need not be removed when servicing the caliper body assembly.
6. Remove mud and foreign matter from the caliper body assembly and support.
CAUTION: Be careful not to allow foreign matter to enter the brake hose connector.
INSTALLATION
1. Install the support to the housing.
Tightening torque: 66 Nm (6.7 kgf-m, 48.7 ft. lbs.)
2. Apply a thin coat of Molykote M7439 to the pad clip.
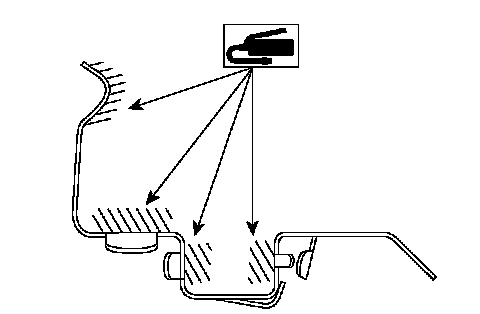
3. Apply a thin coat of Molykote AS880N (Part No. K0777YA010) to the contact surface between the pad and shim.
4. Install the pad to support.
5. Install the caliper body to the support.
Tightening torque: 27 Nm (2.8 kgf-m, 19.9 ft. lbs.)
6. Connect the brake hose using a new brake hose gasket.
Tightening torque: 18 Nm (1.8 kgf-m, 13.0 ft. lbs.)
7. Bleed air from the brake system.
DISASSEMBLY
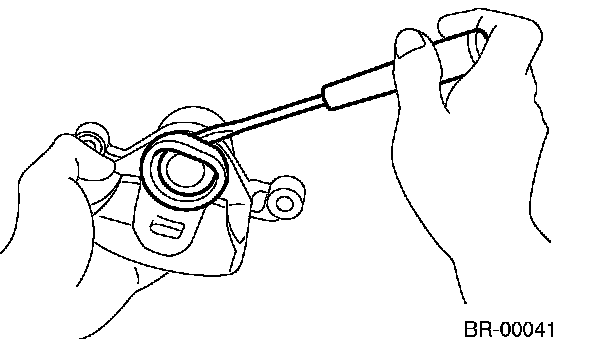
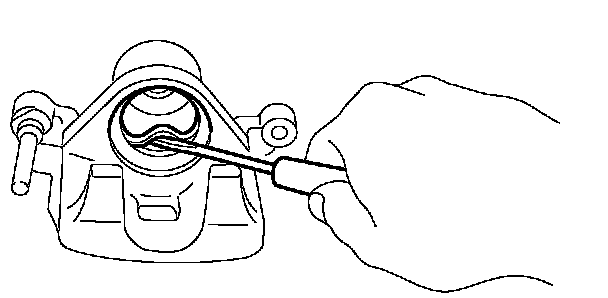
1. Remove the piston boot.
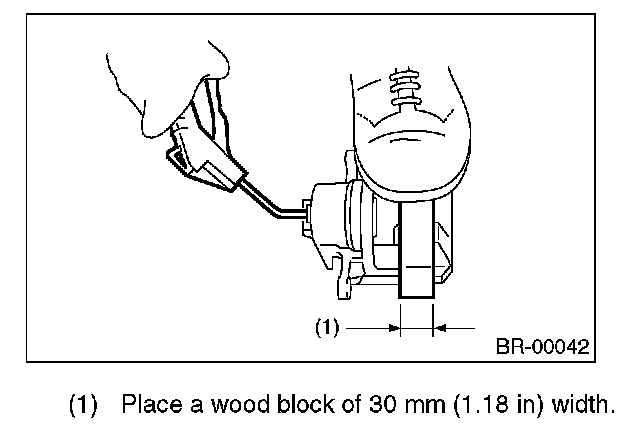
2. Place a wooden block in the caliper body as shown in the figure to prevent the piston from jumping out and being damaged.
3. Gradually apply compressed air via the brake hose installation hole to push the piston out.
4. Remove the piston seal from caliper body cylinder.
CAUTION: Do not damage the cylinder and piston seal groove.
5. Remove the lock pin sleeve and boot from caliper body.
6. Remove the guide pin boot.
ASSEMBLY
1. Clean the inside of the caliper body using brake fluid.
2. Apply a coat of brake fluid to piston seal and install piston seal in the groove on caliper body.
3. Apply a coat of brake fluid to the inner surface of cylinder and the entire outer surface of the piston.
4. Apply a coat of specified grease to the boot and fit to the groove on the ends of cylinder.
Grease: NIGLUBE RX-2 (Part No. K0779GA102)
5. Insert the piston into cylinder.
CAUTION: Do not force the piston into cylinder.
6. Position the boot in the grooves on piston and cylinder.
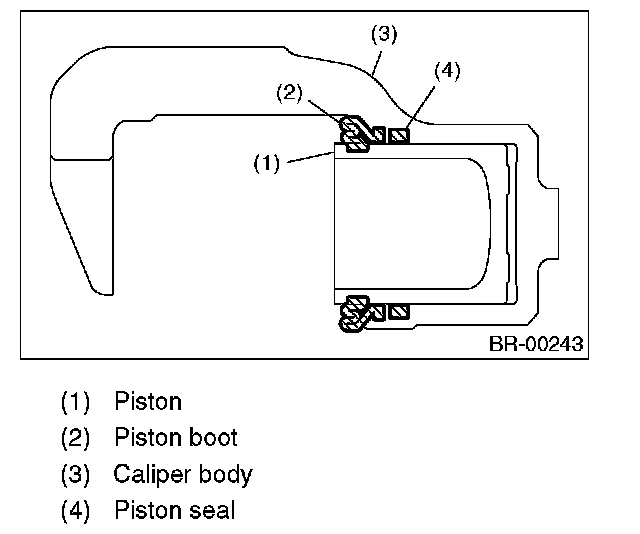
7. Apply a coat of specified grease to the guide pin, outer surface, sleeve outer surface, cylinder inner surface, and boot grooves.
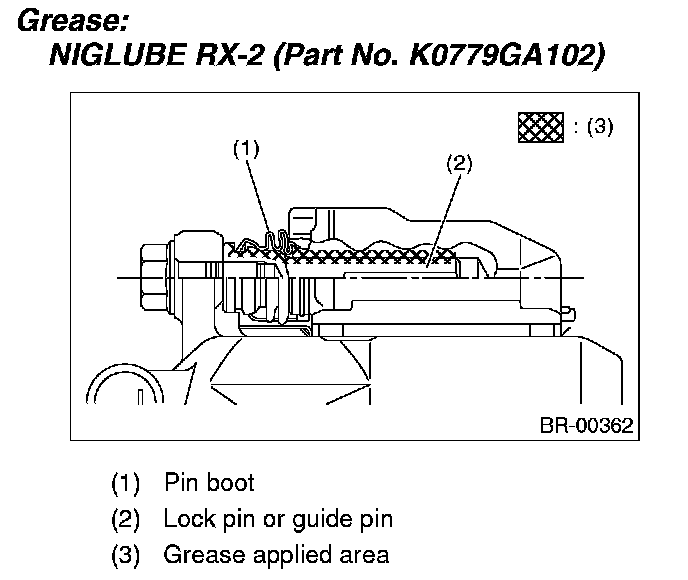
8. Install the guide pin boot to the support.
9. Install the lock pin boot to support, and then insert the lock pin sleeve into the specified position.