Oil Cooler Pipe Seals Replacement
Oil Cooler Pipe Seals Replacement
Tools Required
^ J41239-1 Cooler Line Seal Installer
^ J45201 Cooler Line Seal Remover
Removal Procedure
1. Place a drain pan or suitable container under the vehicle.
2. Raise and support the vehicle. Refer to Vehicle Lifting
3. Clean the cooler line connection points at the transmission.
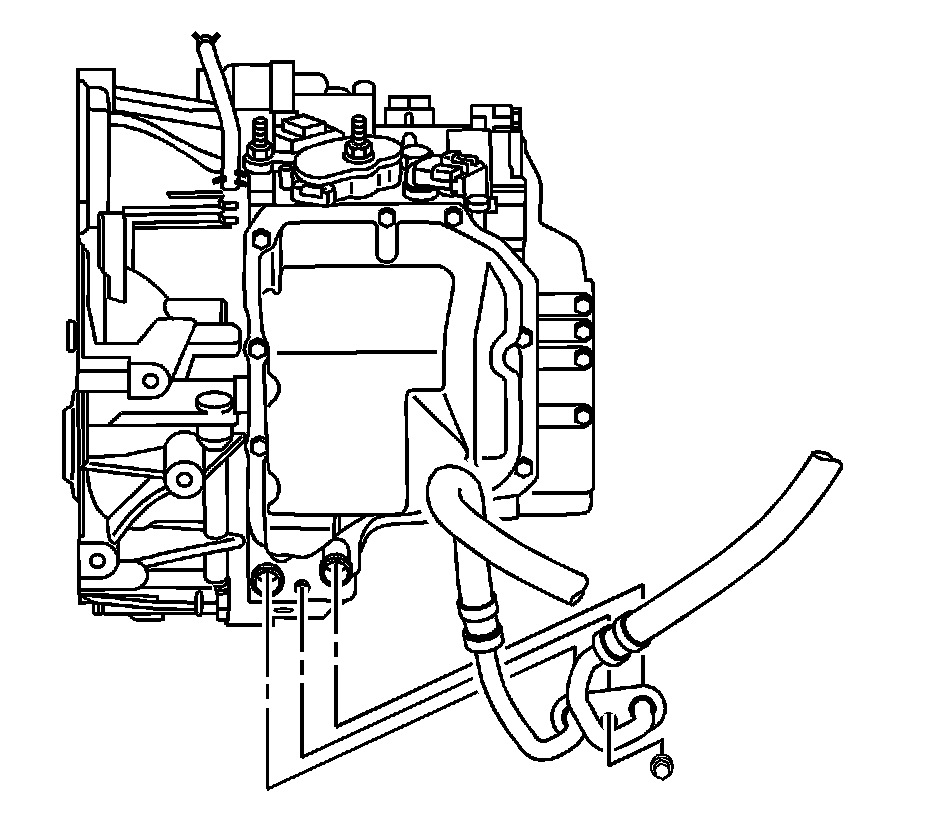
4. Remove the transaxle cooler line assembly nut from the transaxle.
5. Disconnect the cooler lines from the transaxle.
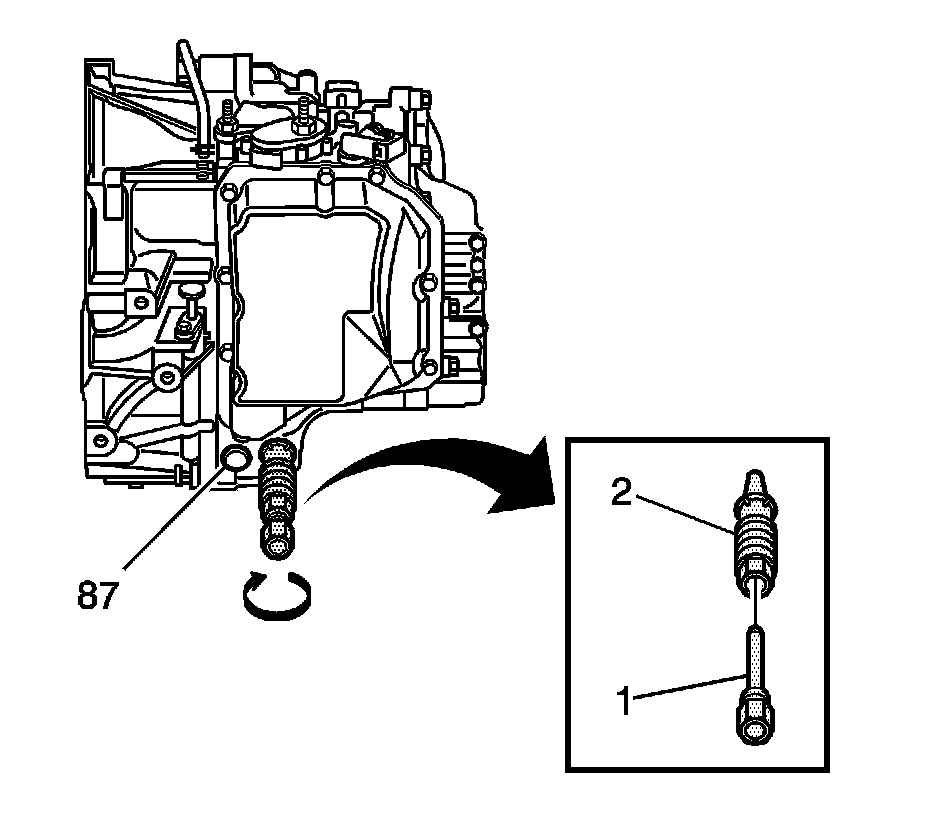
6. Important: Ensure that the J45201 is fully seated into the transaxle seal bore.
Insert the J45201 collet (2) into the cooler line seal.
7. Insert the J45201 forcing screw (1) into the collet (2).
8. Tighten the forcing screw (1) until snug.
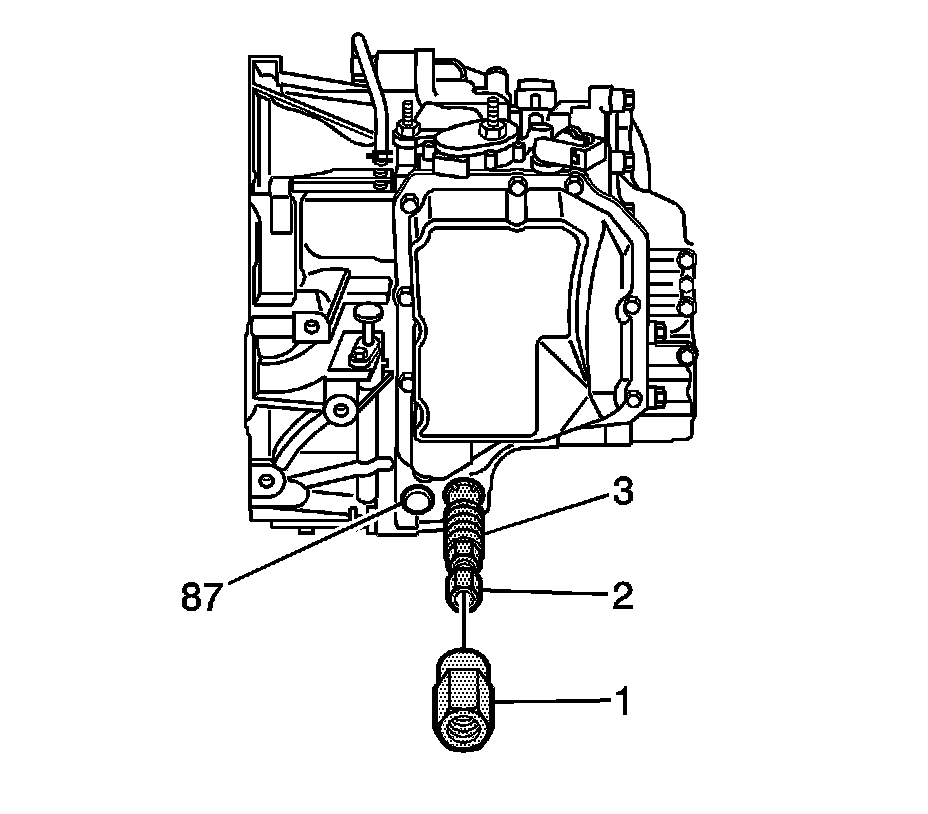
9. Thread the J45201 collar (1) onto the collet (3).
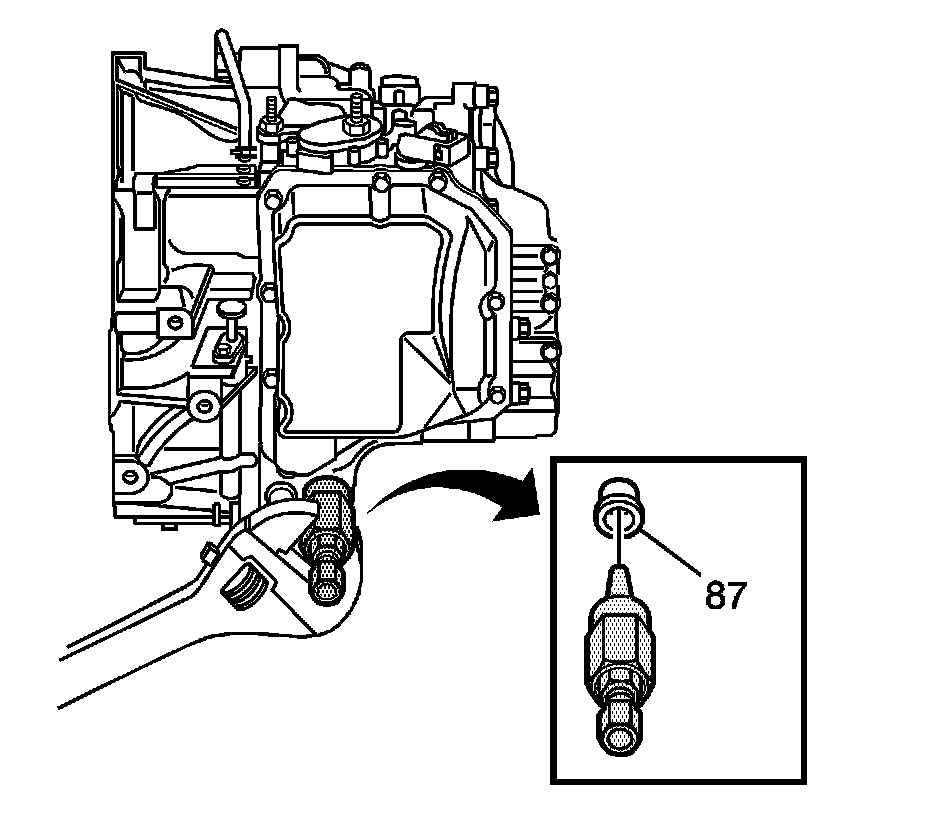
10. Turn the collar clockwise in order to remove the seal (87) from the case bores.
11. Discard the seal (87).
12. Clean the cooler line seal case bores.
Installation Procedure
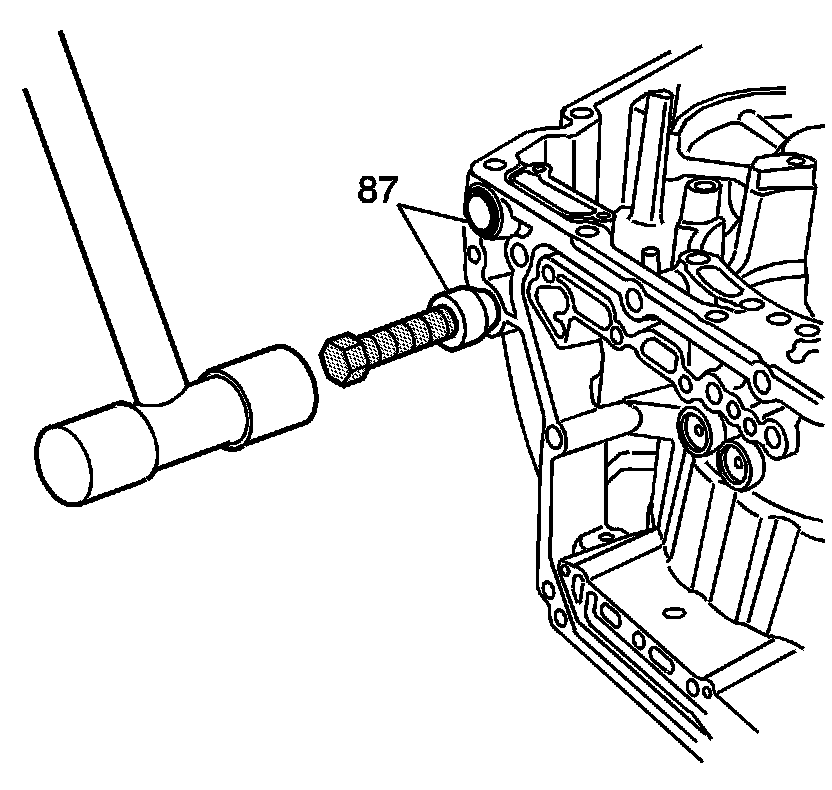
1. Insert a new transaxle cooler line seal into the case bore.
2. Remove the nub from the J41239-1.
3. Install the nub of the J41239-1 on the cooler line seal
4. Tap the new cooler line seal into the case bore.
5. Notice: Refer to Fastener Notice in Service Precautions.
Connect the transaxle cooler line assembly onto the transaxle.
Tighten the transaxle cooler line retaining nut to 7 Nm (62 inch lbs.).
6. Lower the vehicle.
7. Important: Do not use AF P/N 21005966 or P/N 21019223, these fluids are not compatible with this transaxle. Use Saturn T-IV P/N 22689186.
Add fluid to the transaxle as necessary.
8. Start the engine and check for leaks.