Procedures
276019 Removing and Installing Starter
Preliminary work
Preliminary work - starter
Disconnect battery.
Removing starter
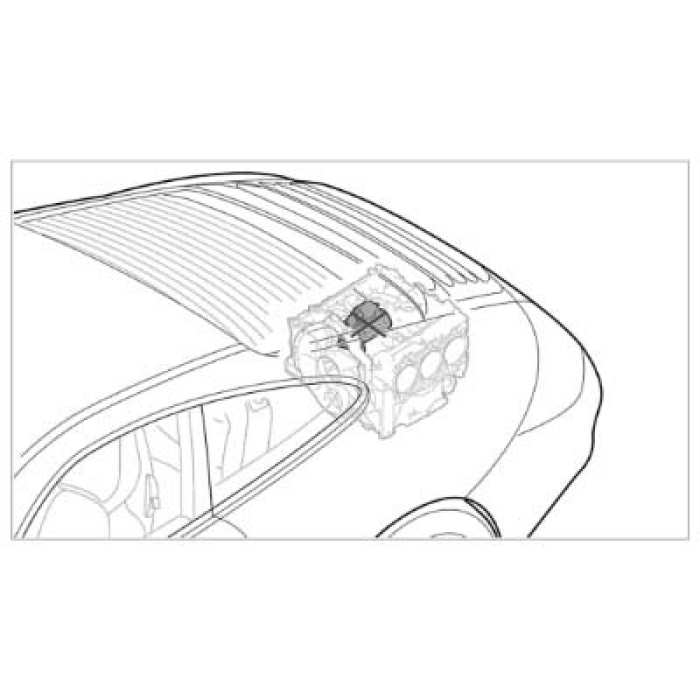
Installation Position:
Unscrewing Fastening Nuts On Starter:
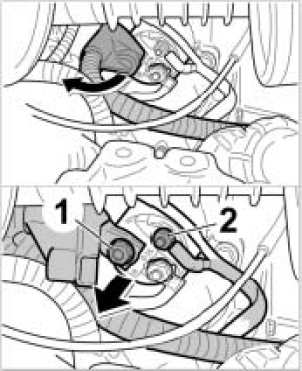
1. Remove caps from fastening nuts.
WARNING: If the battery has not been disconnected, battery voltage will be present at the leads during removal and installation.
- Risk of injury from burns and electric shock.
- Damage to electrical leads, control units and components due to accidental contact of leads with ground.
- Disconnect both battery terminals and cover the + terminal.
2. Unscrew fastening nuts -1, 2- on the starter, remove the leads and lay them to one side.
Unscrewing Fastening Screws:
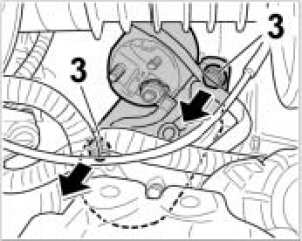
3. Undo the two fastening screws -3-.
4. Remove the starter rearward from the engine, rotating the starter as necessary.
Installing starter
WARNING: If the battery has not been disconnected, battery voltage will be present at the leads during removal and installation.
- Risk of injury from burns and electric shock.
- Damage to electrical leads, control units and components due to accidental contact of leads with ground.
- Disconnect both battery terminals and cover the + terminal.
1. Insert and position starter into engine compartment, rotating it slightly aufsetzen.
The angled cable lug of terminal 50 (M6) -1- faces in driving direction after assembly.
Screwing Down Starter With Fastening Screws:
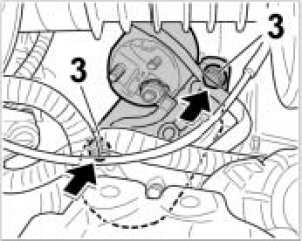
2. Insert fastening screws -3- on starter, screw into the engine housing and tighten Tightening torque 33 ftlb..
Tightening Electrical Leads To Starter:
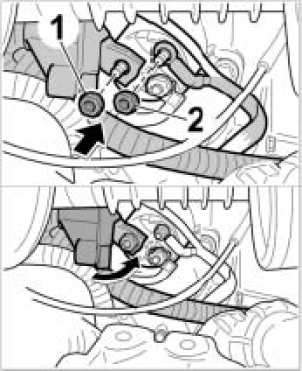
3. Position electrical leads on the starter and tighten with fastening nuts -1, 2-. Tightening torque 13 ftlb. Tightening torque 5.0 ftlb..
4. Fit caps on fastening nuts.
Subsequent work
Subsequent work - starter
Disconnect battery.