Connecting Rod and Piston Installation
^ Tools RequiredJ 29789 Piston Ring Compressor or equivalent
J 39946 Crankshaft Rotation Socket or equivalent
1. Liberally lubricate the cylinder walls, piston rings and piston skirts with engine oil.
2. Select the correctly numbered piston/connecting rod assembly for the cylinder.
3. Coat the crankshaft bearing journal and installed connecting rod bearings with GM crankshaft prelude, GM P/N 1052367, or equivalent.
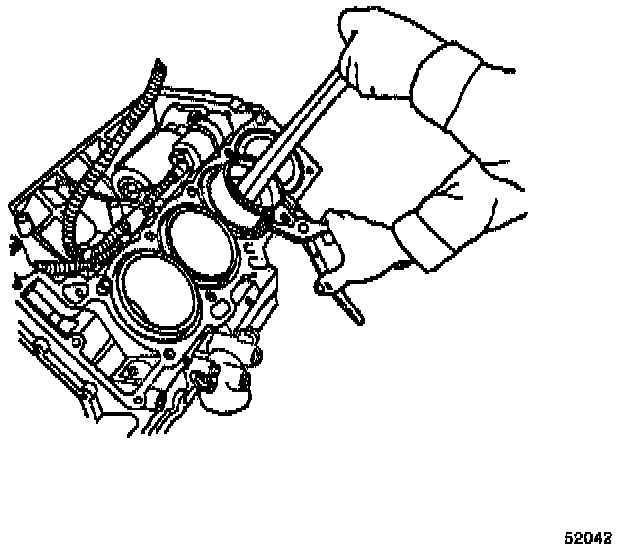
4. Compress the piston rings using the Piston Ring Compressor.
CAUTION: Extreme care must be exercised when installing the piston and connecting rod in order to be sure the rod does not scrape or nick the cylinder bore or the crankshaft surfaces.
5. Using both hands, slowly guide the piston and connecting rod assembly into the cylinder from the top and bottom of the cylinder. DO NOT allow the connecting rod to contact the cylinder wall.
6. When the piston ring compressor contacts the deck surface, gently tap the piston into the cylinder using the handle end of a dead-blow hammer. Guide the connecting rod onto the crankshaft bearing journal while tapping the piston into the cylinder.
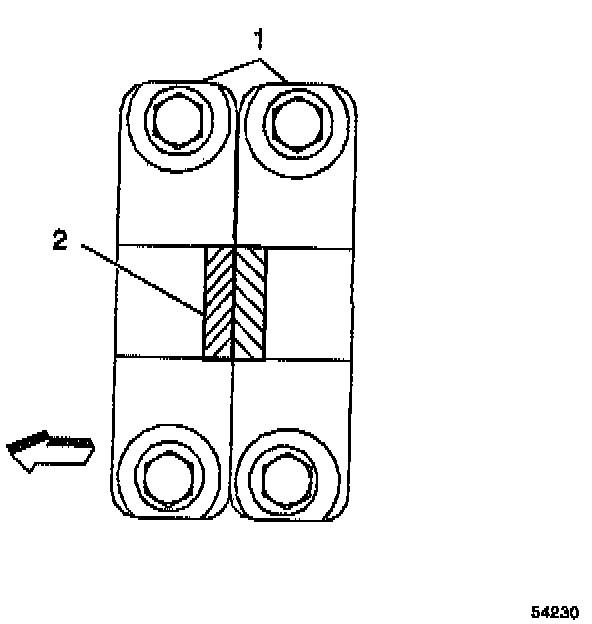
7. Install the connecting rod end cap making sure the bearing lock tangs are aligned on the same side of the rod. When properly installed, the connecting rod bearing cap notches(2) should point towards each other.
8 .Lubricate the connecting rod cap bolts with engine oil and install in the connecting rod. Tighten the connecting rod bolts to 25 Nm + 110 degrees (18 ft. lbs. + 110 degrees).
9. Repeat these procedures for the remaining piston/connecting rod assemblies using the Crankshaft Rotation Socket in order to rotate the crankshaft.