Service Procedure
CAUTION: Before disconnecting any hydraulic lines, hoses or fittings, be sure that the accumulator is fully depressurized. Failure to depressurize the hydraulic accumulator may result in personal injury or damage to painted surfaces.The following steps are to be used to replace the left front brake pipe assembly. Vehicle should be located over a hoist:
Figure 1:
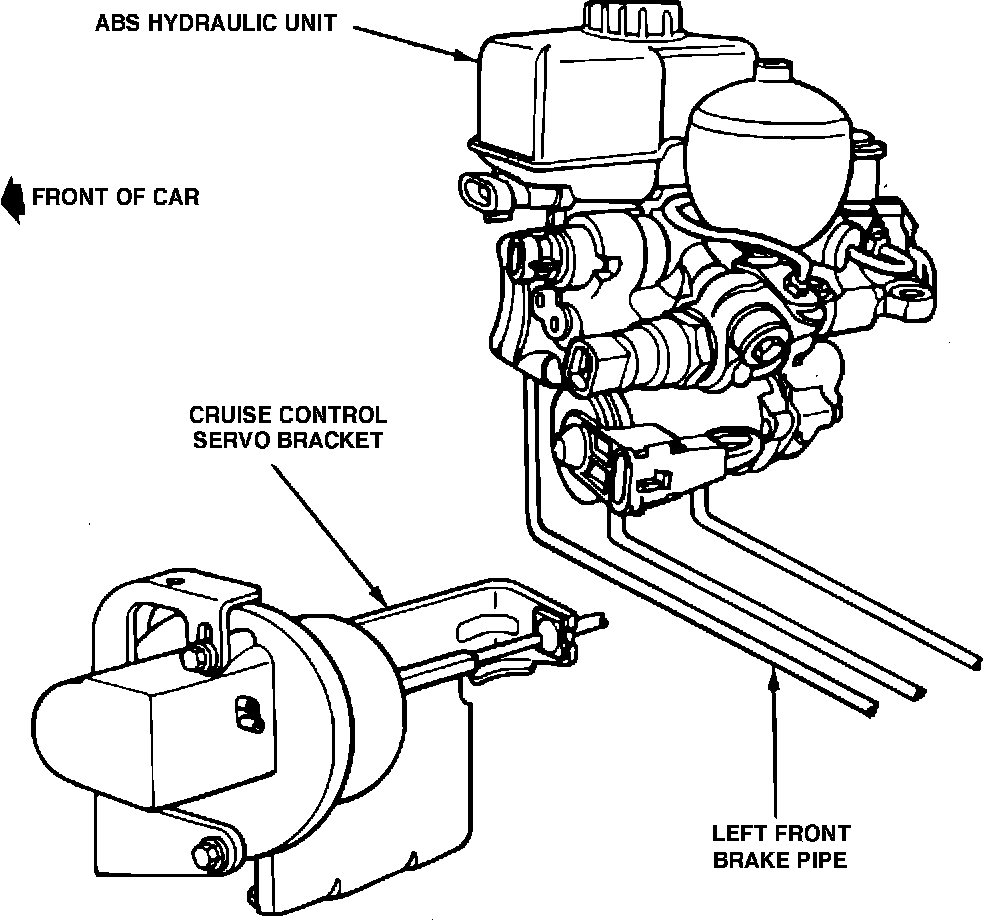
1. With the ignition off, depressurize the hydraulic accumulator by pumping the brake pedal a minimum of 25 times using a pedal force of approximately 222 N (50 lbs.). When a definite increase in pedal effort is felt, stroke the pedal a few additional times. This should remove all hydraulic pressure from the system.
2. Raise hood and Install left fender cover.
NOTICE: Brake fluid will damage painted surfaces. Shop cloths and clean containers should be used to prevent spillage of brake fluid.
3. To provide access to the brake pipe, remove all electrical connections to the hydraulic brake unit.
4. Loosen the left front brake fitting at the hydraulic unit. The left front brake pipe assembly is the forward most pipe on the bottom of the brake hydraulic unit (See Figure 1).
Figure 2:
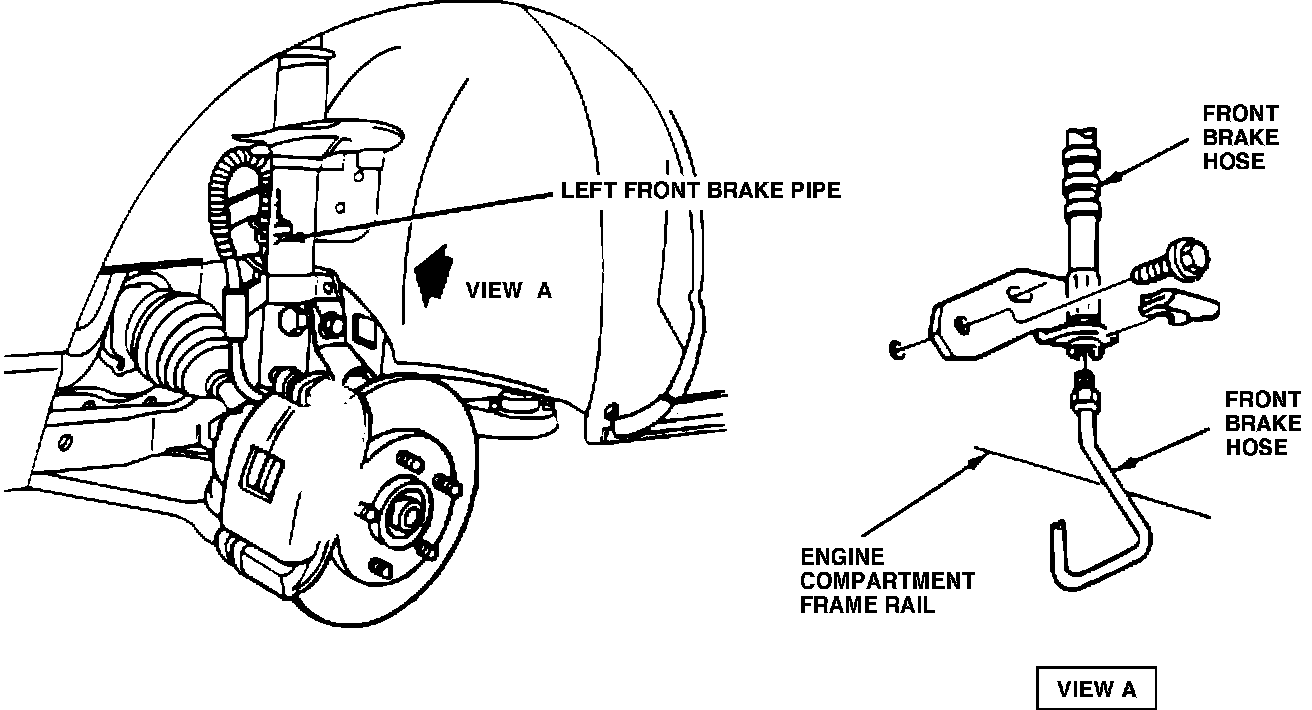
5. Remove the left front tire and wheel assembly (and wheel cover, if so equipped). To provide adequate clearance, turn the front wheel to the left.
6. Loosen the left front brake fine fitting at the hose and (See Figure 2).
Figure 3:
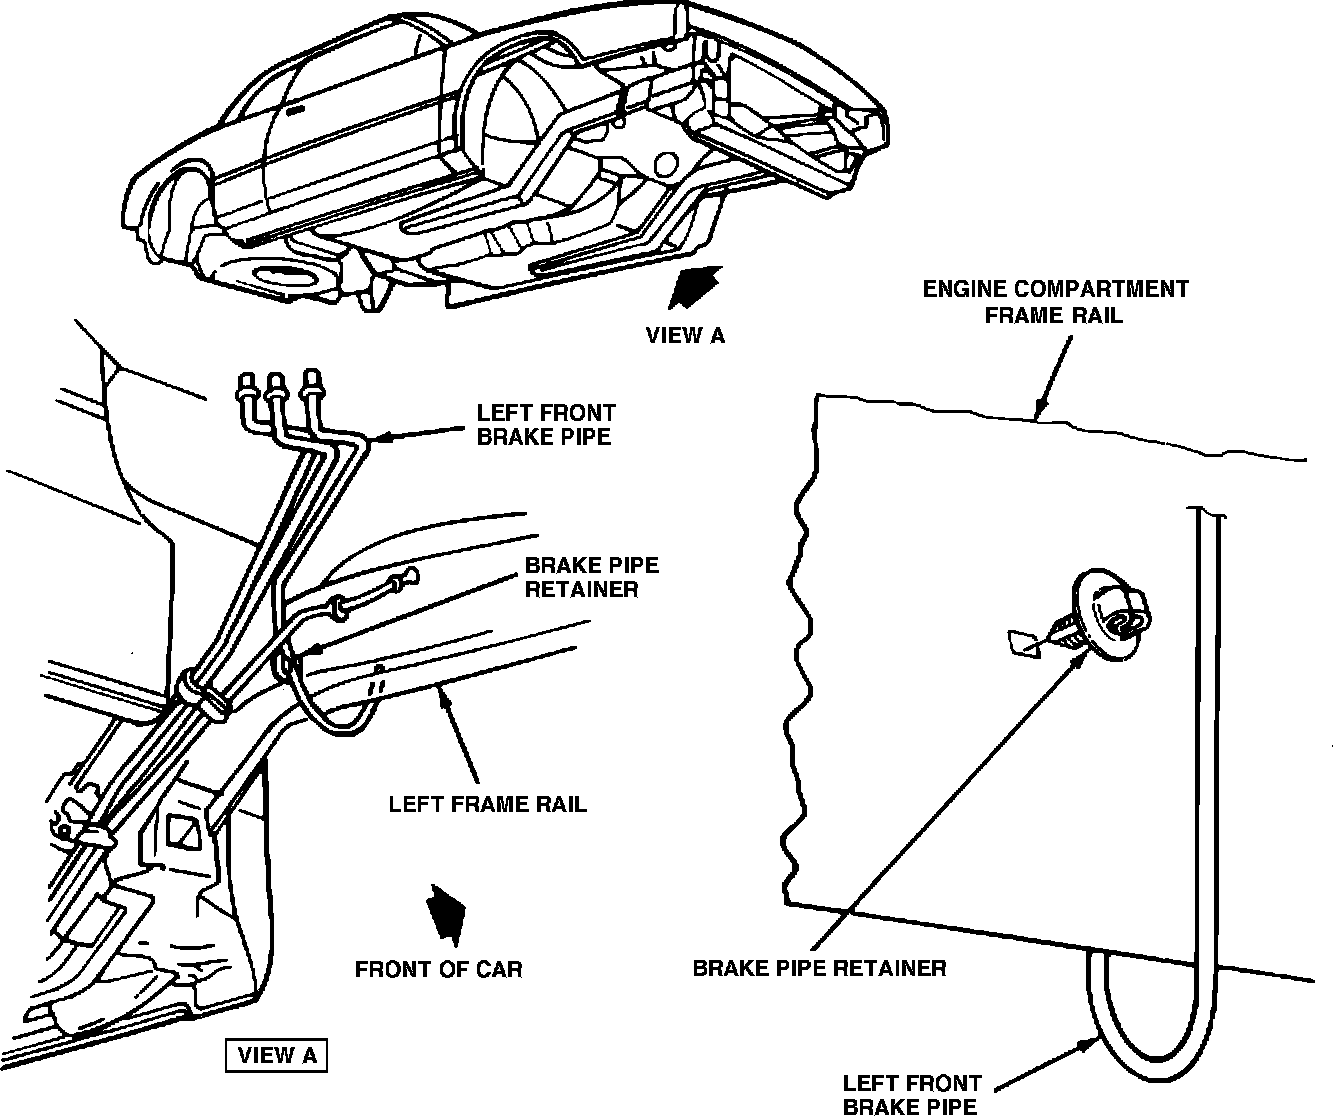
7. Remove the left front brake pipe assembly. The brake pipe is attached to a clip which is held in place at the engine compartment frame rail (See Figure 3). Remove the clip with the brake line assembly and attach fit to the replacement brake pipe assembly (part number 3521577).
8. Route the new brake pipe assembly into position and finger tighten the fitting at the brake hydraulic unit. Verify that the left front brake pipe assembly is properly positioned before tightening.
9. Tighten the brake fitting at the left front wheel to 15 N-m (11 lbs.ft.)
10. Tighten the line at the hydraulic unit to 12 N-m (106 lbs.in.).
11. Secure the left front brake pipe clip into the inner fender in the engine compartment.
12. Verify that the brake lines do not contact the cruise control servo bracket or cruise cable. Verify that all brake pipes do not contact each other in the area of the brake hydraulic unit and cruise control servo bracket. Bend brake pipes away (rearward) from the left front pipe to maintain a minimum of 15 mm (.6 inch) clearance, if required.
13. Replace all electrical connections.
14. Bleed left front brake circuit. Follow proper bleeding procedure in Section 5E of the 1989 Oldsmobile Toronado Service Manual. Add brake fluid to the Hydraulic Unit reservoir as required (to the mark only).
NOTICE: Use only Delco Supreme No. 11 Hydraulic Brake Fluid or equivalent ("DOT 3") from a clean, sealed container. Do not use any fluid from a container which is wet with water. Use of DOT 5 silicone fluid is NOT recommended; internal damage to the pump components may result.
15. Turn ignition on, check for leaks and proper brake pedal "feel" and effort.
16. Replace left front tire and wheel assembly (and wheel cover, if so equipped).
17. Verify that the Hydraulic Unit reservoir is filled to the correct level (fill to the mark only; do not overfill or underfill).
18. Install Campaign Identification Label, remove fender cover, and close hood.
19. Verify that brake system is operating properly.