Compressor HVAC: Service and Repair
Removal and Installation of CompressorREMOVAL
1. Use the recovery/recycling equipment to evacuate the refrigerant.
2. Remove the two engine undercovers, using power tools.
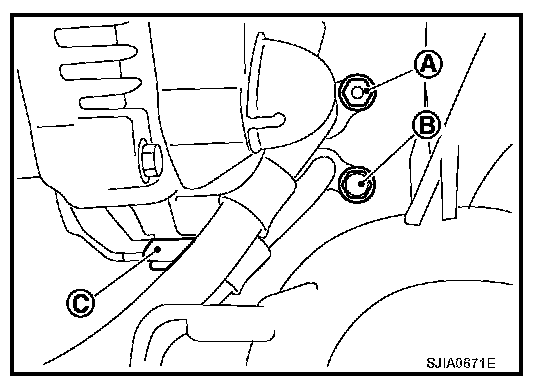
3. Remove low-pressure flexible hose nut (A) and high-pressure flexible hose bolt (B) from compressor.
CAUTION: Cap or wrap the joint of the pipe with suitable material such as vinyl tape to avoid the entry of air.
NOTE: Type 1 shown, type 2 is similar.
4. Remove A/C compressor belt. Refer to "DRIVE BELTS".
5. Disconnect compressor connector (C).
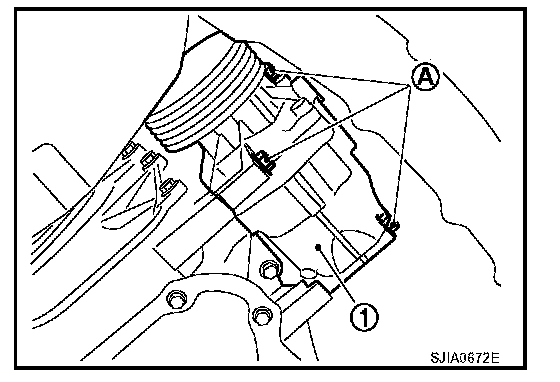
6. Remove bolts (A) from compressor (1), using power tools.
7. Remove compressor (1) downward from the engine compartment.
INSPECTION FOR CLUTCH DISC TO PULLEY CLEARANCE
1. Check the clearance around the entire periphery of the clutch disc.
Clutch disc to pulley clearance: 0.3 - 0.6 mm (0.012 - 0.024 in)
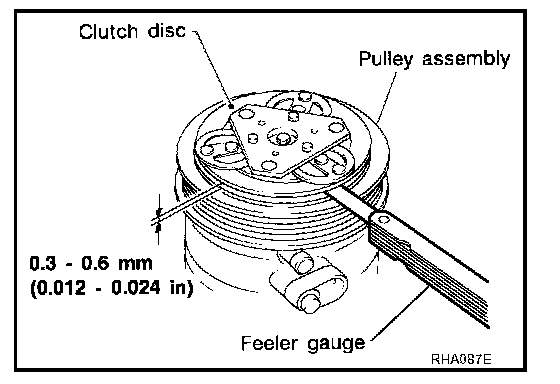
- Measure the clearance for the type 1 compressor as shown.
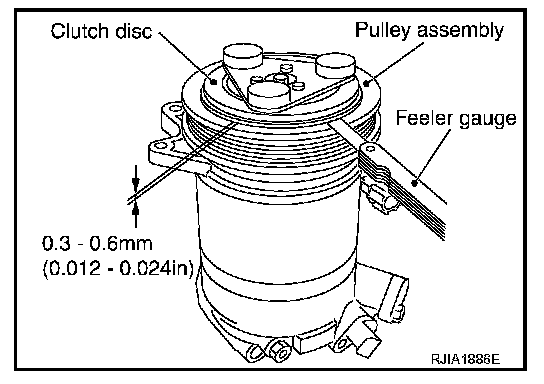
- Measure the clearance for the type 2 compressor as shown.
2. If specified clearance is not obtained, replace compressor.
INSTALLATION
Installation is in the reverse order of removal.
CAUTION:
- Replace O-rings of low-pressure flexible hose and high-pressure flexible hose with a new ones, and apply compressor oil when installing.
- When recharging refrigerant, check for leaks.
Compressor bolts: 25 N.m (2.6 kg-m, 18 ft-lb)