Main Bearing Cap
Main Bearing Cap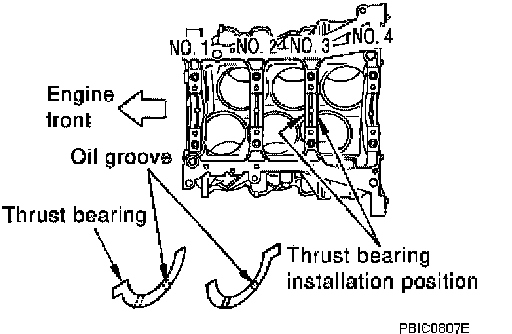
Install the main bearings and the thrust bearings.
Remove dust, dirt, and oil on the bearing mating surfaces of the cylinder block and the main bearing cap.
Install the thrust bearings to both sides of the No. 3 journal housing on the cylinder block and the main bearing cap.
Install the thrust bearings with the oil groove facing the crankshaft arm (outside).
Install bearing with a projection on one end on cylinder block and bearing with a projection at center on cap. Align each projection with mating notch.
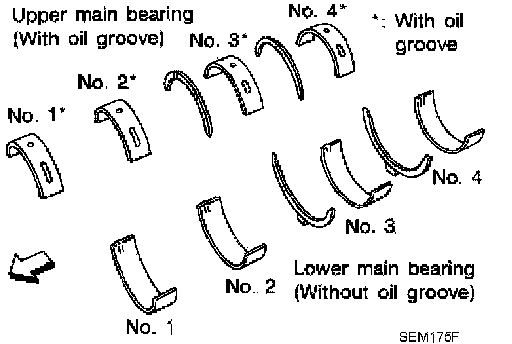
Set the upper main bearings in their proper positions on the cylinder block.
Confirm the correct main bearings are used.
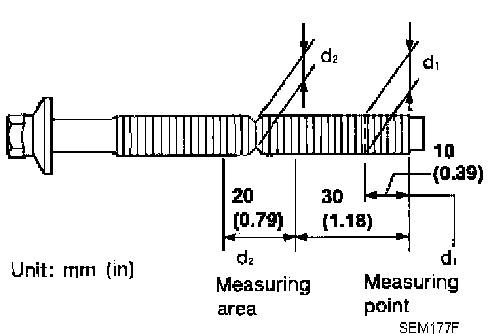
Instructions for the re-use of the main bearing cap bolts.
A plastic zone tightening method is used for tightening the main bearing cap bolts. Measure d1 and d2 as shown.
For d2, select the minimum diameter in the measuring area.
If the difference between d1 and d2 exceeds the limit, replace the bolts for assembly.
Limit (d1 - d2) 0.11 mm (0.0043 inch)
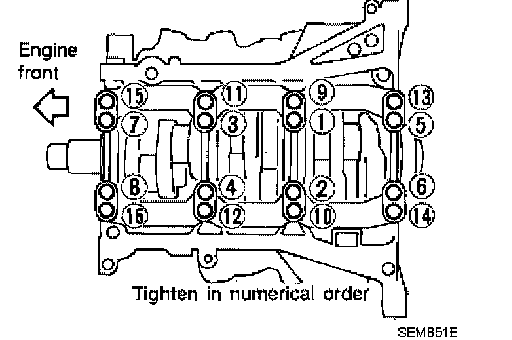
After installing the crankshaft, lower main bearings, main bearing caps, main bearing beam, and bearing cap bolts. Tighten the bearing cap bolts in the numerical order as shown.
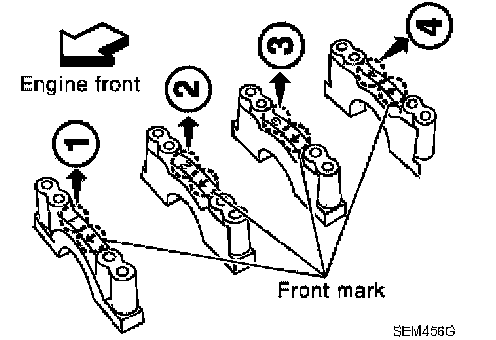
Make sure that the front marks on the main bearing beam faces the front of the engine.
Prior to tightening all the bearing cap bolts, place the bearing beam in its proper position by shifting the crankshaft in the axial position.
After tightening the bearing cap bolts, make sure the crankshaft turns smoothly.
Lubricate the threads and seat surfaces of the bolts with new engine oil.
Tighten the bolts in two stages:
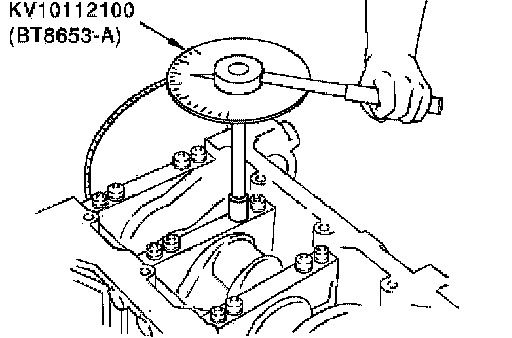
CAUTION: Measure the tighten angle in stage 2 with an angle wrench. Do not measure visually.
Stage 1 32 - 38 Nm (3.3 - 3.9 kg-m, 24 - 28 ft. lbs.)
Stage 2 90° - 95° degrees clockwise
Tool number KV10112100 (BT-8653-A)