Control Module HVAC: Service and Repair
CONTROL UNIT
Removal and Installation
FRONT AIR CONTROL (MANUAL A/C)
Removal
1.Remove the AT finisher. A/T Finisher
2.Remove the cup holder.
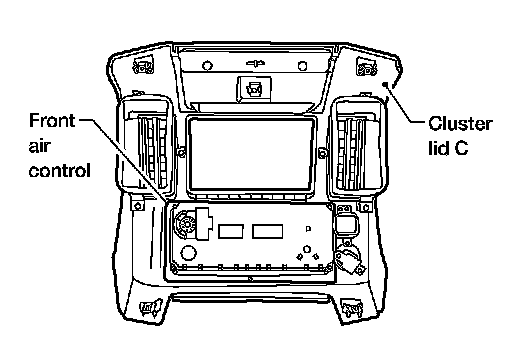
3.Remove cluster lid C. Cluster Lid C.
4.Remove the four screws securing the front air control to cluster lid C.
5.Remove the front air control.
Installation
Installation is in the reverse order of removal.
A/C AND AV SWITCH ASSEMBLY (AUTOMATIC A/C)
Removal and Installation
The front A/C switch is integrated into the A/C and AV switch assembly in cluster lid C in the instrument panel.
Audio Unit (BASE AUDIO), Without Navigation (BOSE AUDIO
WITHOUT NAVIGATION) or With Navigation (BOSE AUDIO WITH NAVIGATION).
A/C AUTO AMP. (AUTOMATIC A/C)
Removal
Remove the display unit. Mid Audio (MID AUDIO), "Removal and Installation" (BOSE AUDIO WITHOUT NAVIGATION) or With Navigation (BOSE AUDIO
WITH NAVIGATION).
Installation
Installation is in the reverse order of removal.
REAR AIR CONTROL (FRONT)
Removal
1.Remove the front roof console finisher from the front roof console. Service and Repair.
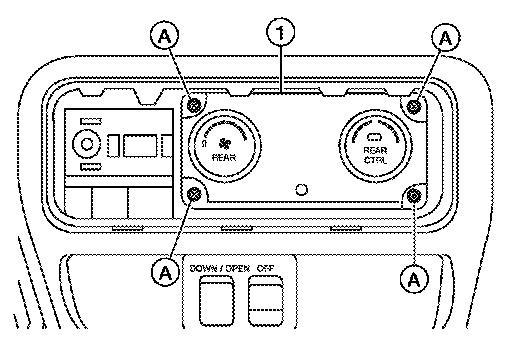
2.Remove the 4 rear air control (front) screws (A), disconnect the rear air control (front) connector and remove the rear air control (front) (1) from the front roof console.
Installation
Installation is in the reverse order of removal.
REAR AIR CONTROL (REAR)
Removal
1.Remove the rear finisher assembly from the center console. Center Console Assembly.
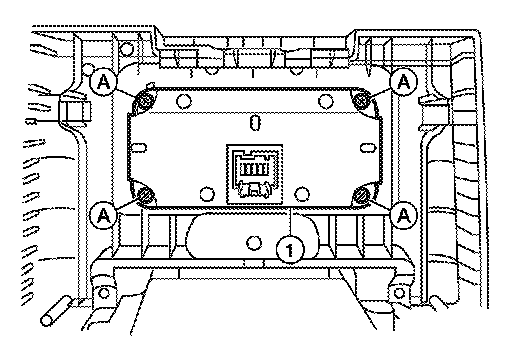
2.Remove the four rear air control (rear) screws (A) and the rear air control (rear) (1) from the rear finisher assembly.
Installation
Installation is in the reverse order of removal.