Disassembly
Precaution1. Clean the transaxle exterior thoroughly with a steam cleaner or cleaning solvent before disassembly.
WARNING Using compressed air can cause dirt and other particles to fly out, causing injury to the eyes. Wear protective eye wear whenever using compressed air.
2. Clean the removed parts (except sealed bearings) and all sealing surfaces with cleaning solvent, and dry with compressed air.
3. Clean out all holes and passages with compressed air, and check that there are no obstructions.
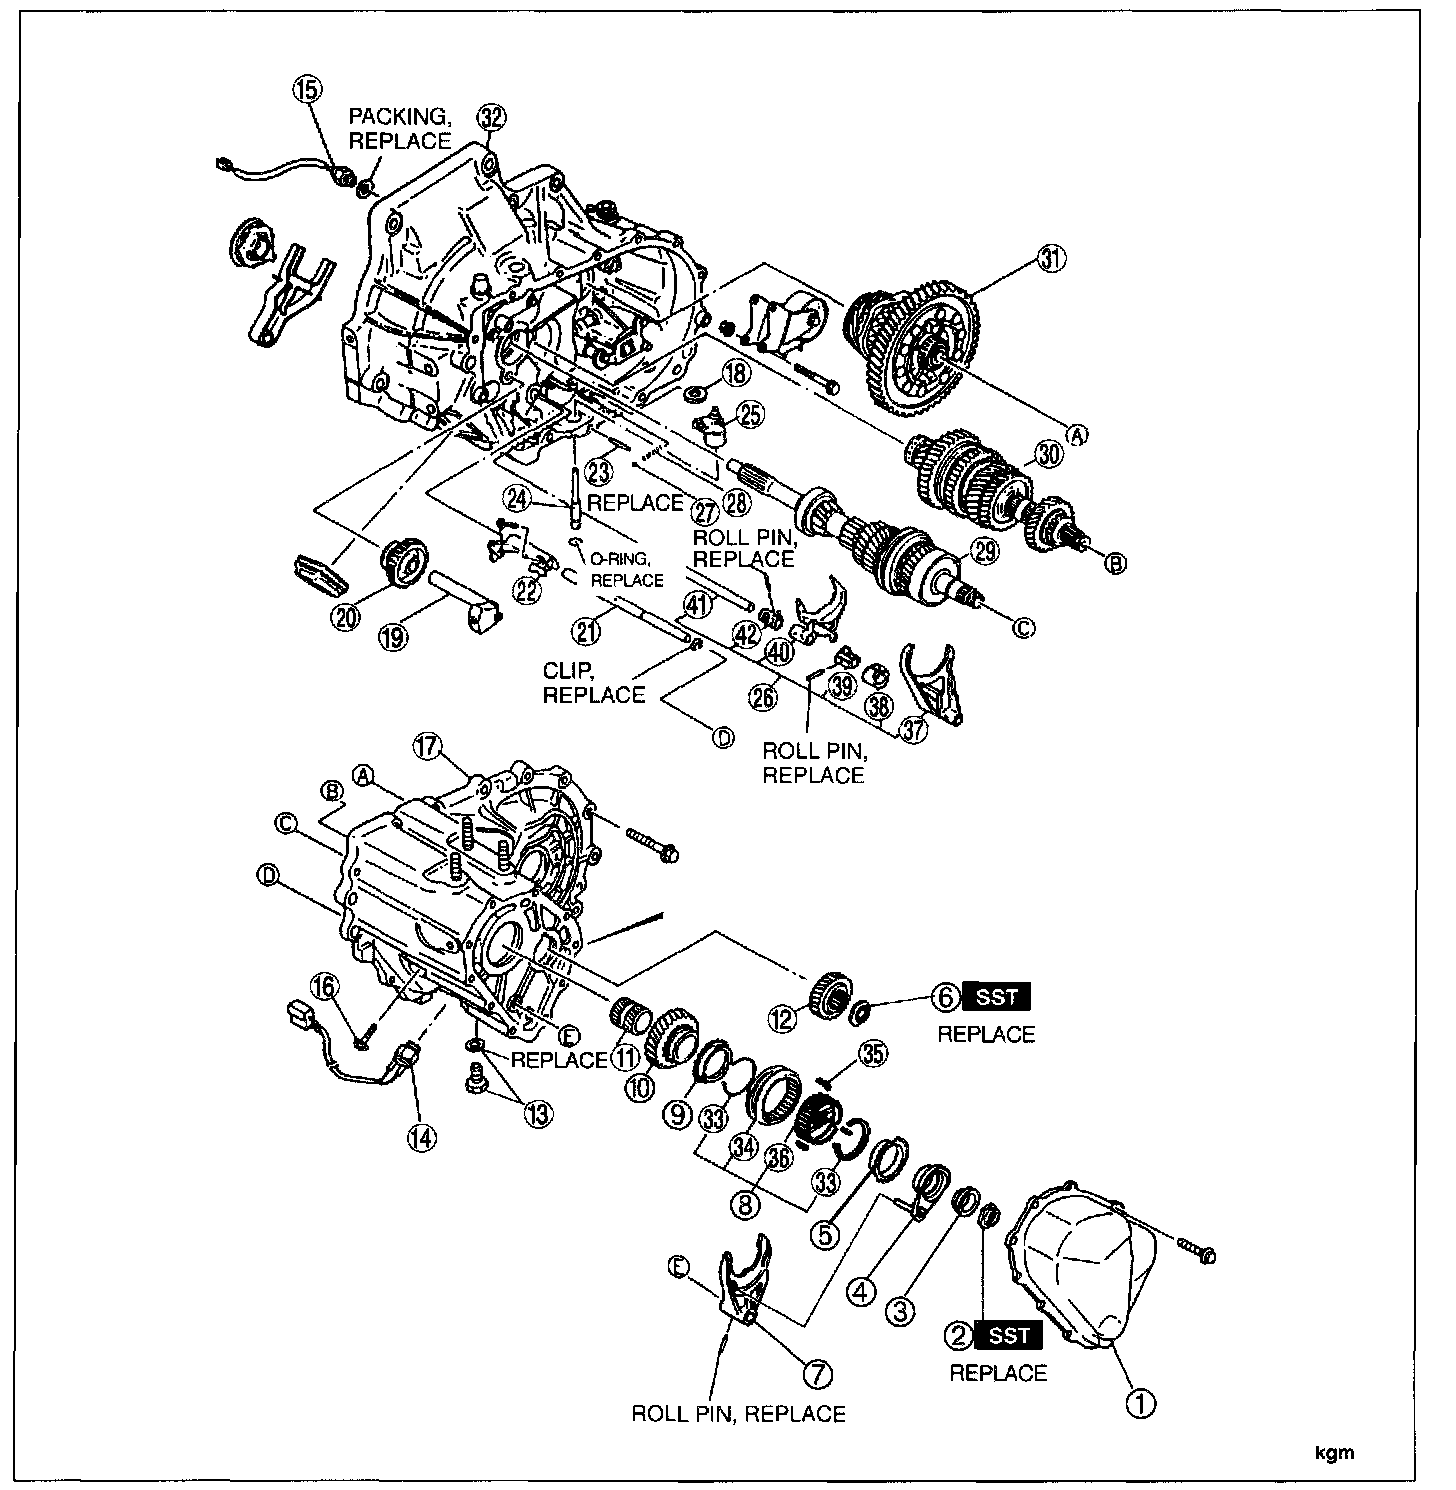
5th/Reverse Gear and Housing Parts
1. Measure the 5th gear thrust clearance, referring to Preinspection.
2. Disassemble in the order shown in the image, referring to Disassembly Note.
1. Rear cover
2. Locknut (primary shaft)
3. Reverse synchronizer gear sleeve
4. Primary reverse synchronizer cone assembly
5. Reverse synchronizer ring
6. Locknut (secondary shaft)
7. 5th/reverse shift fork
8. 5th/reverse clutch hub assembly
9. 5th synchronizer ring
10. 5th gear
11. Gear sleeve
12. Secondary 5th gear
13. Guide bolt and washer
14. Back-up light switch
15. Neutral switch
16. Lock bolt
17. Transaxle case assembly
18. Magnet
19. Reverse idler shaft
20. Reverse idler gear
21. 5th/reverse shift rod
22. 5th/reverse shift rod end
23. Pin
24. Crank lever shaft
25. Crank lever assembly
26. Shift fork and control rod assembly
27. Steel ball
28. Spring
29. Primary shaft gear assembly
30. Secondary shaft gear assembly
31. Differential assembly
32. Clutch housing
33. Synchronizer key springs
34. Clutch hub sleeve
35. Synchronizer key
36. Clutch hub
37. 3rd/4th shift fork
38. Interlock sleeve
39. Control lever
40. 1st/2nd shift fork
41. Control rod
42. Control end
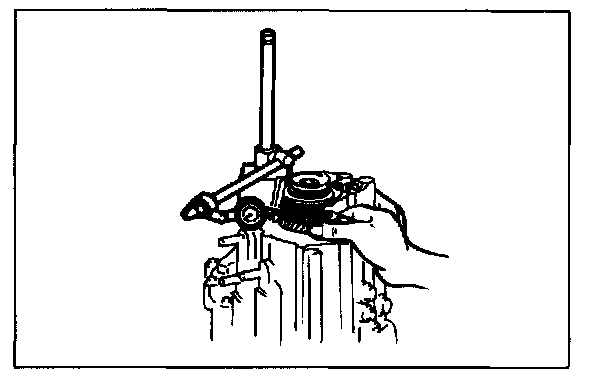
Preinspection
5th gear thrust clearance
1. Measure the 5th gear thrust clearance by using a dial indicator.
Clearance: 0.08-0.15 mm (0.003-0.006 in)
Maximum: 0.20 mm (0.008 in)
2. If the clearance exceeds the maximum, check the contact surfaces of the 5th gear and the clutch hub. Replace worn or damaged parts.
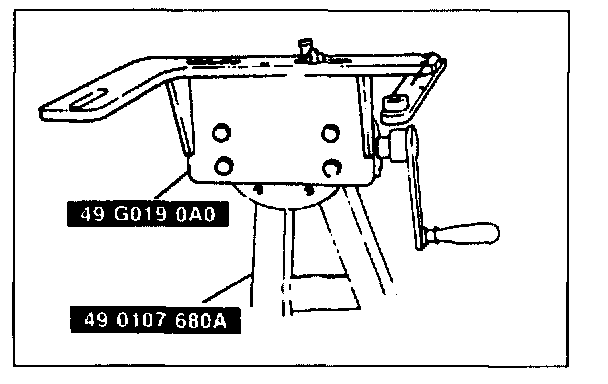
Disassembly note
Locknut
1. Mount the transaxle on the SSTs.
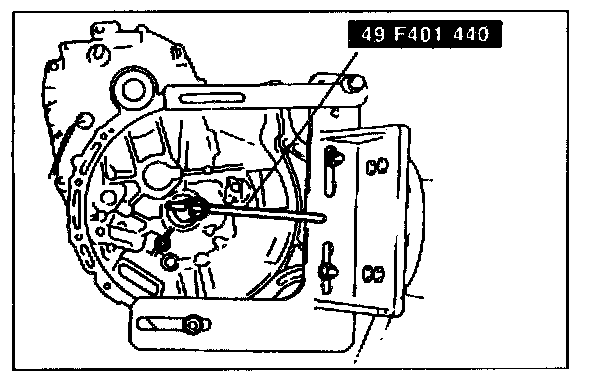
2. Lock the primary shaft by using the SST.
3. Shift to 1st gear to lock the rotation of the primary shaft.
4. Uncrimp the tabs of the locknuts.
5. Remove the locknuts from the primary and secondary shafts.
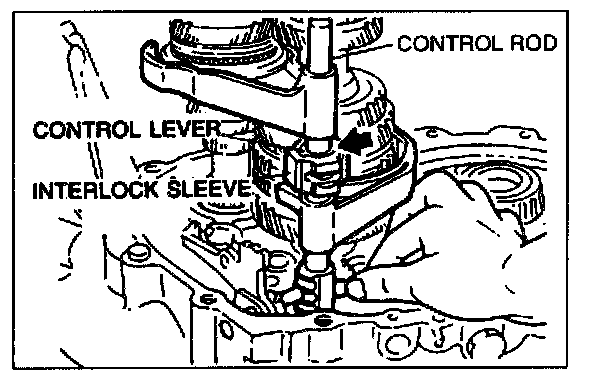
Shift fork and control rod assembly
1. Align the ends of the interlock sleeve and of the control lever (arrow). Turn the control rod counterclockwise.
2. While holding the 1st/2nd shift fork with one hand and the 3rd/4th shift fork with the other, raise them both at the same time and shift each of the clutch hub sleeves.
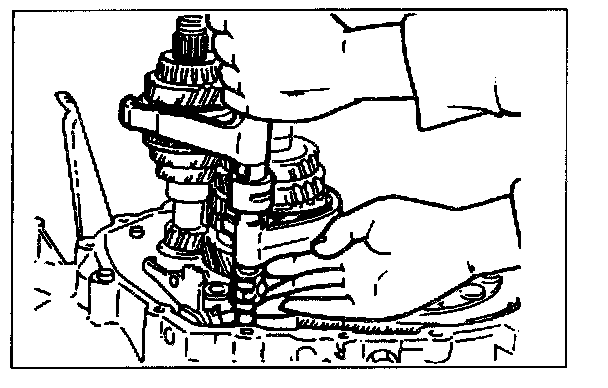
3. Lift the control end and remove the steel ball, and, at the same time, remove the control rod from the clutch housing.
4. Separate the control rod and shift fork assembly from each of the clutch hub sleeves.
Clutch Housing and Transaxle Case Components
NOTE: The oil seals do not need to be removed unless you are replacing them.
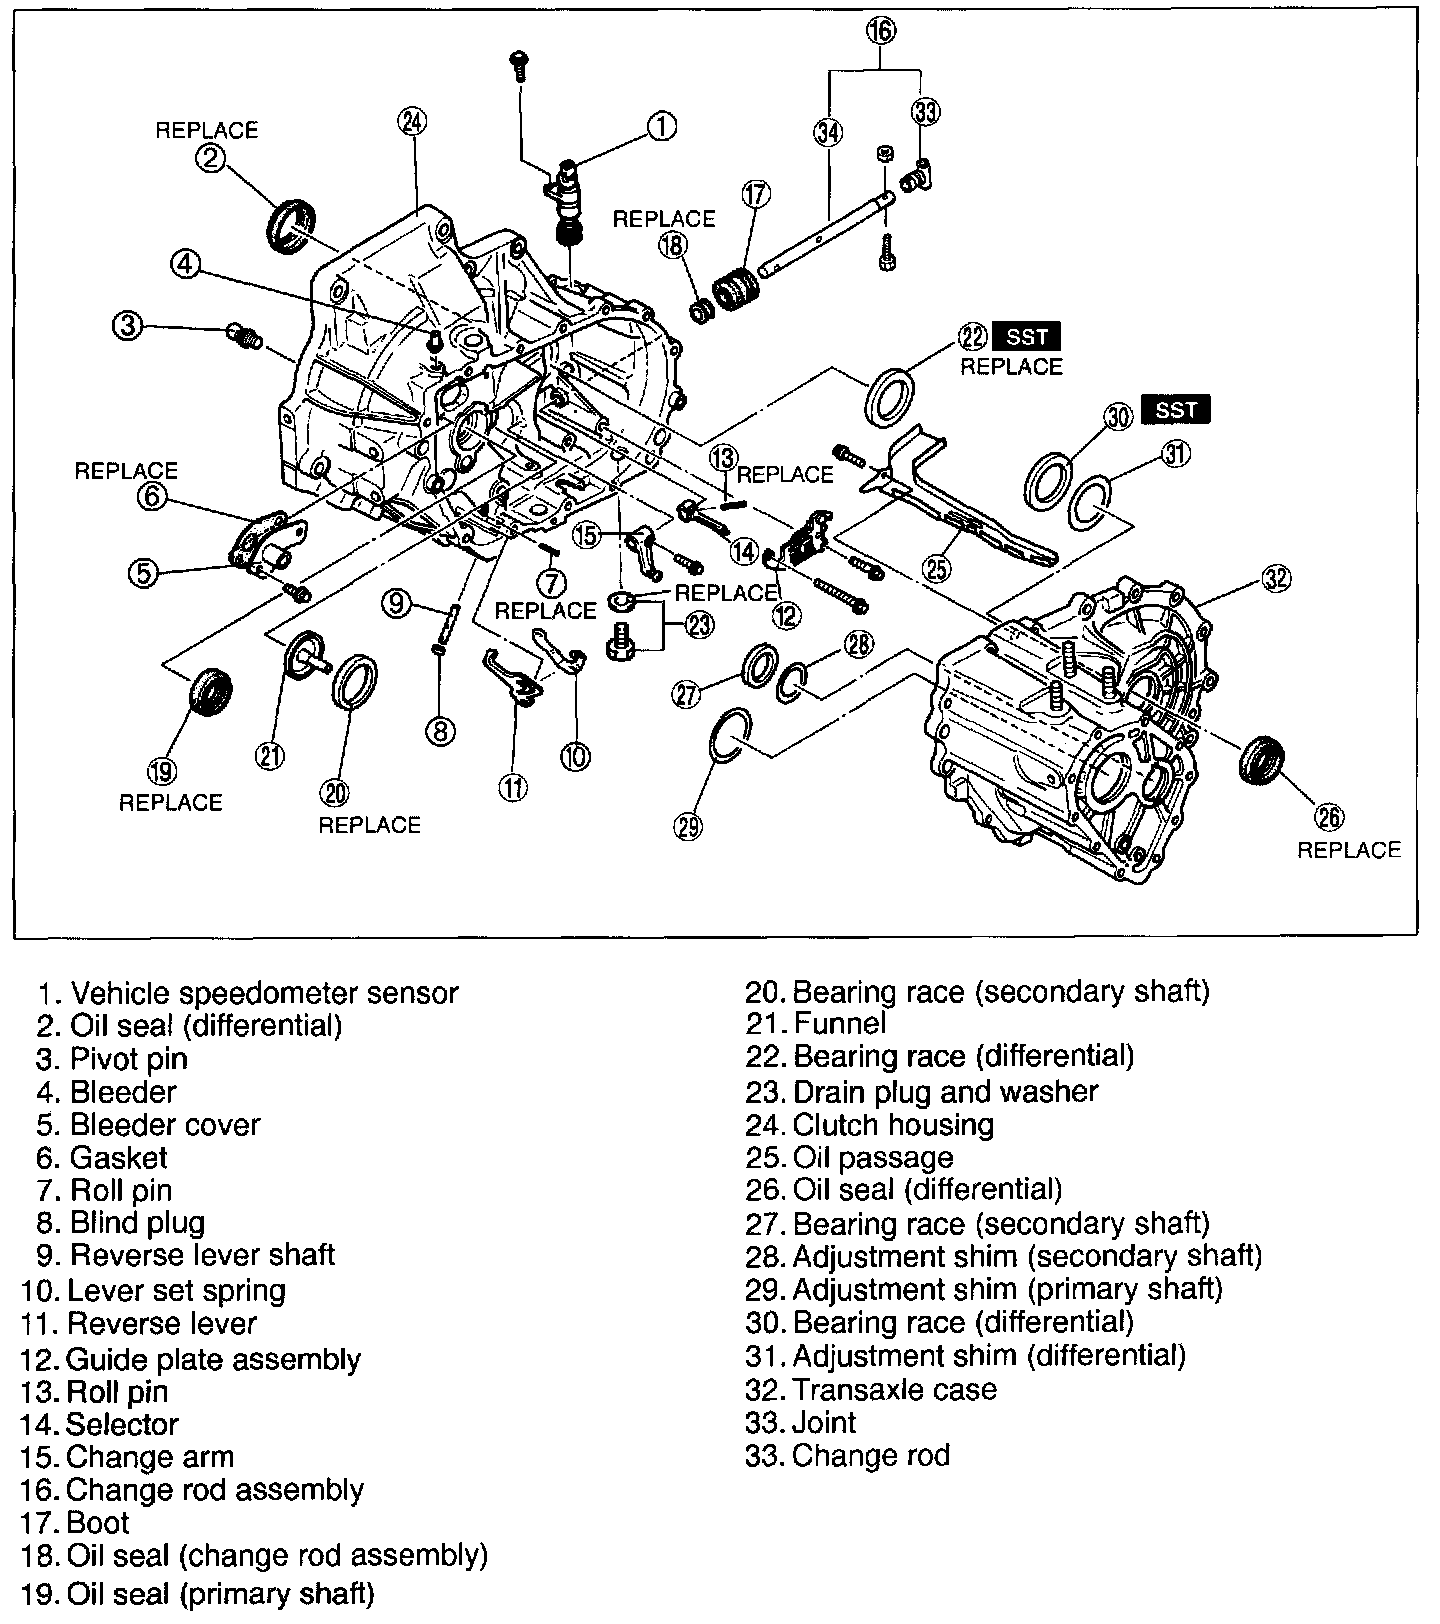
Disassemble in the order shown in the image, referring to Disassembly Note.
Disassembly note
Oil seal (differential)
Remove the oil seal.
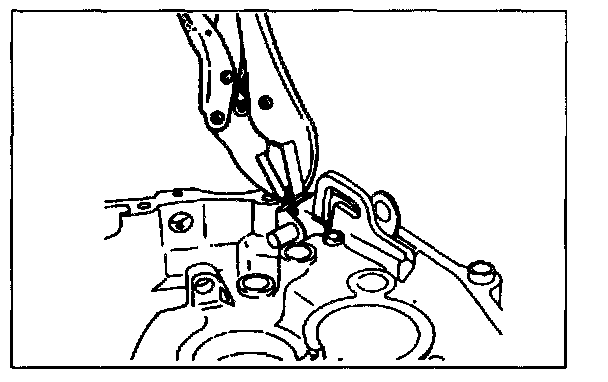
Reverse lever shaft
1. Remove the roll pin with pliers.
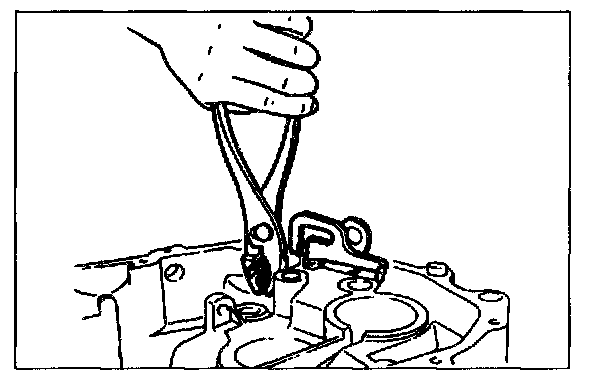
2. Protect the reverse lever shaft with a rag and remove the shaft.
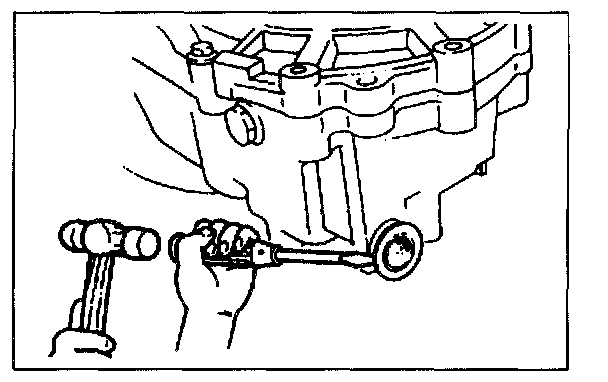
Oil seal (change rod assembly)
Remove the oil seal.
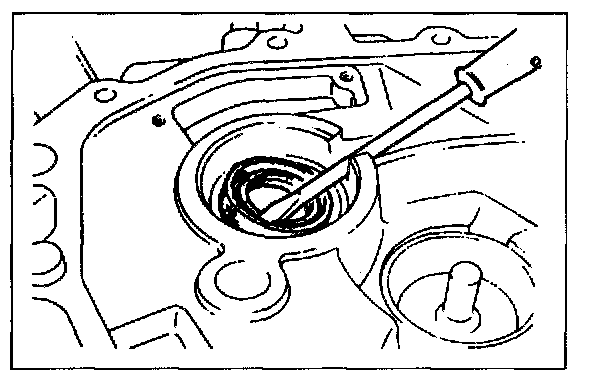
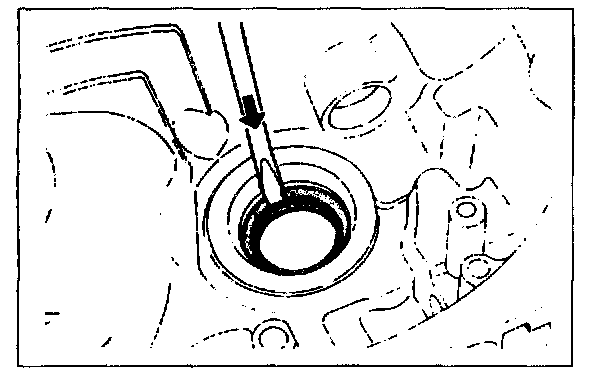
Oil seal (primary shaft)
CAUTION: The clutch housing is made of aluminum, and is therefore easily dented and scratched by metal tools. When removing the oil seal, keep contact with the clutch housing to a minimum.
Remove the oil seal from the clutch housing as shown in the image.
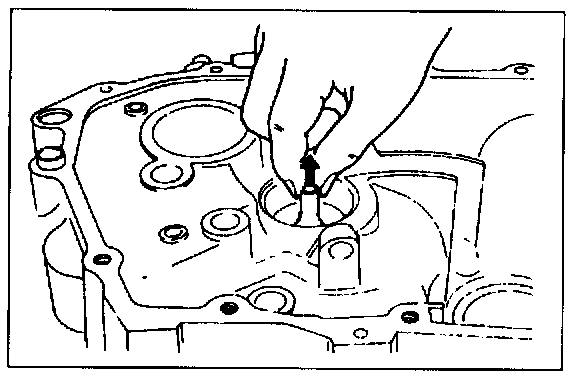
Bearing race (secondary shaft)
Remove the bearing race by lifting it and the funnel out together.
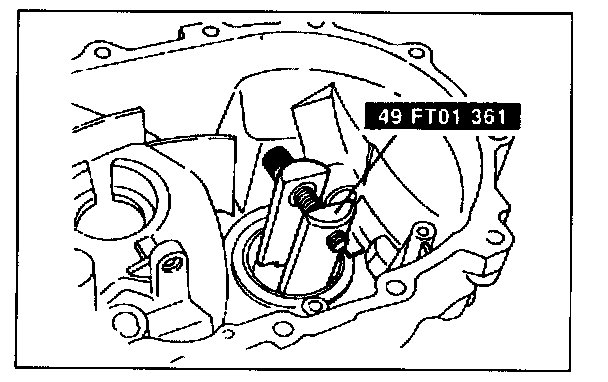
Bearing race (differential)
1. Install the SST to the bearing race.
2. Remove the bearing race by using a press.
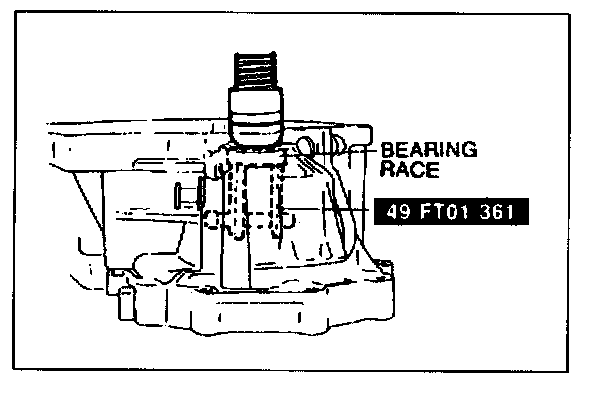
Bearing race and adjustment shim (differential)
1. Install the SST to the bearing race.
2. Press out the bearing race and remove the adjustment shim.
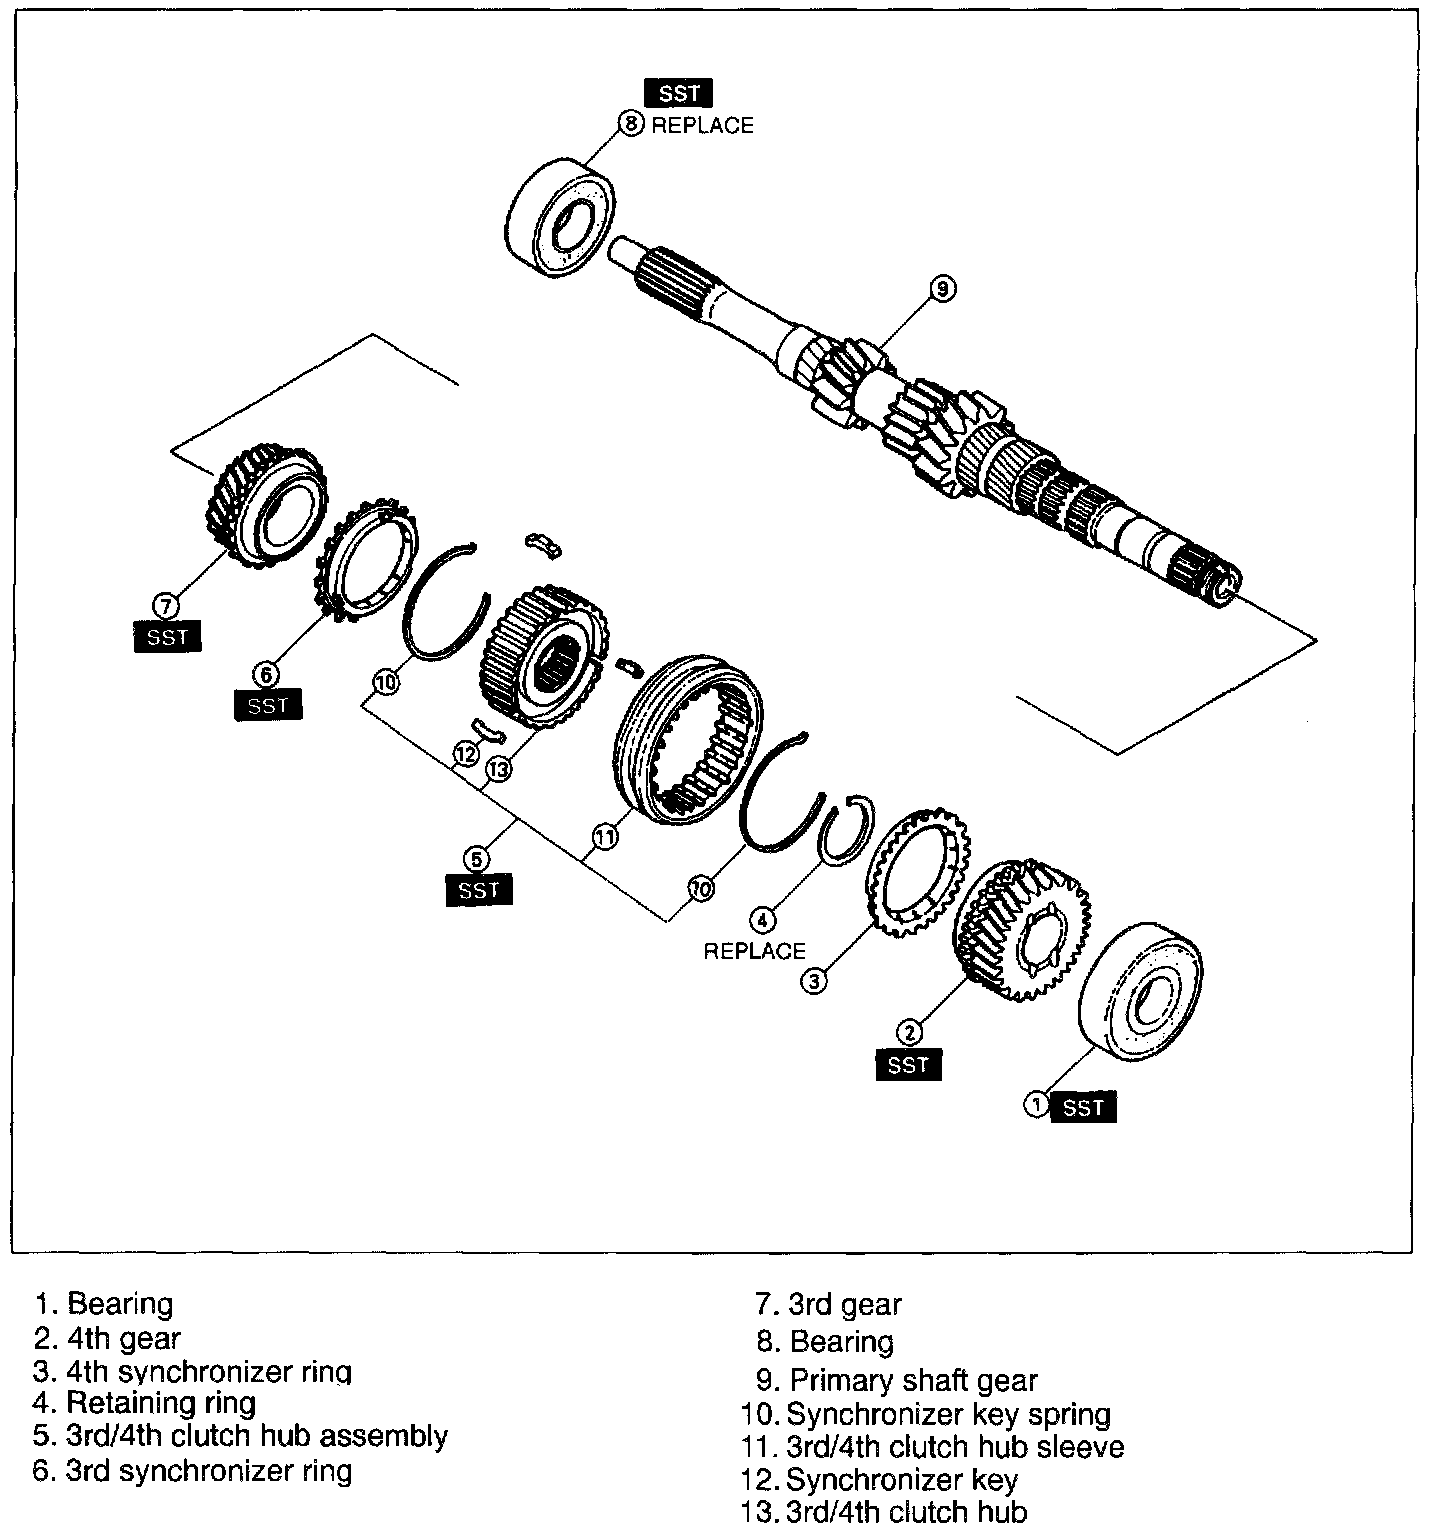
Primary Shaft Assembly
1. Measure the thrust clearance of all gears before disassembly, referring to Preinspection.
2. Disassemble in the order shown in the image, referring to Disassembly Note.
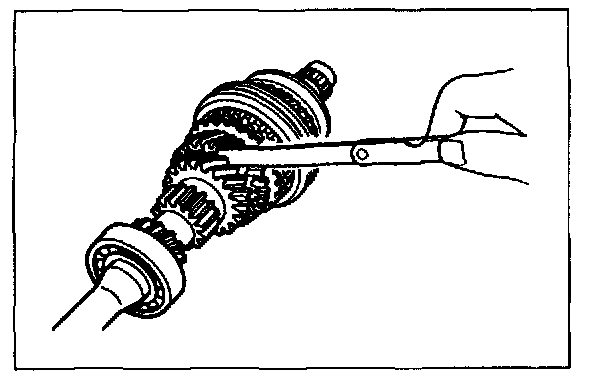
Preinspection
3rd gear thrust clearance
1. Measure the clearance between 3rd gear and 2nd gear.
Clearance: 0.06-0.21 mm (0.002-0.008 in)
Maximum: 0.26 mm (0.010 in)
2. If the clearance exceeds the maximum, check the contact surfaces of the 3rd gear, 2nd gear and clutch hub. Replace worn and damaged parts.
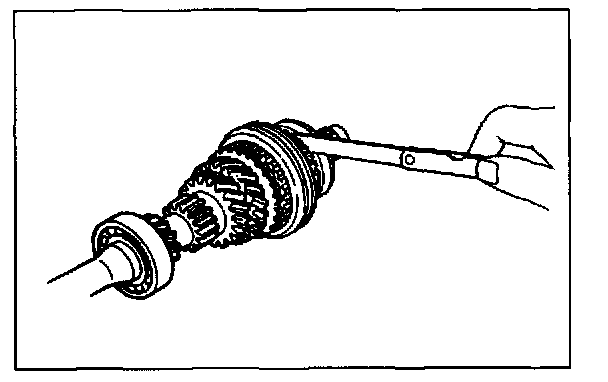
4th gear thrust clearance
1. Measure the clearance between 4th gear and the ball bearing.
Clearance: 0.14-0.39 mm (0.005-0.015 in)
Maximum: 0.44 mm (0.017 in)
2. If the clearance exceeds the maximum, check the contact surfaces of the 4th gear, ball bearing, and clutch hub. Replace worn and damaged parts.
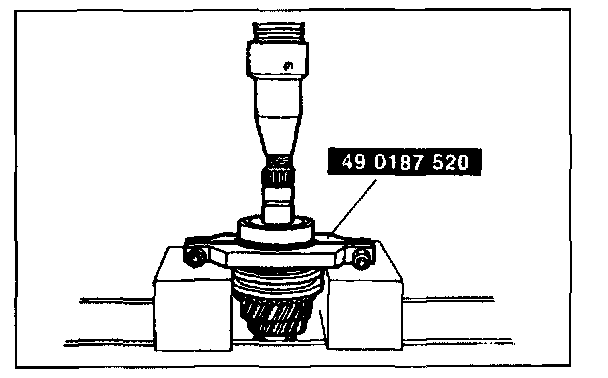
Disassembly note
Bearing and 4th gear
1. Support the primary shaft to keep it from falling.
2. Remove the ball bearing and 4th gear by using the SST.
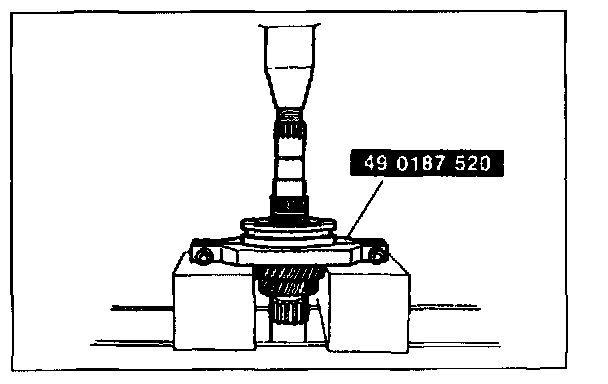
3rd/4th clutch hub assembly, 3rd synchronizer ring and 3rd gear
1. Remove the retaining ring.
2. Remove the 3rd/4th clutch hub assembly, 3rd synchronizer ring, and 3rd gear by using the SST.
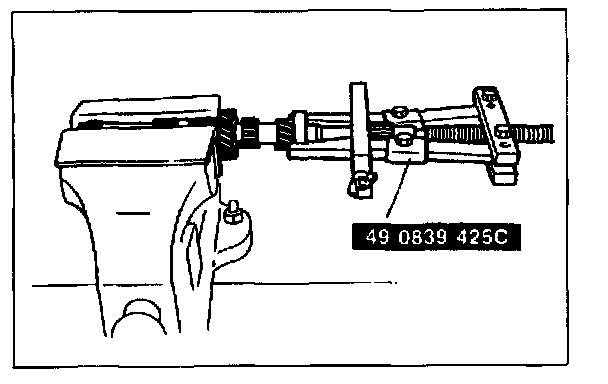
Bearing
Remove the bearing by using the SST.
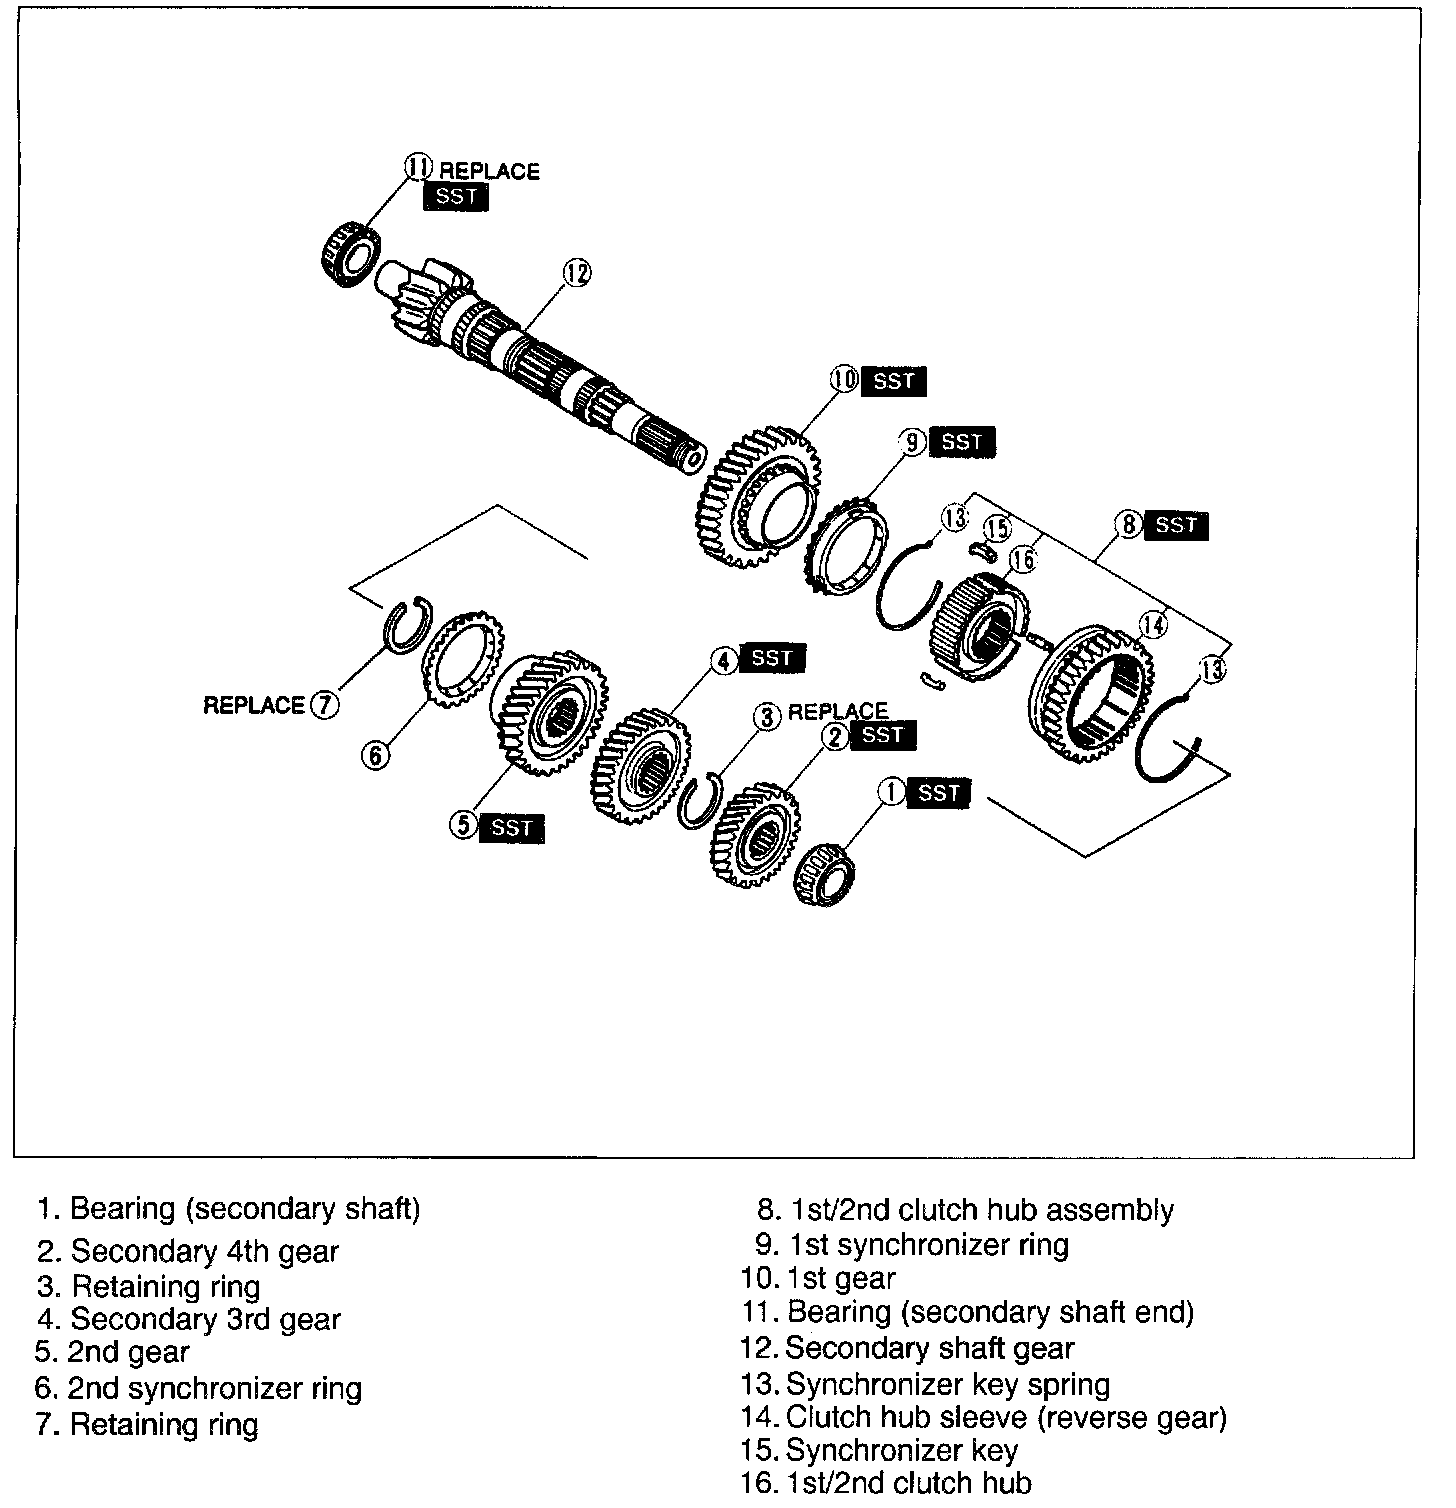
Secondary Shaft Assembly
1. Measure the thrust clearance of 1st gear and 2nd gear before disassembly, referring to Preinspection.
2. Disassemble in the order shown in the image, referring to Disassembly Note.
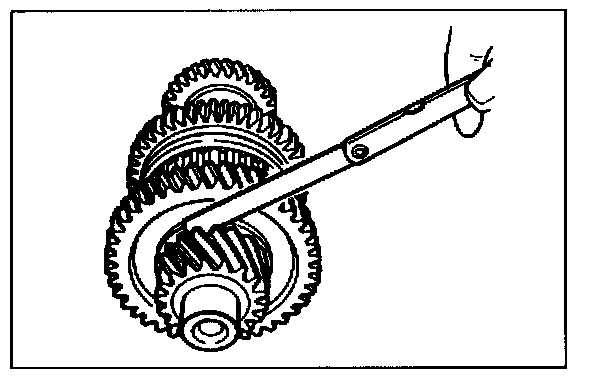
Preinspection
1st gear thrust clearance
1. Measure the clearance between 1st gear and the differential drive gear.
Clearance: 0.05-0.28 mm (0.002-0.011 in)
Maximum: 0.33 mm (0.013 in)
2. If the clearance exceeds the maximum, check the contact surfaces of the 1st gear, differential drive gear of the secondary shaft gear, and 1st/2nd clutch hub assembly. Replace worn and damaged parts.
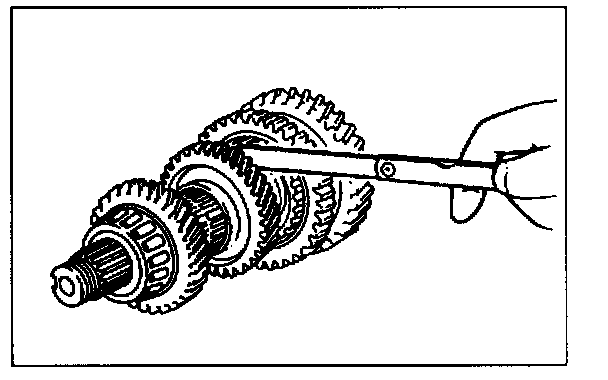
2nd gear thrust clearance
1. Measure the clearance between 2nd gear and secondary 3rd gear.
Clearance: 0.18-0.51 mm (0.007-0.020 in)
Maximum: 0.56 mm (0.022 in)
2. If the clearance exceeds the maximum, check the contact surfaces of the 2nd gear, secondary 3rd gear, and 1st/2nd clutch hub assembly. Replace worn and damaged parts.
Disassembly note
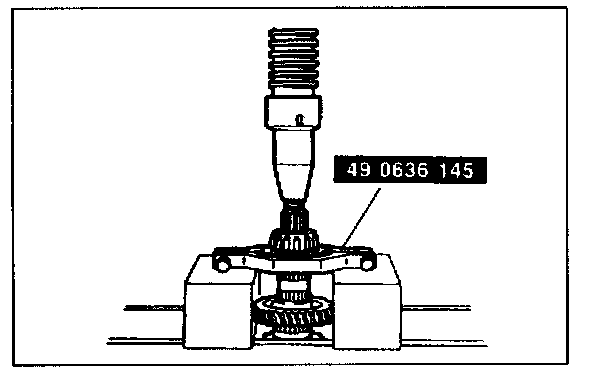
Bearing (secondary shaft) and secondary 4th gear
Remove the bearing and secondary 4th gear by using the SST.
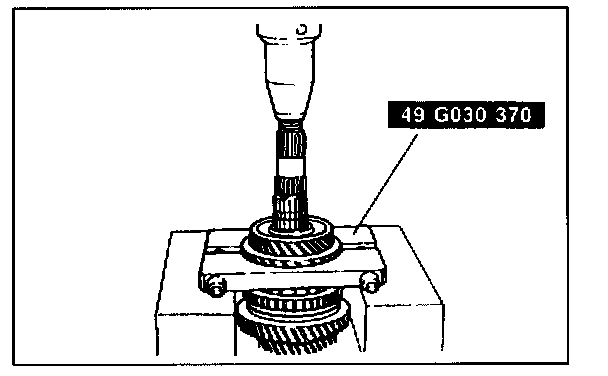
Secondary 3rd gear and 2nd gear
1. Remove the retaining ring.
2. Shift the gears to 1st gear.
3. Remove the secondary 3rd gear and 2nd gear by using the SST.
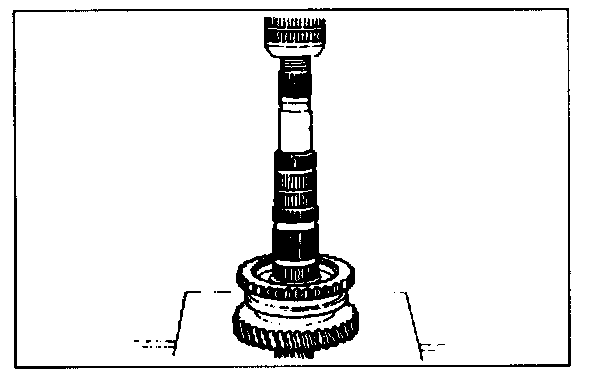
1st/2nd clutch hub assembly, 1st synchronizer ring and 1st gear
1. Remove the retaining ring.
2. Remove the 1st/2nd clutch hub assembly, 1st synchronizer ring, and 1st gear by using a press.
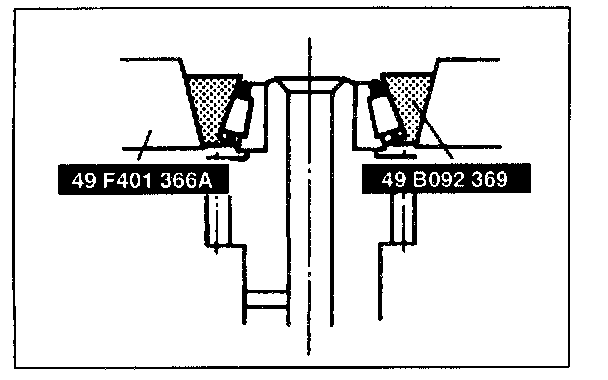
Bearing (secondary shaft end)
Remove the bearing by using the SSTs.