Fuel Injector: Service and Repair
WARNING: Fuel line spills and leaks are dangerous. Fuel can ignite and cause serious injuries or death and damage. Fuel can also irritate skin and eyes. To prevent this, always complete the "Fuel Line Safety Procedures."Removal/Installation
1. Remove in the order shown in the figure below.
2. Install in the reverse order of removal, referring to Installation Note.
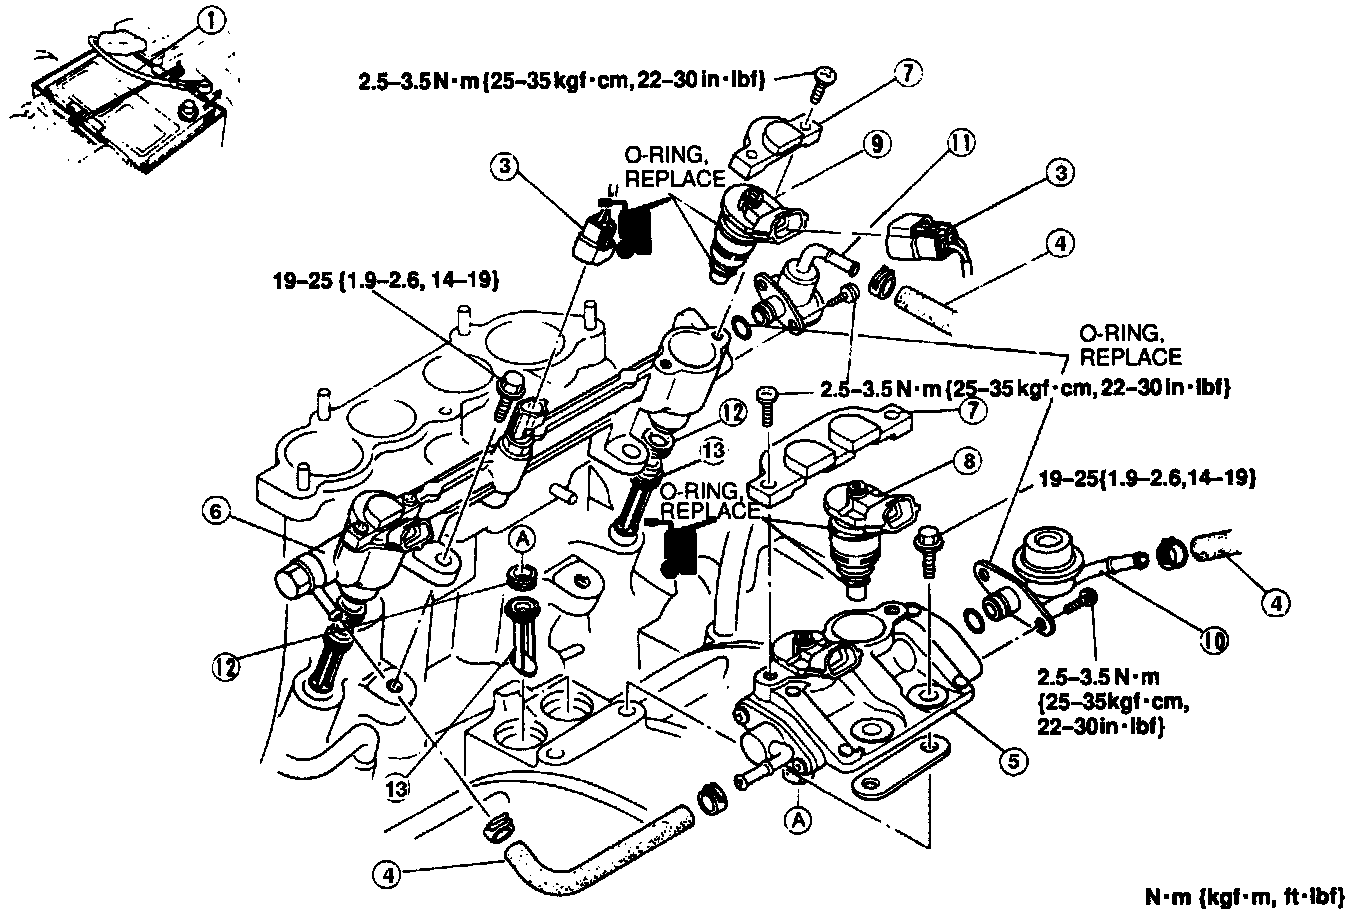
1. Negative battery cable
2. Extension manifold Inspection
3. Connector
4. Fuel hoses Inspection
5. Fuel distributor assembly (Primary)
6. Fuel distributor assembly (Secondary)
7. Cover Inspection
8. Injector (Primary)
9. Injector (Secondary)
10. Pulsation damper
11. Pressure regulator
12. Insulator
13. Air bleed socket
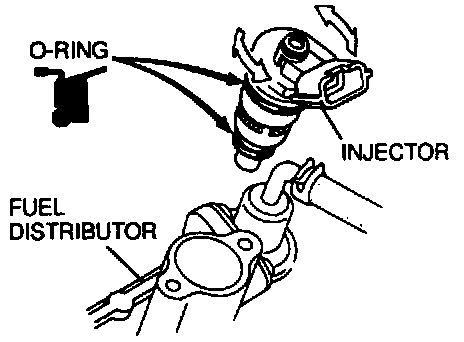
Installation Note/ Injector Installation
1. Use new 0-rings.
2. Apply a small amount of clean engine oil to the 0-rings before installing them.
3. Check for deposits on the injector areas of the fuel distributor.
4. Clean any deposits found, with a suitable solvent.
5. Install the injector squarely into fuel distributor and gradually twist it.
Fuel Leakage Test
1. Install the fuel hose.
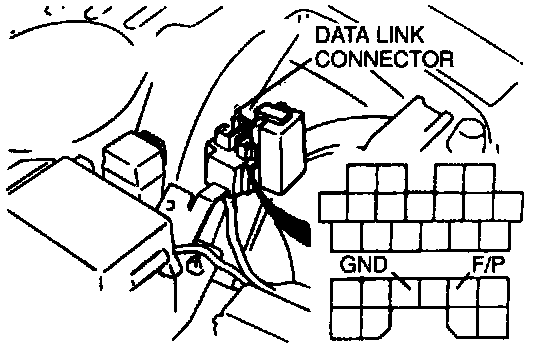
2. Connect the data link connector terminals F/P and GND with a jumper wire.
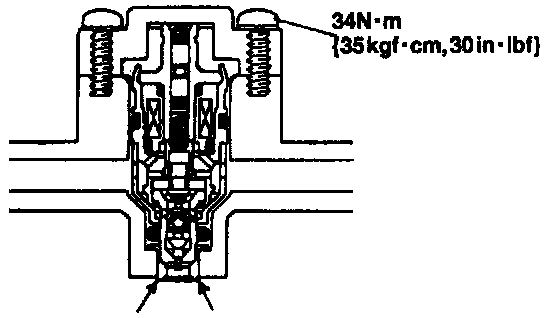
3. Turn the ignition switch ON and check for fuel leaks from the fuel distributor.
4. If fuel leaks, check the injector 0-ring and fuel distributor.
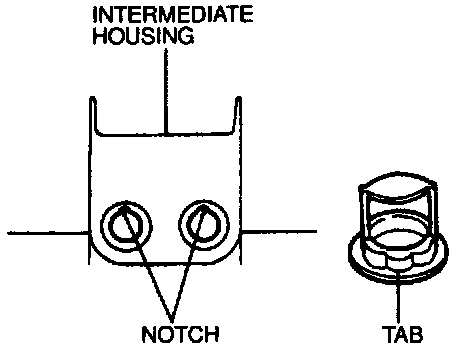
Air Bleed Socket Installation
Align the tab of the air bleed socket with the notches in the intermediate housing.