Extension Housing/Parking Mechanism
EXTENSION HOUSING / PARKING MECHANISMPreparation
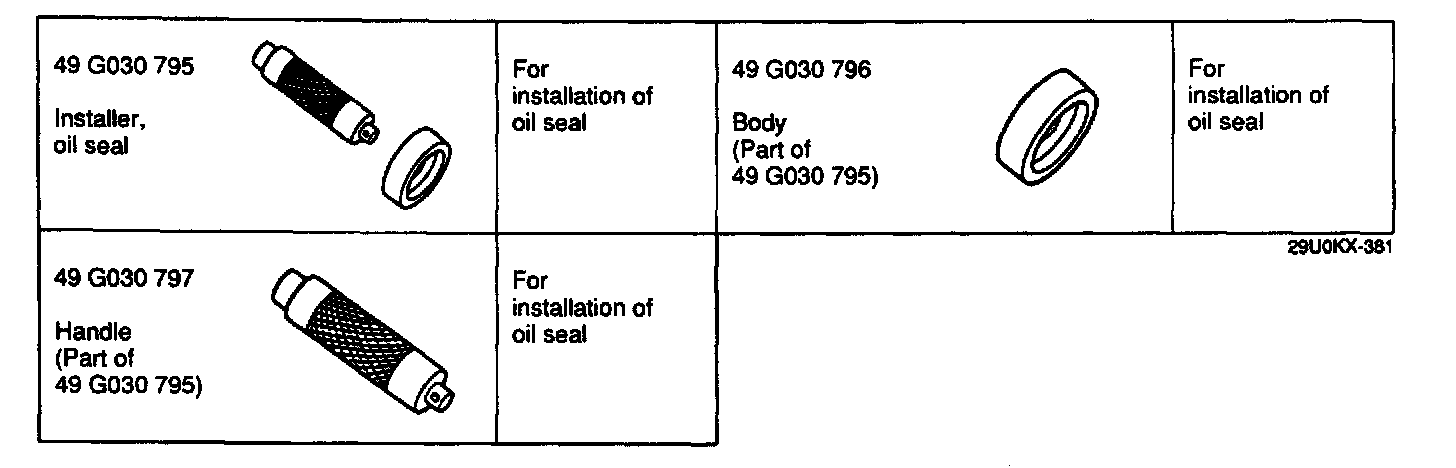
SST
Disassembly / Inspection / Assembly
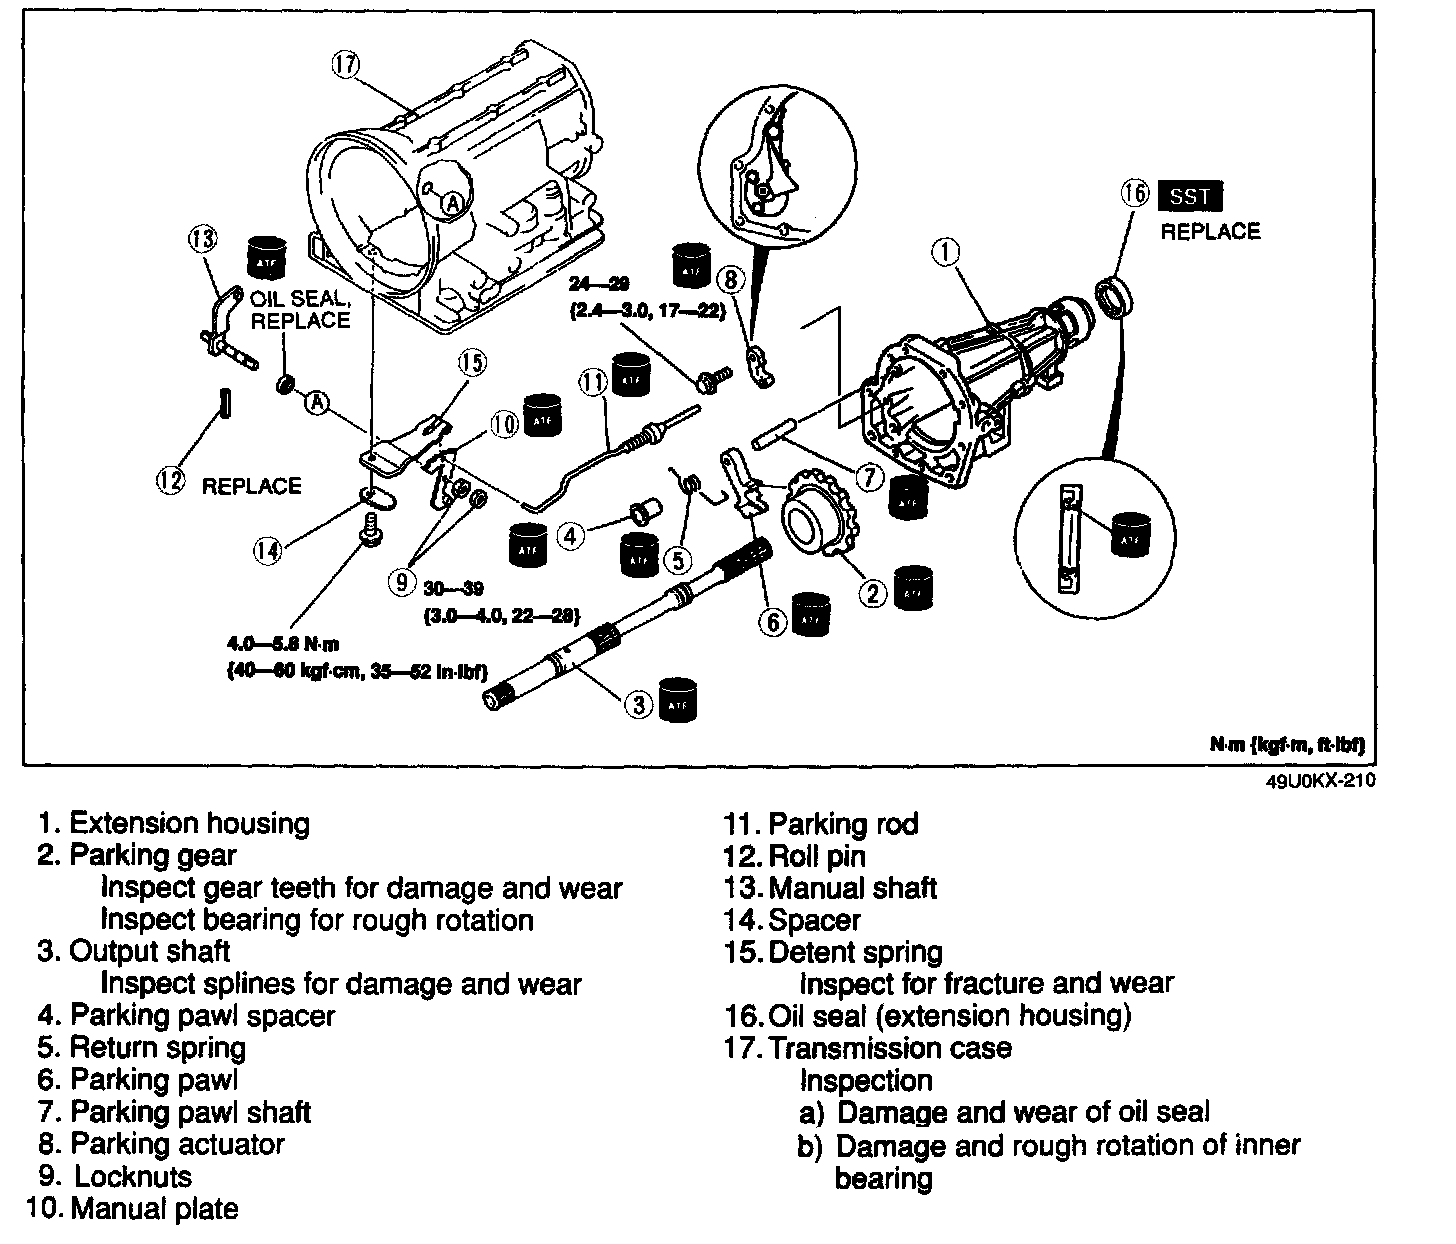
1. Disassemble in the order shown in the figure, referring to Disassembly Note.
2. Inspect all parts and replace as necessary.
3. Assemble in the reverse order of disassembly, referring to Assembly Procedure.
Disassembly note
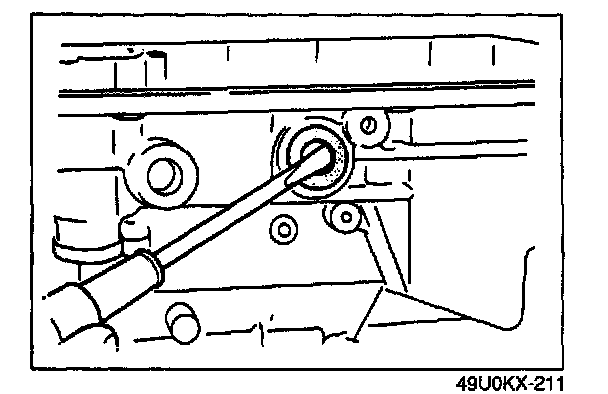
Oil seal (transmission side)
Remove the oil seal, being careful to not allow any metal tools to scratch the inside of the transmission case.
Assembly procedure
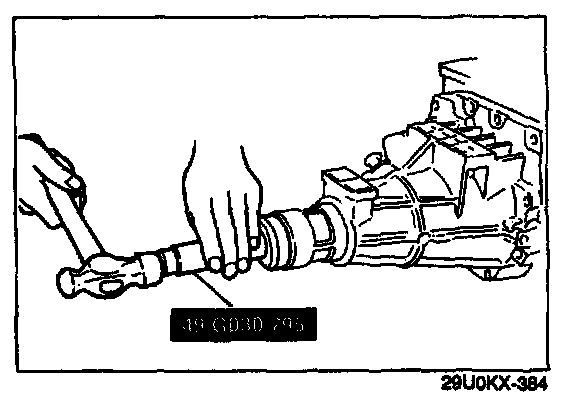
1. Apply ATF to the lip of the new oil seal.
2. Install the oil seal by using the SST.
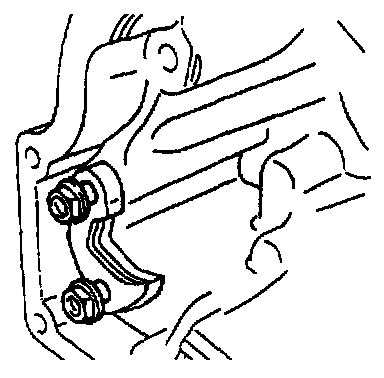
3. Apply ATF to the parking actuator and install them in the extension housing.
Tightening torque: 24 - 29 N.m {2.4 - 3.0 kgf.m, 18 - 21 ft.lbf)
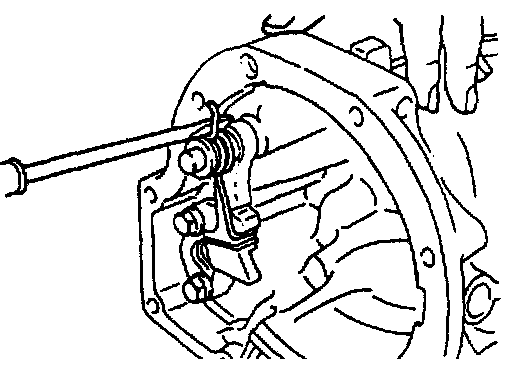
4. Apply ATF to the parking pawl shaft and install it in the extension housing.
5. Apply ATF to the parking pawl, return spring, and spacer. Install them in the extension housing.
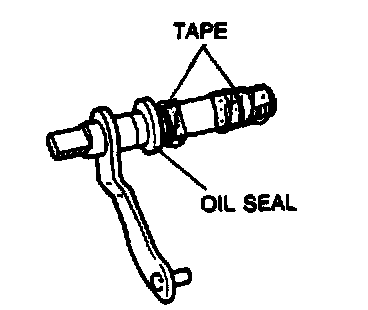
6. Wrap the threads of the manual shaft with tape.
7. Apply ATF to the lip of a new oil seal and install it onto the manual shaft.
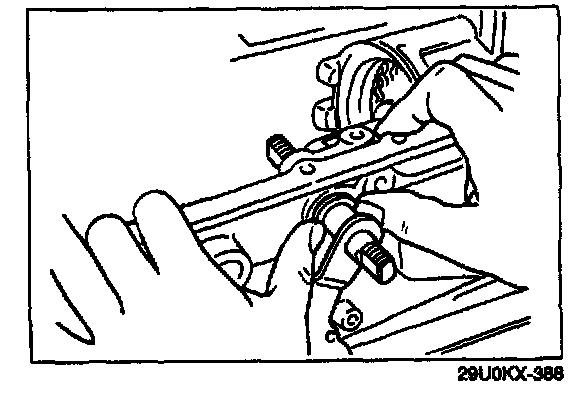
8. Apply ATF to the bearing in the transmission case.
9. Install the manual shaft into the transmission case.
10. Push the oil seal squarely into the transmission case.
11. Remove the tape.
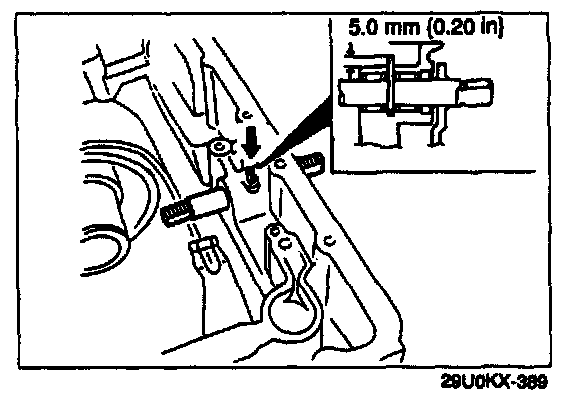
12. Align the groove in manual shaft with the roll pin hole.
Tap the roll pin into the case as shown in the figure.
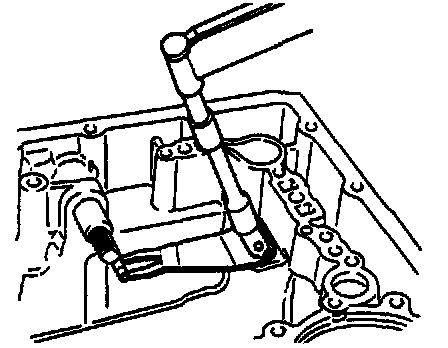
13. Install the detent spring and spacer.
Tightening torque: 4.0 - 5.8 N.m {40 - 60 kgf.cm, 35 - 52 in.lbf}
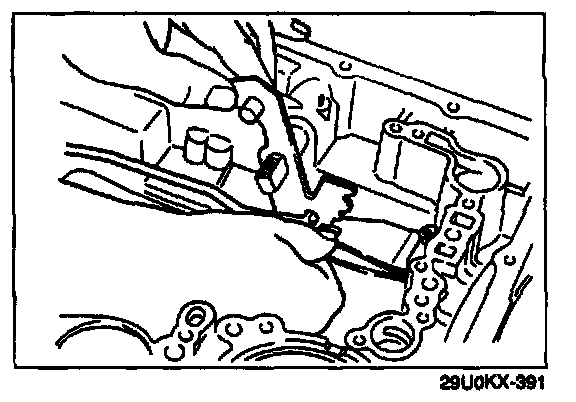
14. Install the manual plate and parking rod.
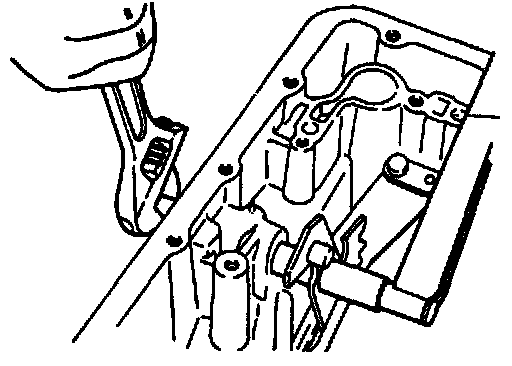
15. While holding the manual shaft as shown in the figure, tighten the locknuts.
Tightening torque: 30 - 39 N.m {3.0 - 4.0 kgf.m, 22 - 28 ft.lbf}
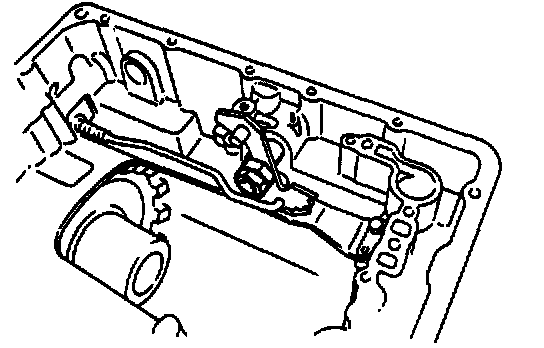
16. Verify operation of the parking mechanism.
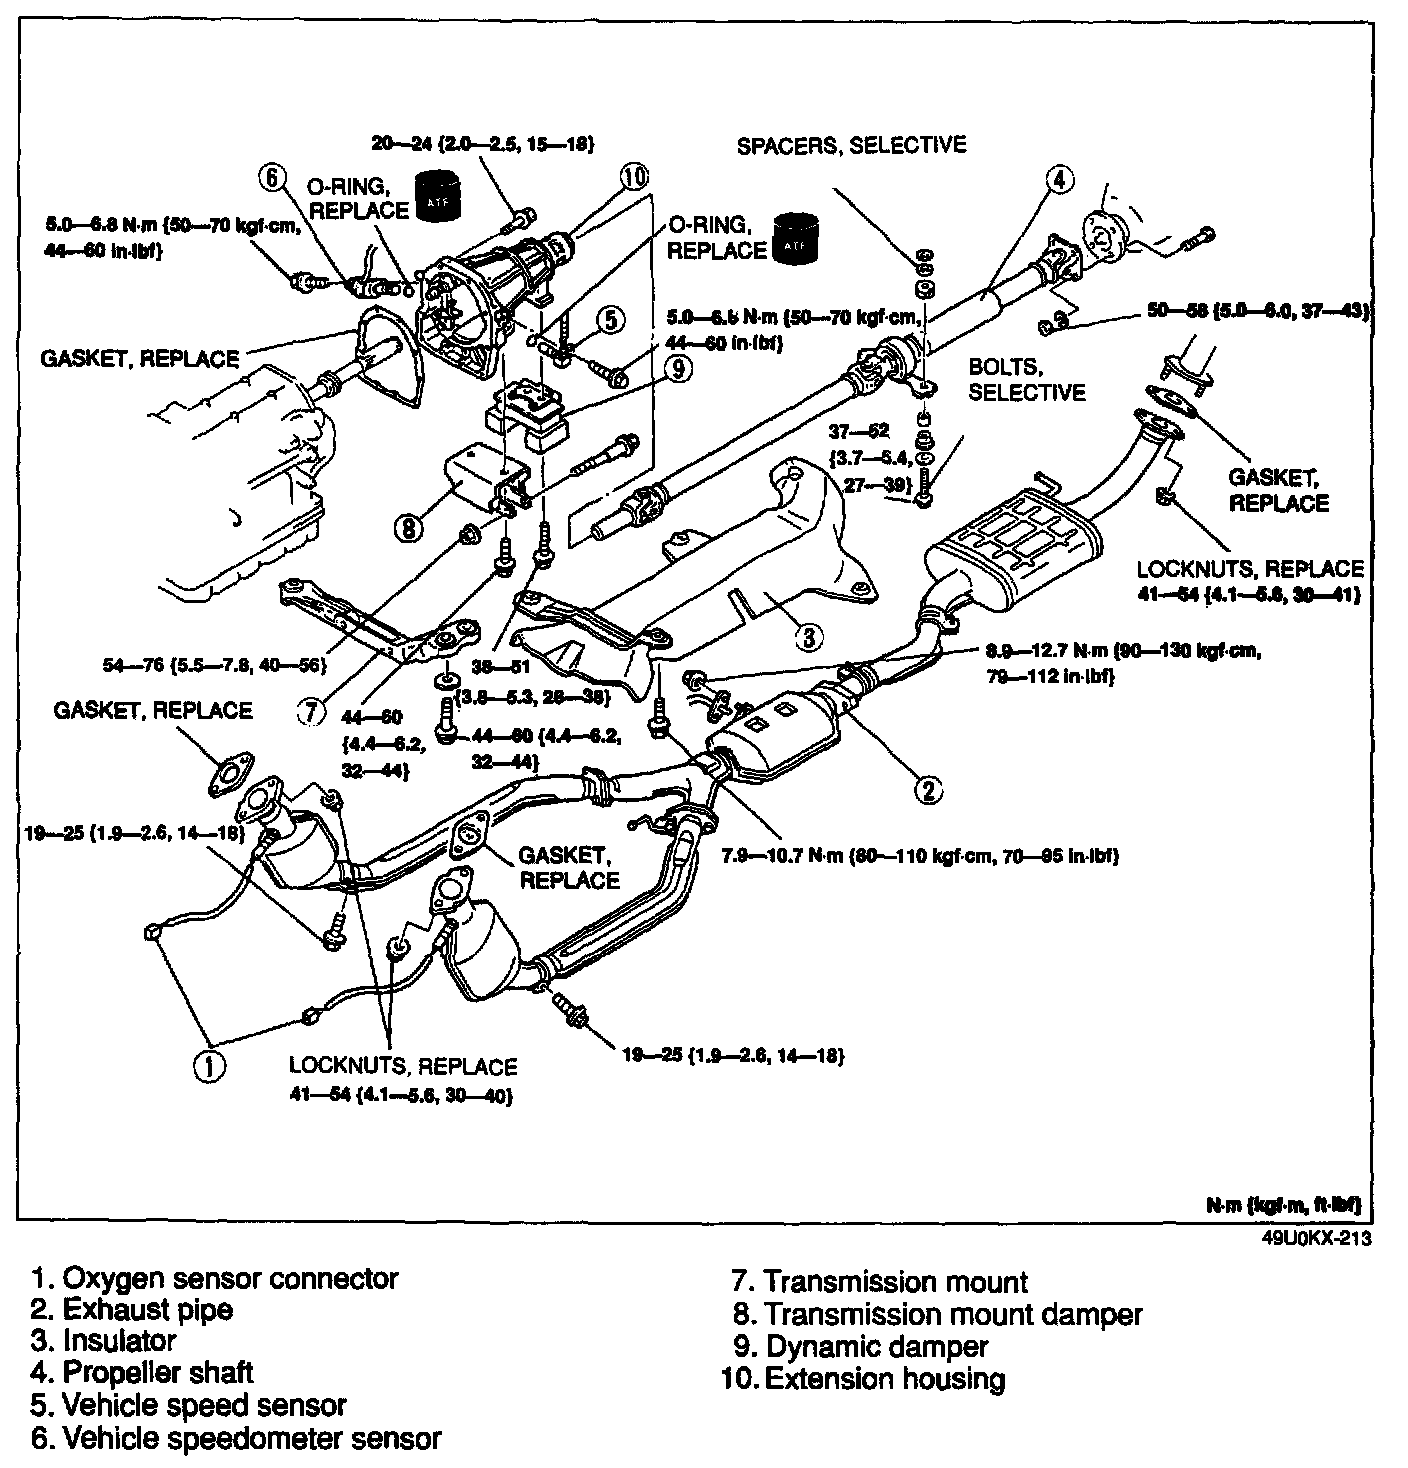
On-Vehicle Removal / Installation
1. Disconnect the negative battery cable.
2. Clean the transmission exterior thoroughly with a steam cleaner or cleaning solvent.
3. Remove in the order shown in the figure, referring to Removal Note.
4. Install the reverse order of removal, referring to Installation Note.
5. Perform the following after installation of the extension housing.
(1) Connect the negative battery cable.
(2) Check the ATF level and add ATF to specification, if necessary.
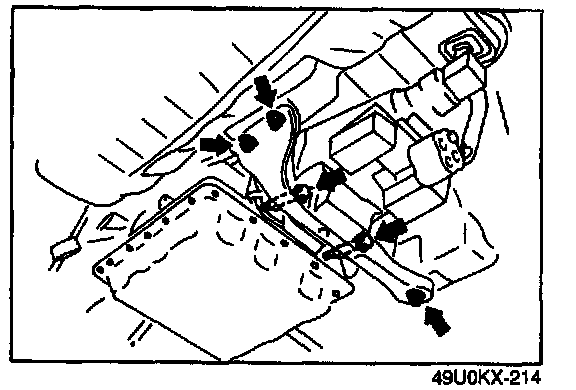
Removal note
Transmission mount
1. Support the transmission with a jack.
2. Remove the transmission mount bolts and nuts.
3. Remove the transmission mount.
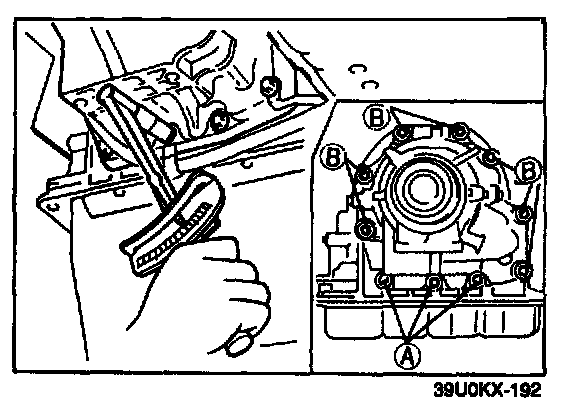
Installation note
Extension housing
1. Install a new gasket on the transmission case.
2. Install the extension housing.
Bolt length (Measured from below the head)
A: 30 mm {1.181 in)
B: 45 mm {1.772 in)
Tightening torque: 20 - 24 N.m {2.0 - 2.5 kgf.m, 15 - 18 ft.lbf}
Transmission mount
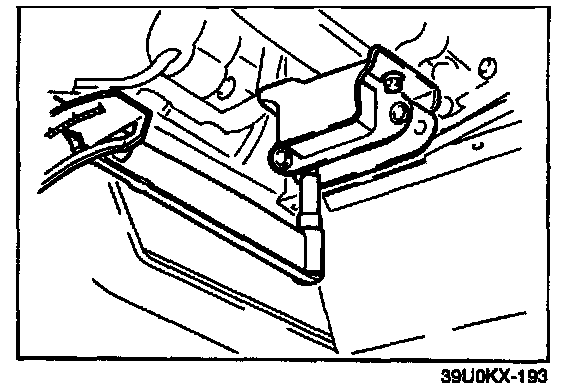
1. Install the transmission mount damper to the extension housing.
Tightening torque: 44 - 60 N.m {4.4 - 6.2 kgf.m, 32 - 44 ft.lbf}
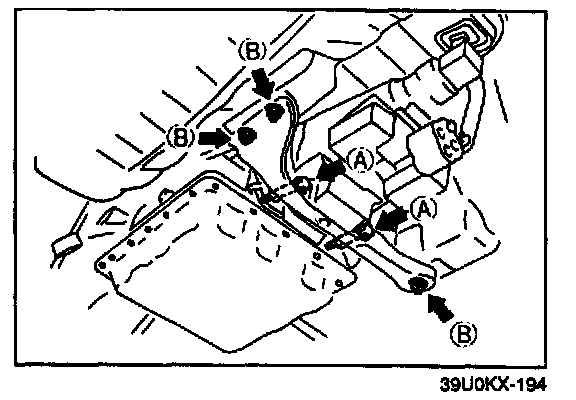
2. Install the transmission mount and tighten the bolts B as shown.
Tightening torque B: 44 - 60 N.m {4.4 - 6.2 kgf.m, 32 - 44 ft.lbf}
3. Loosely tighten nuts A.
4. Remove the transmission jack.
5. Tighten nuts A.
Tightening torque A: 54 - 76 N.m {5.5 - 7.8 kgf.m, 40 - 56 ft.lbf}