Piston Ring: Service and Repair
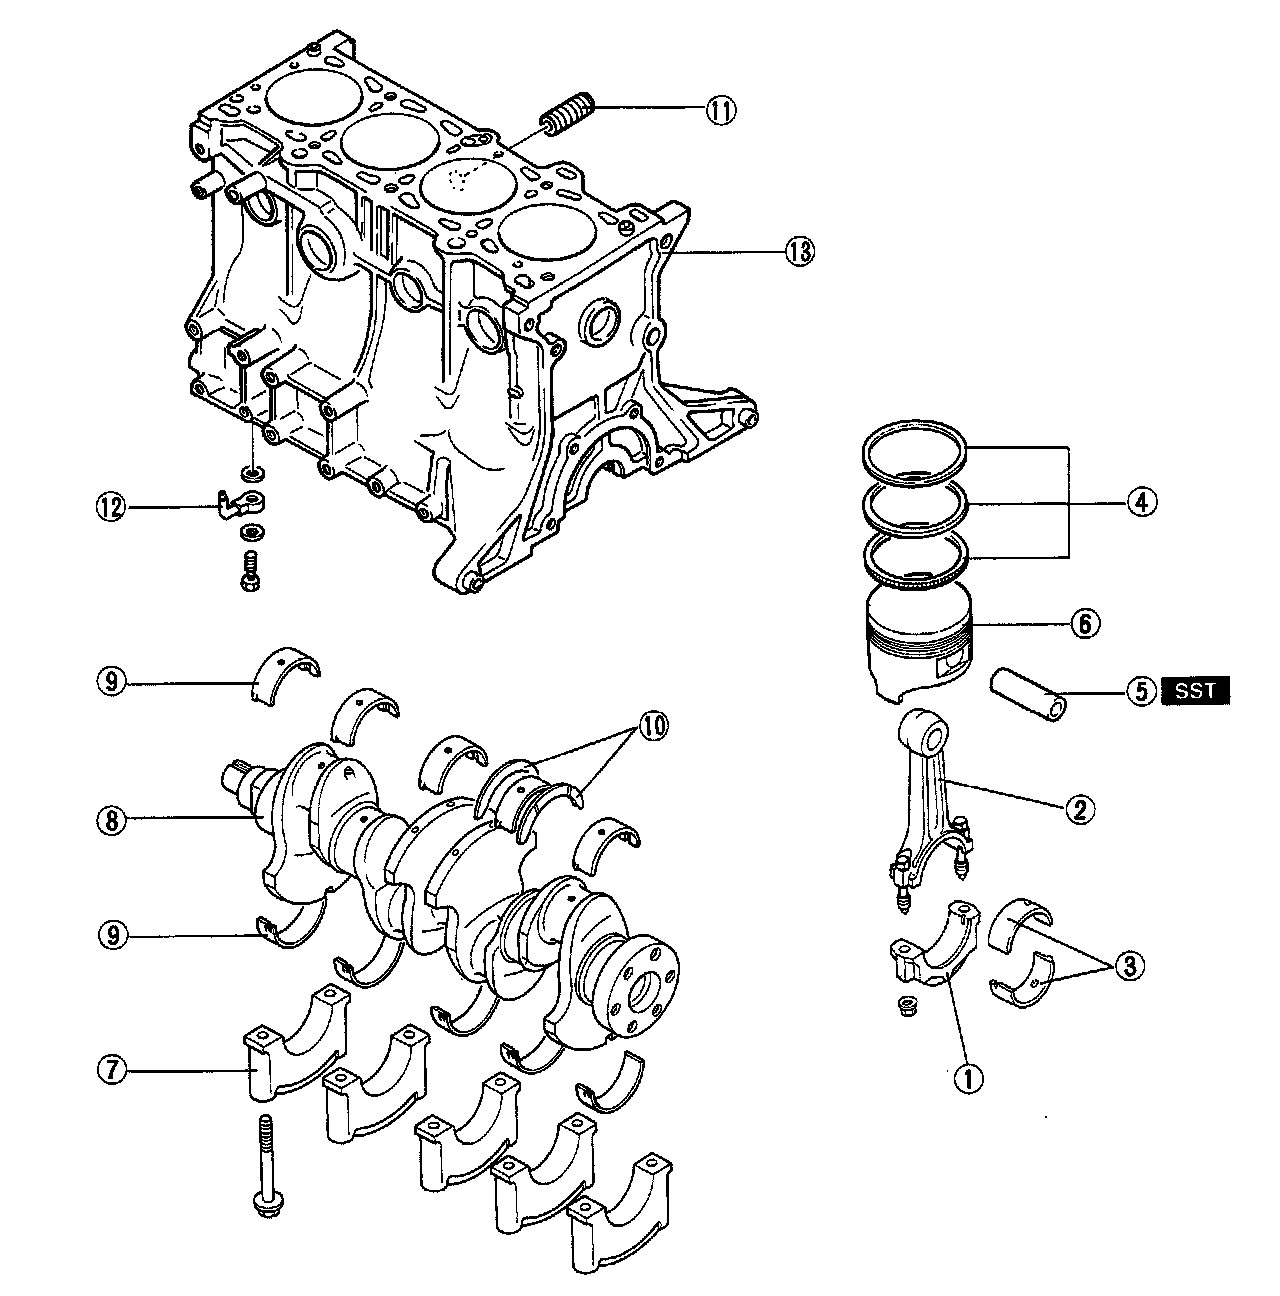
Legend
1. Connecting rod cap
2. Connecting rod
3. Connecting rod bearing
4. Piston ring
5. Piston pin
6. Piston
7. Main bearing cap
8. Crankshaft
9. Main bearing
10. Thrust bearing
11. Oil filter joint
12. Oil jet
13. Cylinder block
Disassembly Note
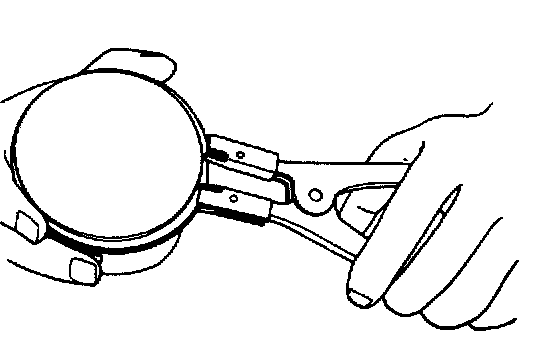
Piston ring
Caution
^ Do not apply excessive tension, which may cause the rings to snap out.
1. Remove the piston rings with a piston ring expander (commercially available).
INSPECTION / REPAIR
PISTON, PISTON RING, AND PISTON PIN
Piston
Caution
^ If the piston is replaced, the piston rings must also be replaced.
1. Inspect the outer circumferences of all pistons for seizure or scoring. Replace the piston if necessary.
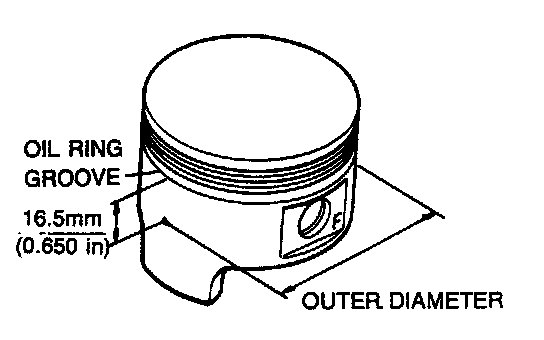
2. Measure the outer diameter of each piston at a right angle (90°) to the piston pin, 16.5mm (0.650 in) below the oil ring land lower edge.
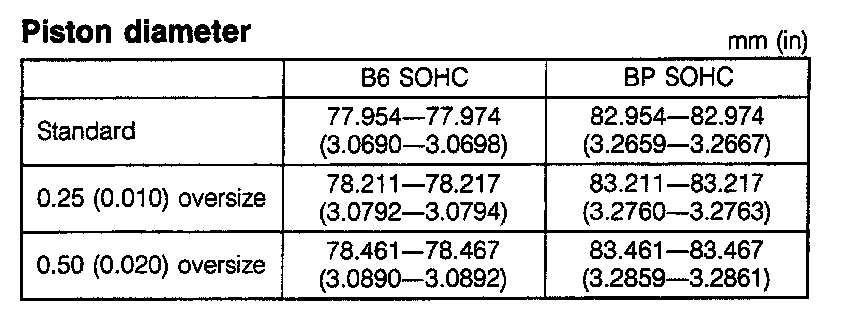
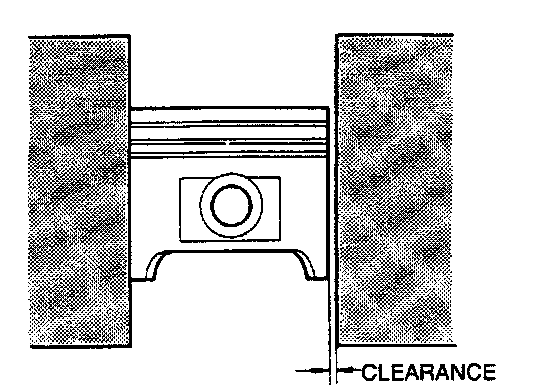
3. Measure the piston-to-cylinder clearance.
Clearance: 0.039-0.052mm (0.0015-0.0020 in)
Maximum: 0.15mm (0.006 in)
4. If the clearance exceeds the maximum, replace the piston or rebore the cylinders to fit oversize pistons.
Piston and Piston Rings
1. Measure the piston ring to ring land clearance around the entire circumference using a new piston ring.
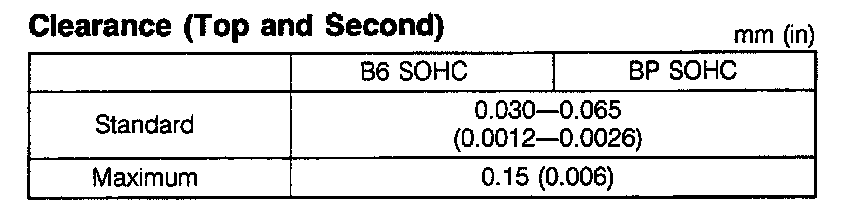
2. If the clearance exceeds the maximum, replace the piston.
3. Inspect the piston rings for damage, abnormal wear, or breakage. Replace the piston rings if necessary.
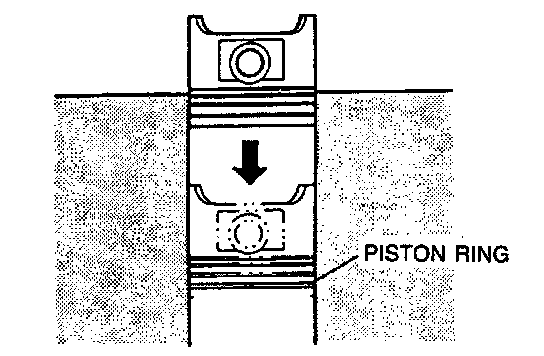
4. Insert the piston ring into the cylinder by hand and use the piston to push it to the bottom of the ring travel.
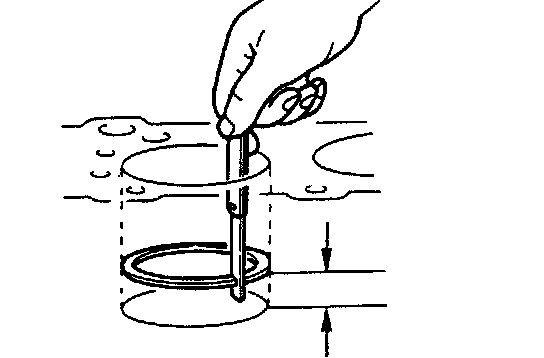
5. Measure each piston ring end gap with a feeler gauge. Replace the piston ring if necessary.
End gap
Top: 0.15-0.30mm (0.006-0.012 in)
Second: 0.1 5-0.30mm (0.006-0.012 in)
Oil rail: 0.20-0.70mm (0.008-0.028 in)
Maximum: 1.0mm (0.039 in)
ASSEMBLY
Piston Ring
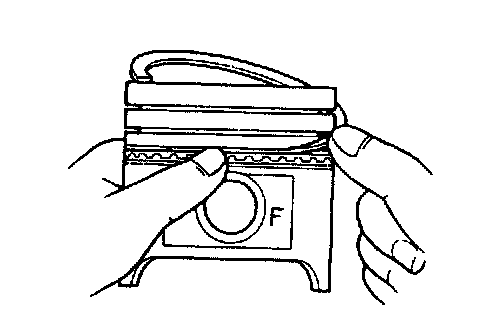
1. Install the three-piece oil rings on the pistons.
(1) Apply clean engine oil to the oil ring spacer and rails.
(2) Install the oil ring spacer with the ends upward.
Note
^ The upper rail and lower rail are the same.
^ The rails may be installed with either face upward.
(3) Install the upper rail and lower rail.
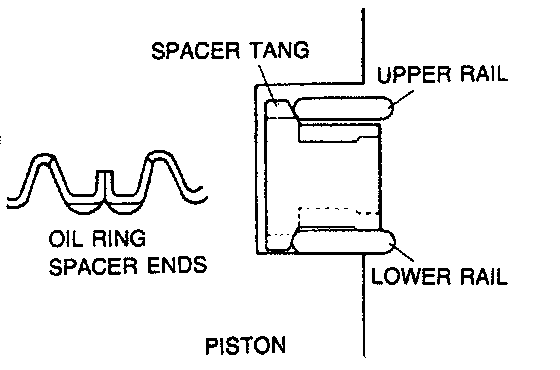
2. Verify that both rails are expanded by the spacer tangs as shown in the image by making certain the rails turn smoothly in both directions.
Caution
^ The rings must be installed with the R marks upward.
^ The second ring must be installed with the scraper face downward.
3. Apply clean engine oil to the top and second piston rings.
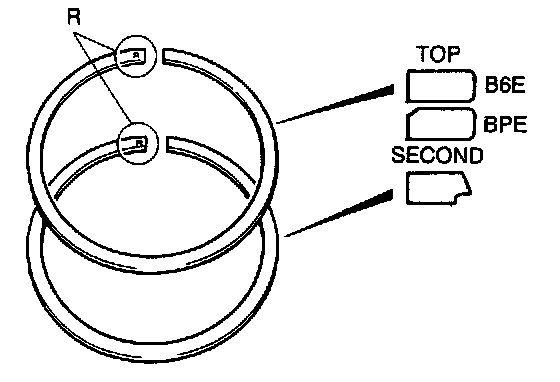
4. Install the second ring to the piston; then install the top ring. Use a piston ring expander (commercially available).
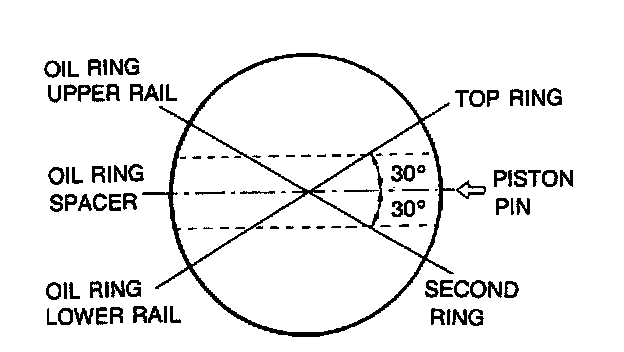
5. Position the end gaps of the rings as shown in the image.