Air Duct: Service and Repair
DUCTS AND GRILLESRemoval and Installation
COMPONENT LAYOUT
Exploded View ATC-143:
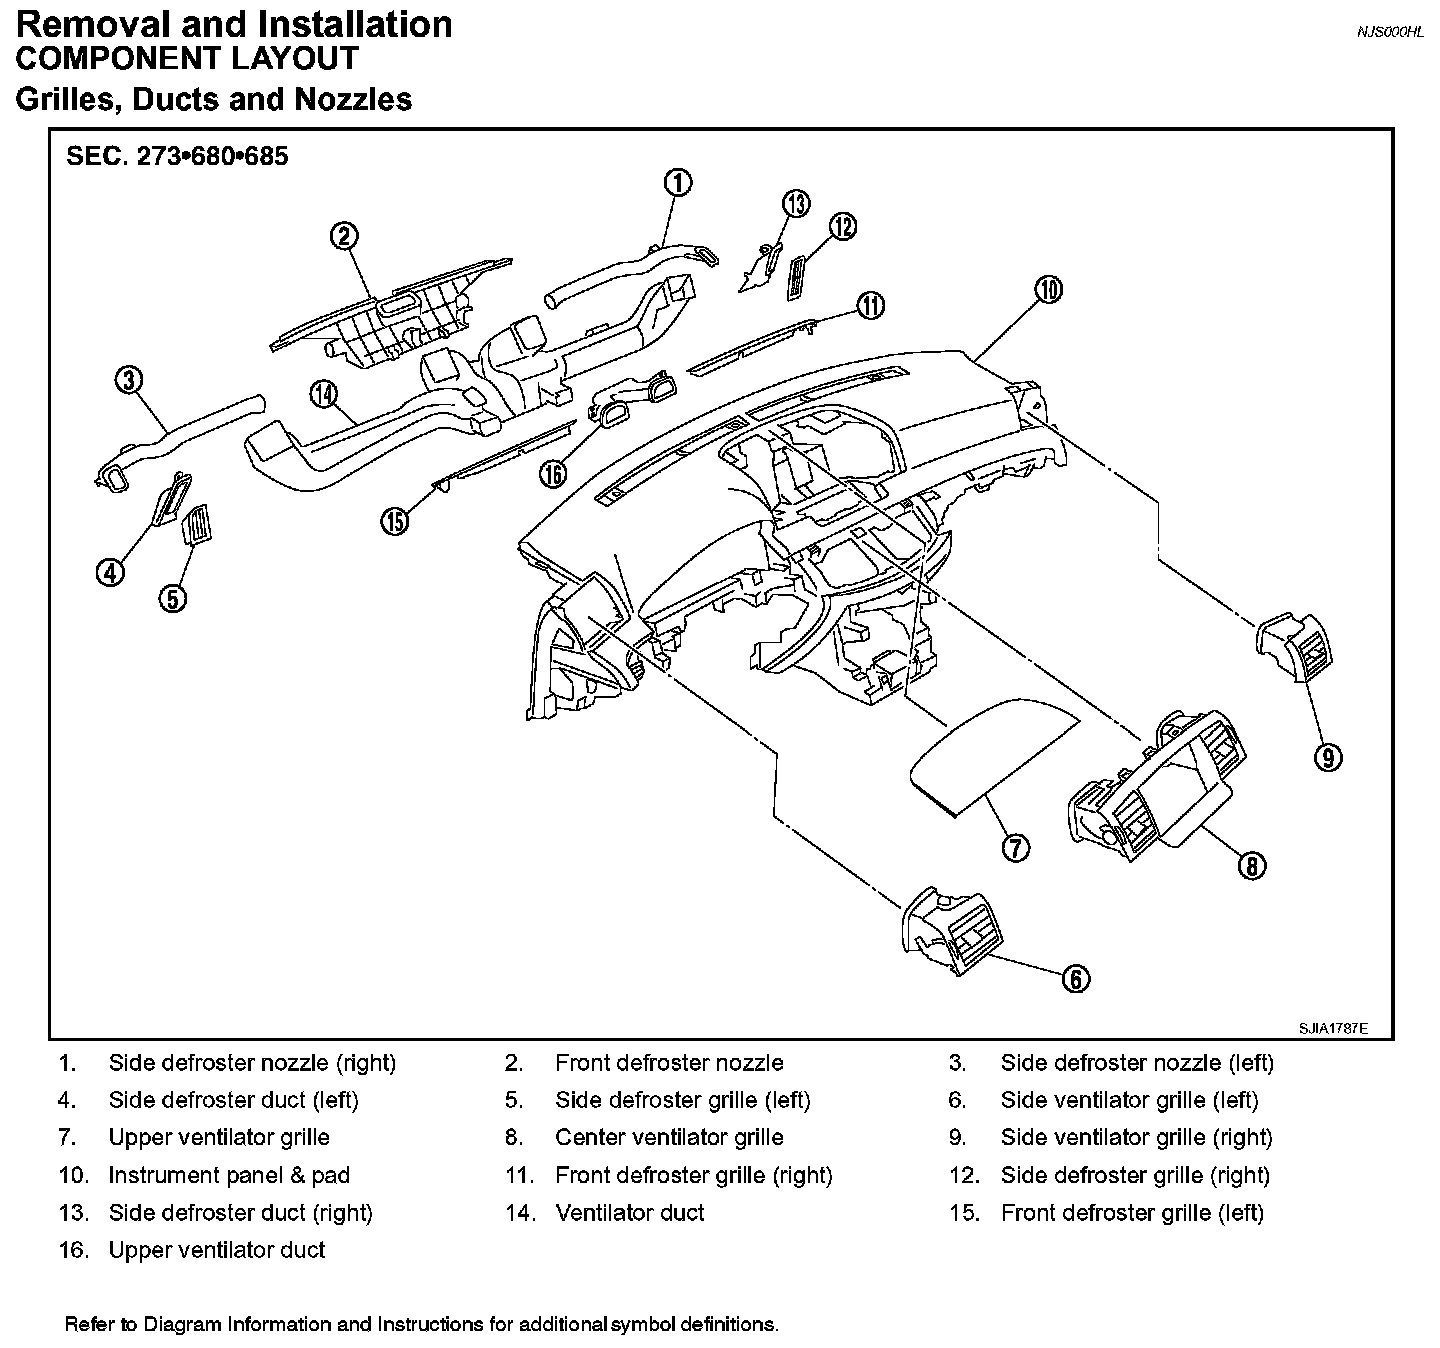
Grilles, Ducts and Nozzles
Exploded View ATC-144:
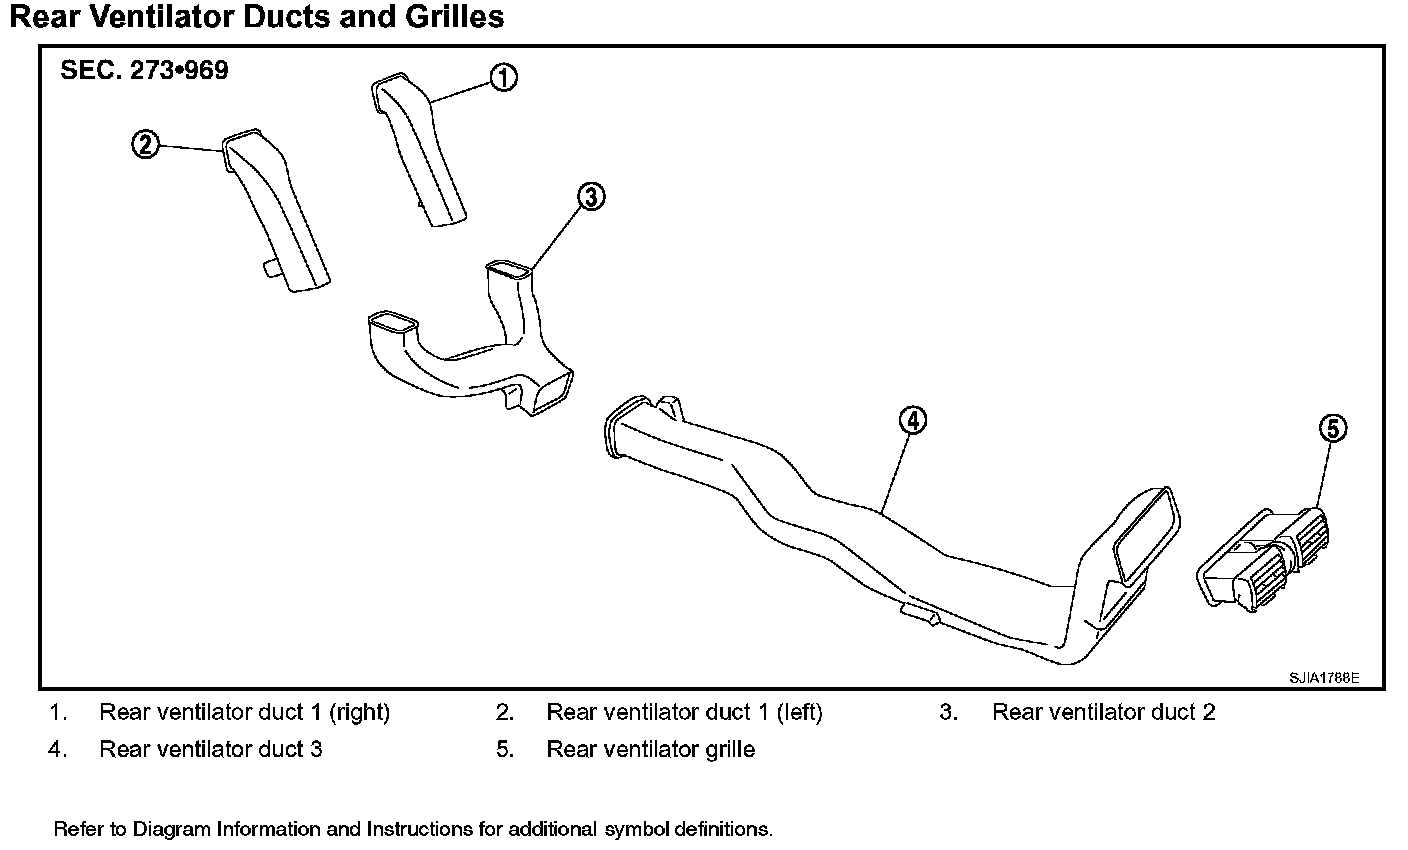
Rear Ventilator Ducts and Grilles
Exploded View ATC-144:
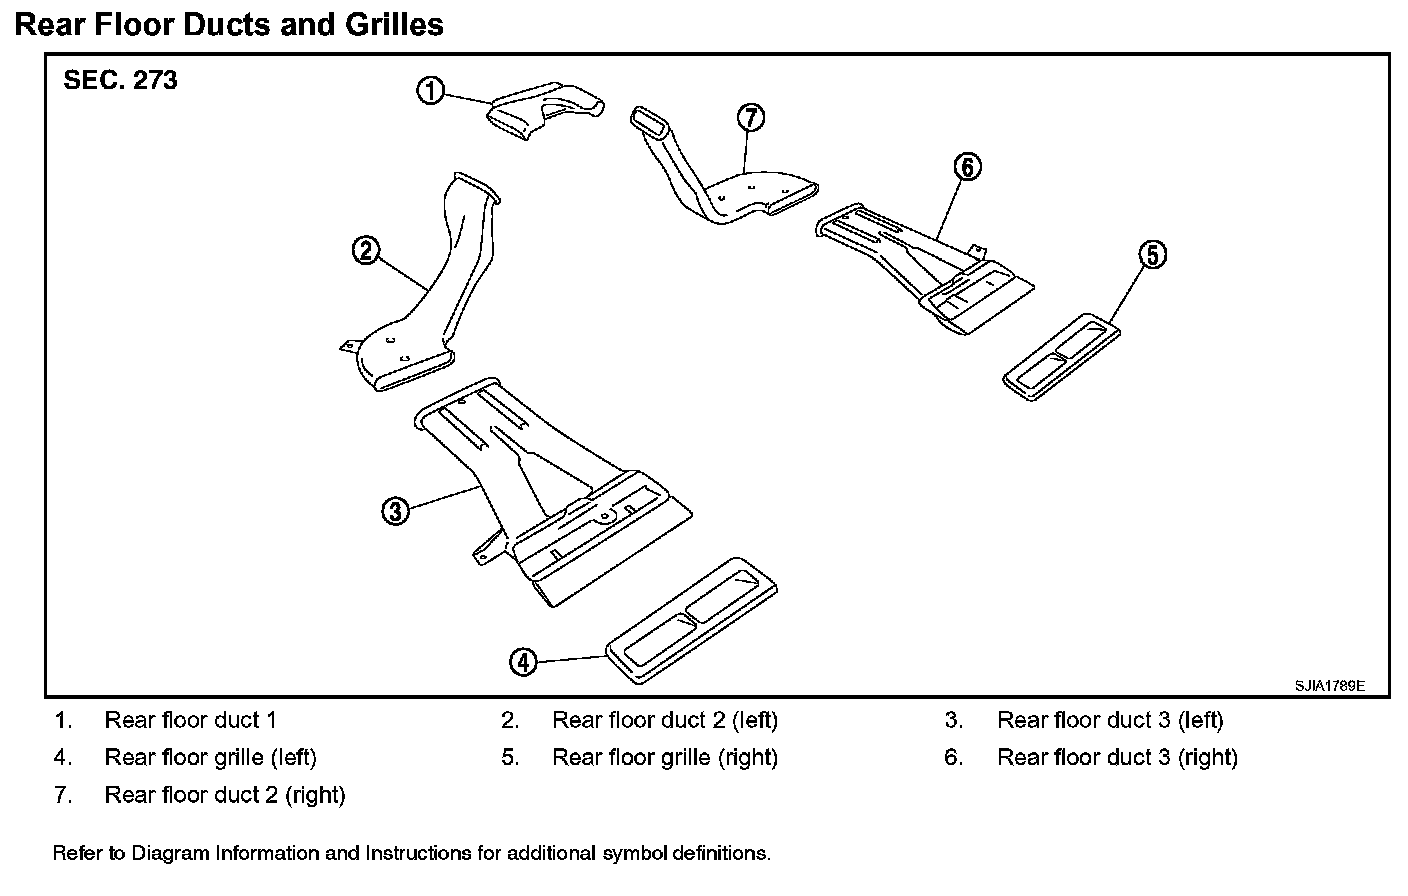
Rear Floor Ducts and Grilles
REMOVAL
Removal of Center Ventilator Grilles
Remove center ventilator assembly. Refer to "INSTRUMENT PANEL ASSEMBLY".
Removal of Side Ventilator Grilles
Remove side ventilator assembly. Refer to "INSTRUMENT PANEL ASSEMBLY".
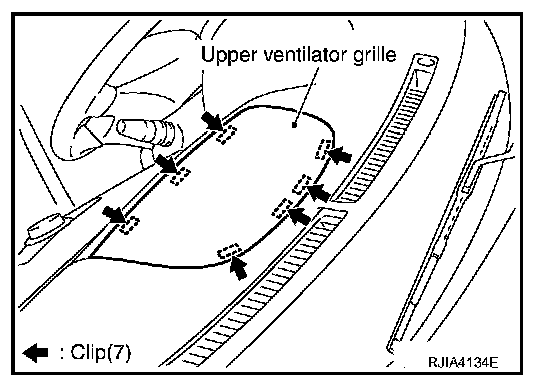
Removal of Upper Ventilator Grille
Remove mounting metal clips, and then remove upper ventilator grille.
Removal of Upper Ventilator Duct
1. Remove instrument panel & pad. Refer to "INSTRUMENT PANEL ASSEMBLY".
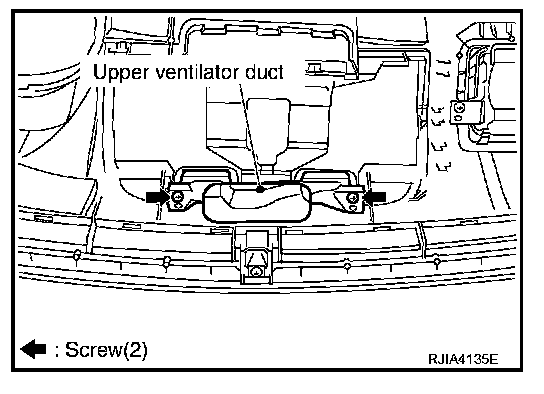
2. Remove mounting screws, and then remove upper ventilator duct, using power tools.
Removal of Front Defroster Nozzle, Side Defroster Nozzles and Ventilator Duct
1. Remove instrument panel & pad. Refer to "INSTRUMENT PANEL ASSEMBLY".
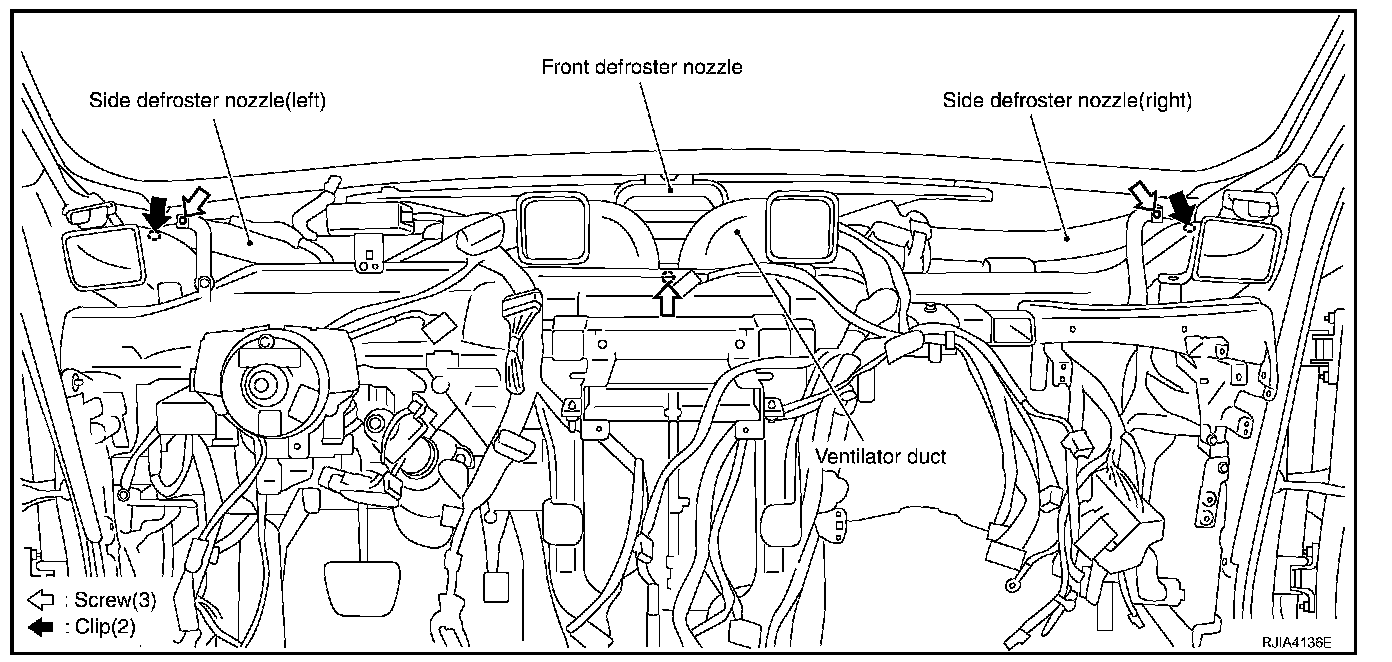
2. Remove mounting clips, and then remove side defroster nozzles.
3. Remove front defroster nozzle.
4. Remove mounting screws, and then remove ventilator duct, using power tools.
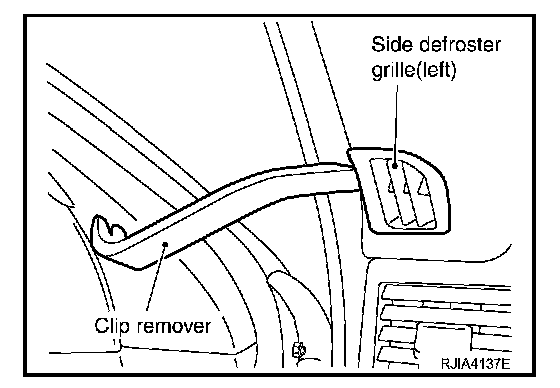
Removal of Side Defroster Grilles
Remove side defroster grilles, using clip remover.
Removal of Side Defroster Ducts
1. Remove front pillar garnish. Refer to "FRONT PILLAR GARNISH".
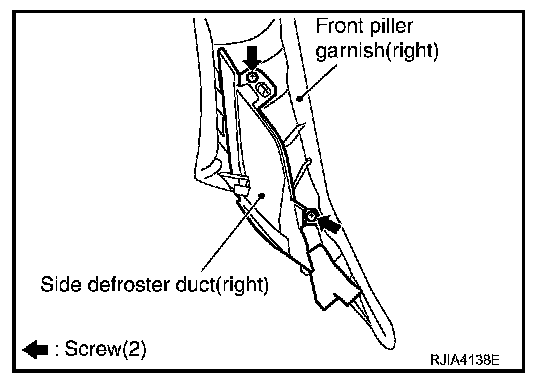
2. Remove mounting screws, and then remove side defroster ducts.
Removal of Rear Ventilator Grille
1. Remove console rear finisher. Refer to "INSTRUMENT PANEL ASSEMBLY".
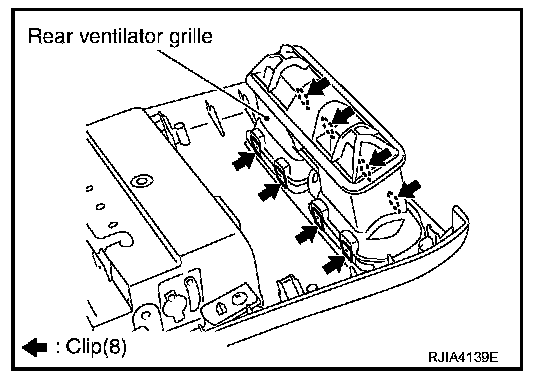
2. Remove mounting clips, and then remove rear ventilator grille.
Removal of Rear Ventilator Ducts
1. Remove center console. Refer to "INSTRUMENT PANEL ASSEMBLY".
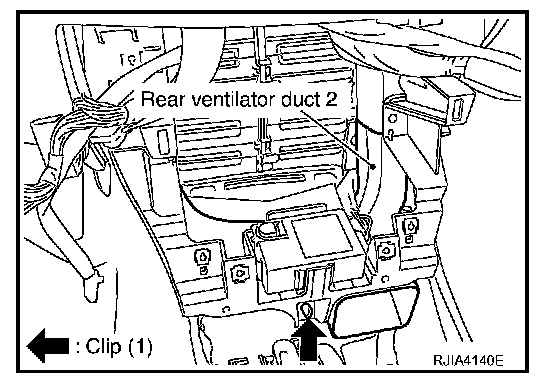
2. Remove mounting clip, and then remove rear ventilator duct 2.
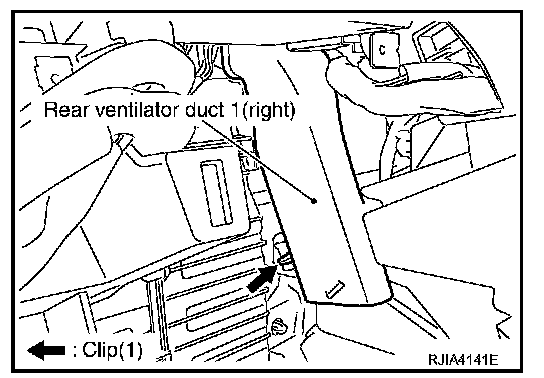
3. Remove mounting clips, and then remove rear ventilator ducts 1.
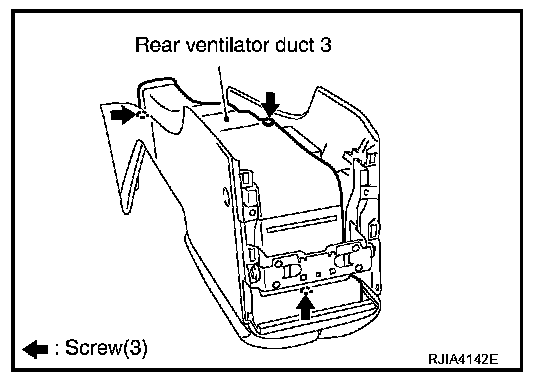
4. Remove mounting screws, and then remove rear ventilator duct 3.
Removal of Foot Grilles
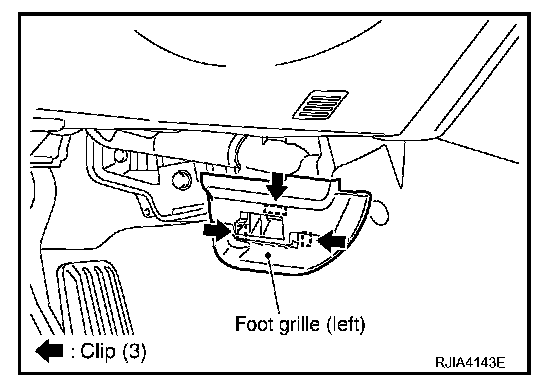
1. Remove mounting clips, and then remove foot grille (left).
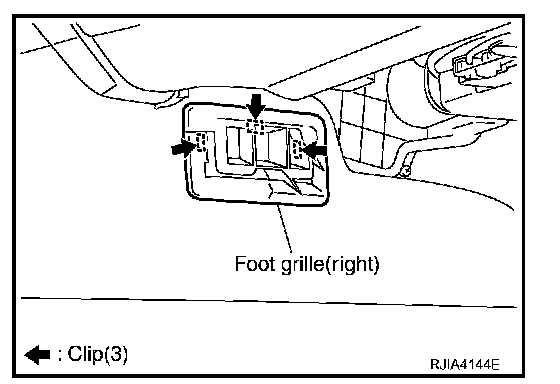
2. Remove mounting clips, and then remove foot grille (right).
Removal of Foot Ducts
1. Remove instrument driver lower panel. Refer to "INSTRUMENT PANEL ASSEMBLY".
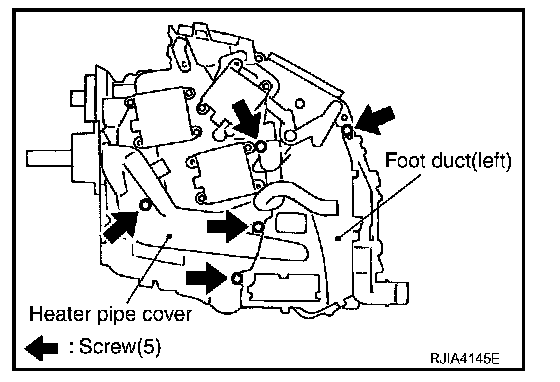
2. Remove mounting screws, and then remove heater pipe cover.
3. Remove mounting screws, and then remove foot duct (left).
4. Remove blower unit. Refer to "BLOWER UNIT".
5. Remove air mix door motor (passenger side). Refer to "AIR MIX DOOR MOTOR".
6. Remove mode door motor (passenger side). Refer to "MODE DOOR MOTOR".
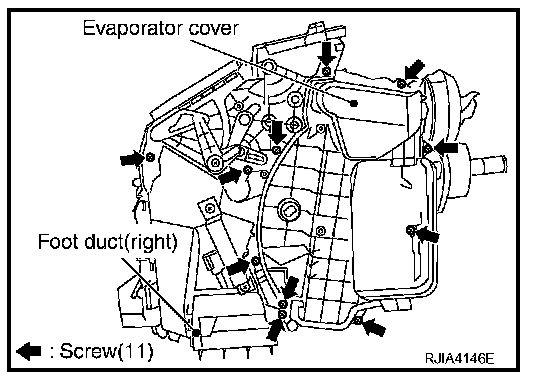
7. Remove mounting screws, and then remove evaporator cover.
8. Remove mounting screws, and then remove foot duct (right).
Removal of Rear Floor Grilles
1. Slide front seats toward vehicle front.
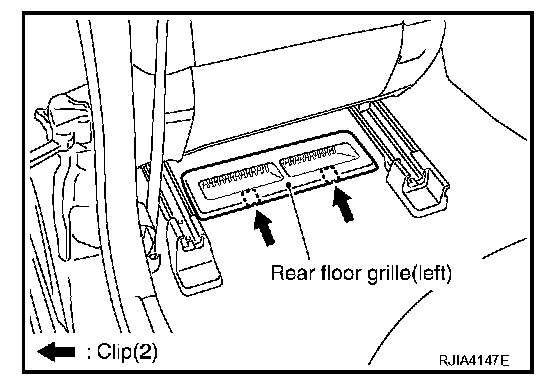
2. Remove mounting clips, and then remove rear floor grilles.
Removal of Rear Floor Ducts
1. Remove center console. Refer to "INSTRUMENT PANEL ASSEMBLY".
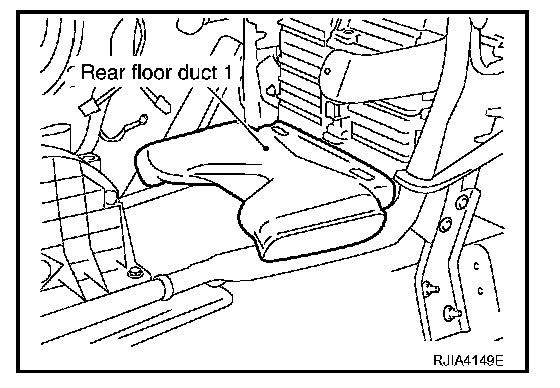
2. Remove rear floor duct 1.
3. Remove front seats. Refer to "FRONT SEAT".
4. Peel back floor trim to a point where rear floor duct is visible.
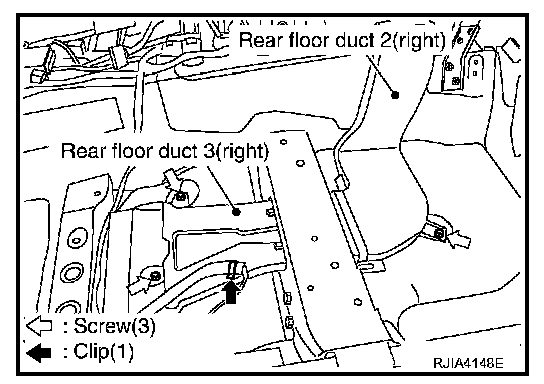
5. Remove mounting screws and clip, and then remove rear floor ducts 2 and 3.
INSTALLATION
Installation is basically the reverse order of removal.