Service Procedure
SERVICE PROCEDUREIMPORTANT:
Before starting, make sure:
^ ASIST on the Toughbook(R) PC has been freshly Synchronized (Updated).
^ All C-III software updates (if any) have been run.
NOTE:
C-III automatically gets applicable ECM reprogramming data from ASIST on the Toughbook(R) PC.
^ C-III PCMCIA Card Adapter is installed.
^ C-III Security Card is installed.
^ That a screen print for Warranty documentation can be done from C-III during this process while still cable-connected to the vehicle.
1. Use the USB cable to connect the Vehicle Interface (VI) to the Toughbook(R) PC and then connect the VI to the vehicle.
CAUTION:
For ECM reprogramming, the Toughbook(R) PC MUST be connected to the VI using the USB cable.
2. Connect the AC Adapter to the Toughbook(R) PC.
CAUTION:
Be sure to connect the AC Adapter. If PC battery voltage drops during reprogramming, the process will be interrupted.
3. Connect a battery charger:
^ Set the battery charger at a low charge rate (trickle charge).
CAUTION:
If the vehicle battery voltage drops during reprogramming, the ECM may be damaged.
4. Turn the ignition ON with the engine and all vehicle electrical loads OFF.
^ The engine must be OFF (not running) during the reprogramming procedure.
CAUTION:
If a vehicle electrical load remains ON, the ECM may be damaged.
5. Open / start ASIST on the Toughbook(R) PC.
6. Select CONSULT Utilities, and select CONSULT-III.
7. Wait for the "Detecting VI/MI in progress" message to clear.
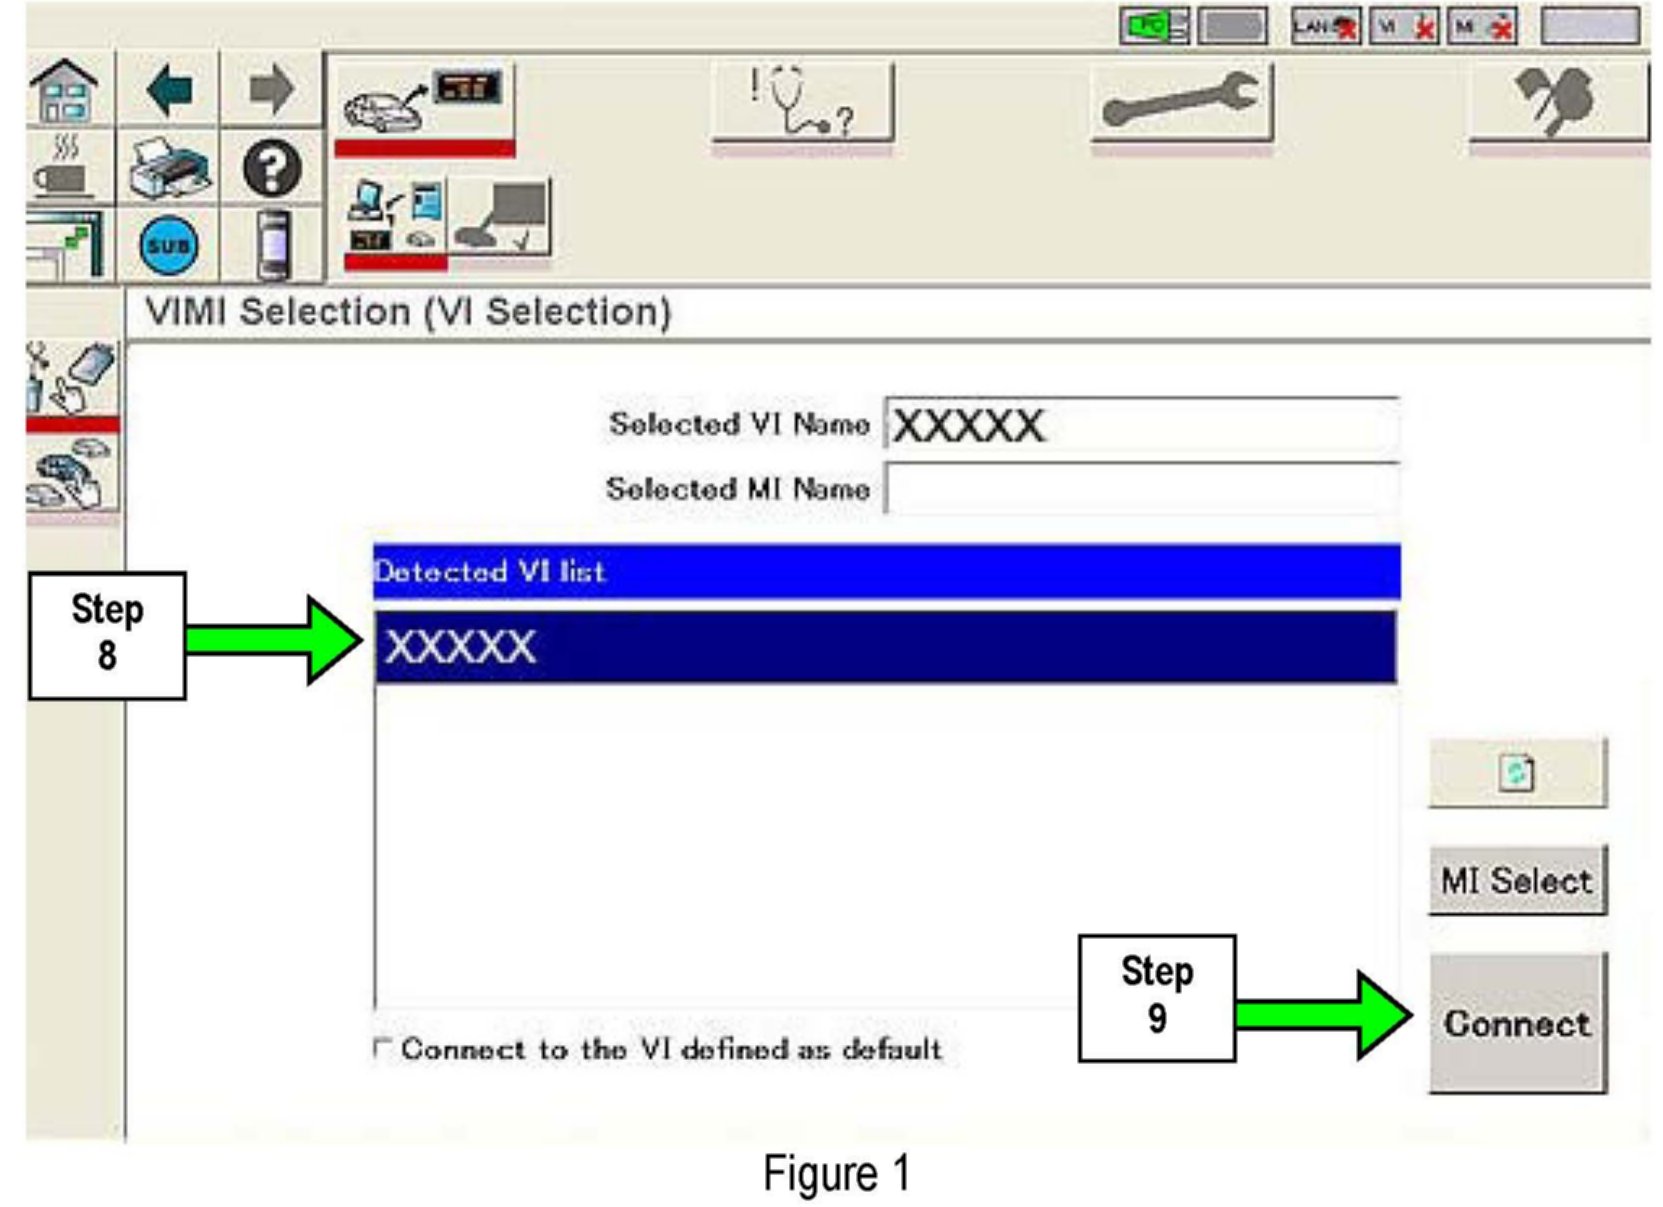
8. Select the detected VI from the list. (See Figure 1.)
9. Select Connect. (See Figure 1.)
10. Wait for the "Checking the firmware version" message to clear.
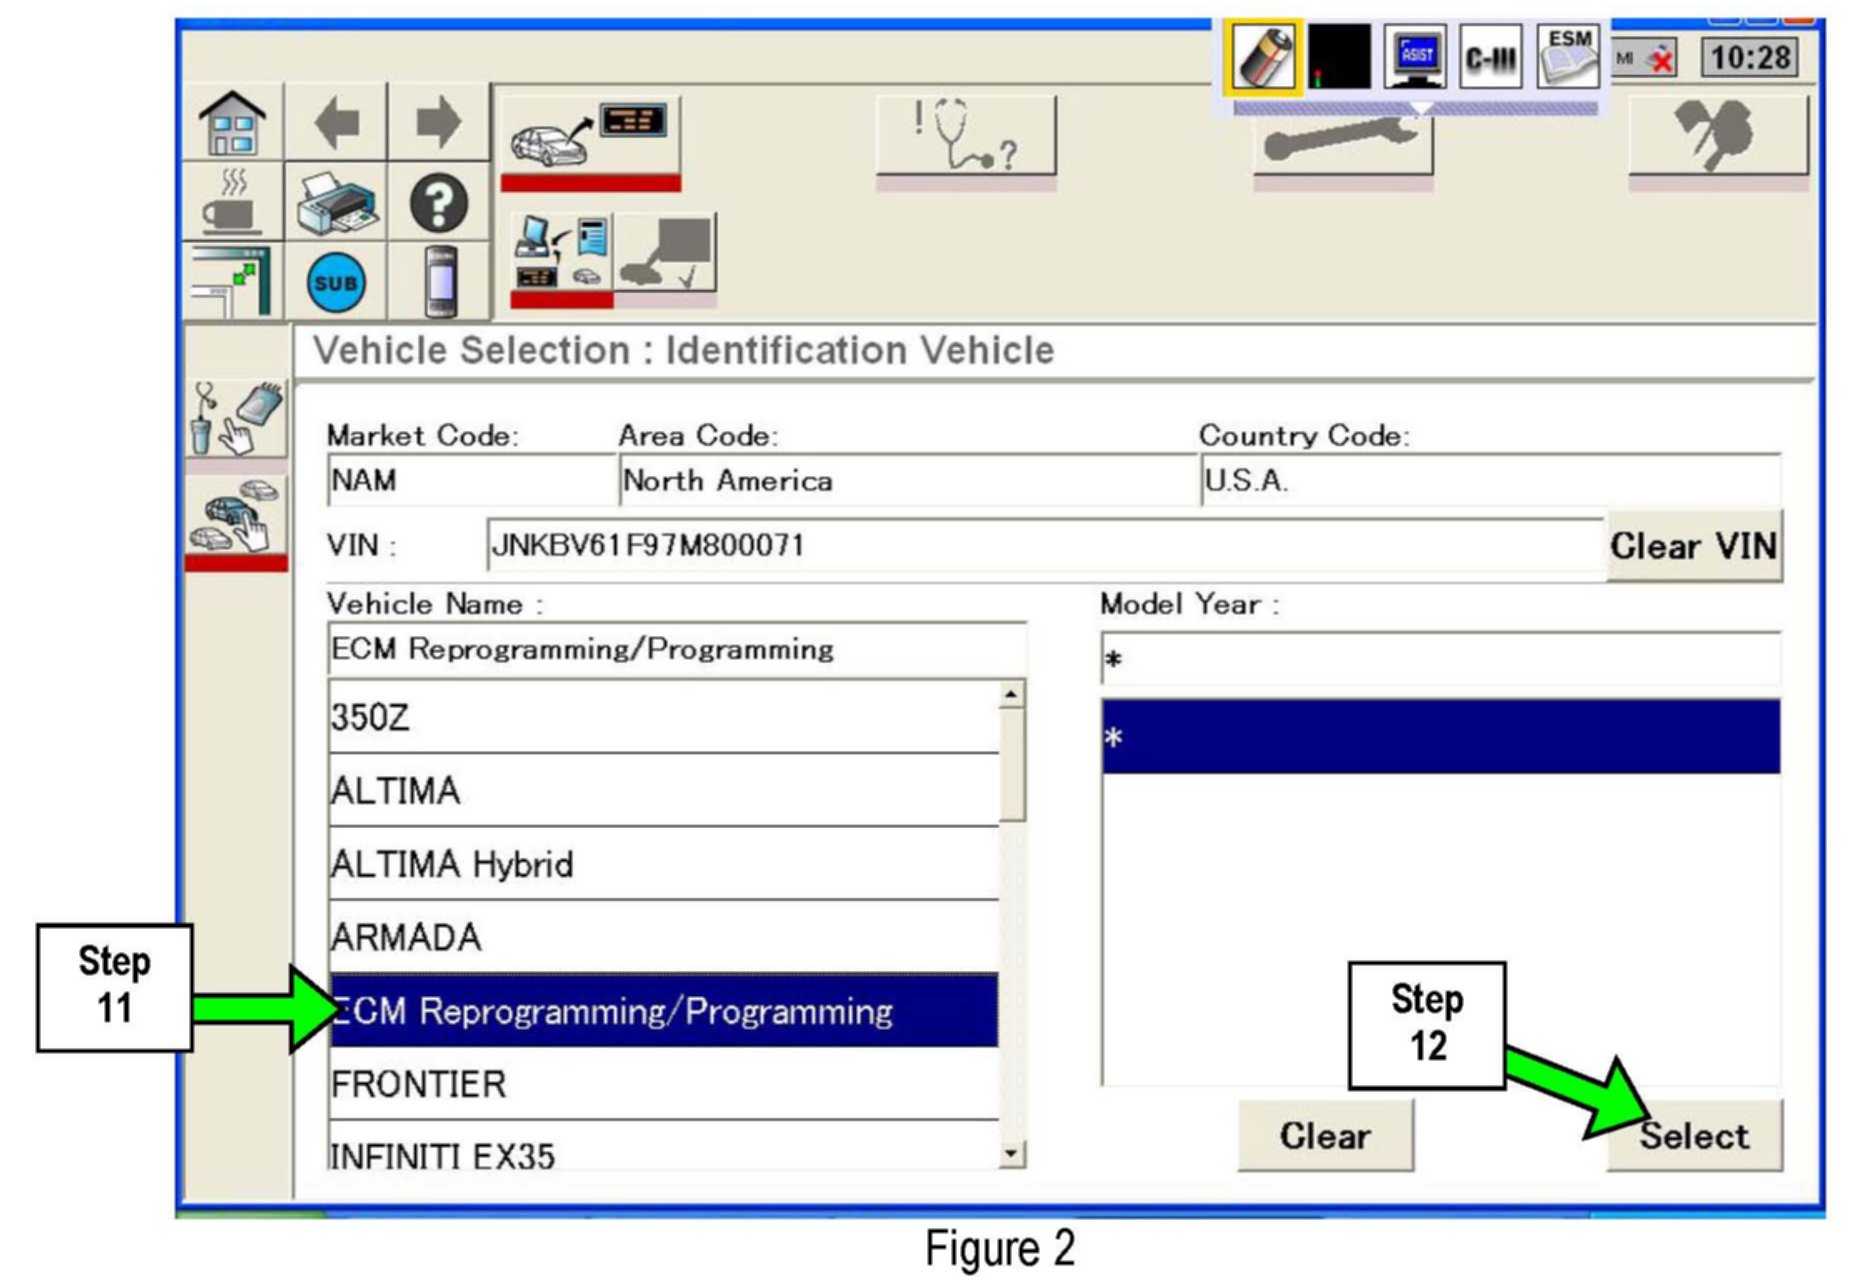
11. Select ECM reprogramming / Programming (see Figure 2).
12. Select Select.
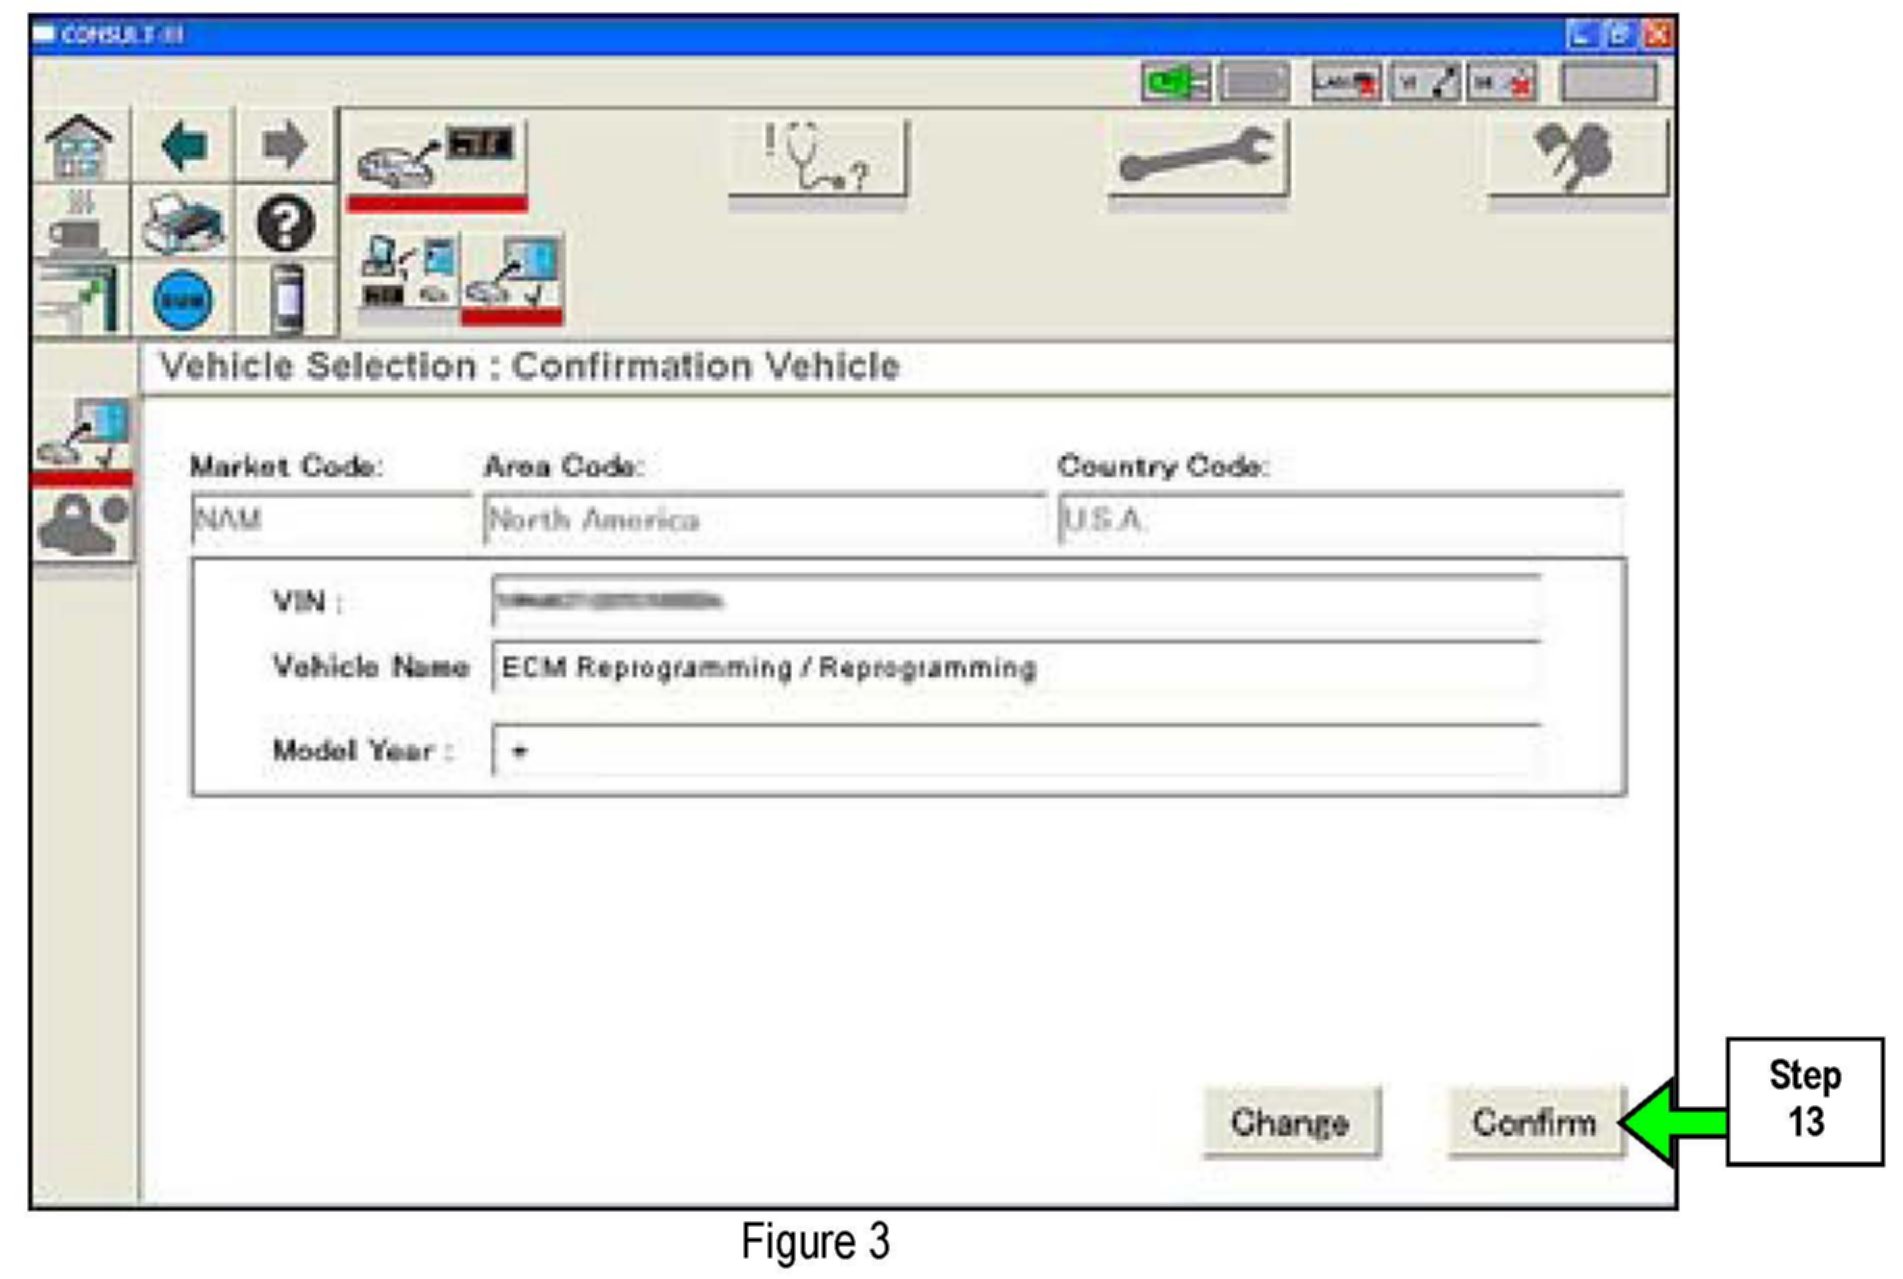
13. Select Confirm.
14. Wait for System Call and ECM Diagnosis to complete.
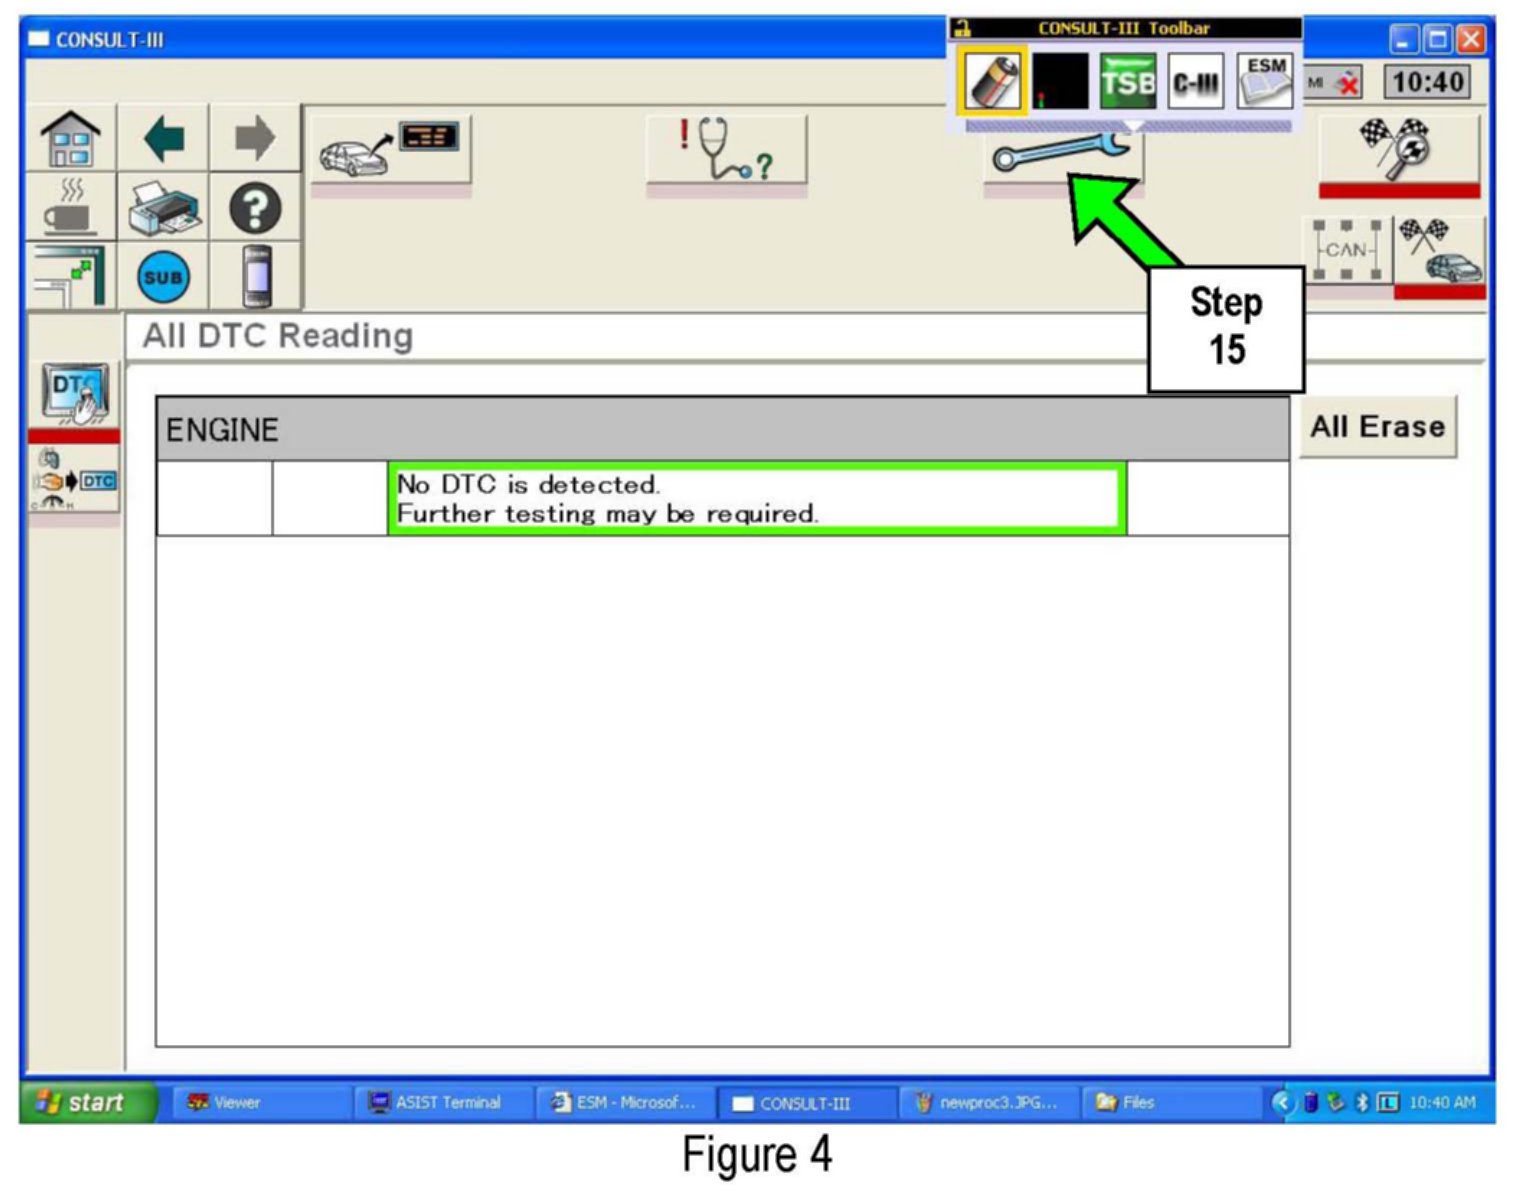
15. If there are no DTC detected, select the "Repair" wrench symbol (see Figure 4).
NOTE:
Repair any DTCs before continuing with reprogramming. Use standard Warranty procedures. Repairs for DTCs are not covered by this bulletin.
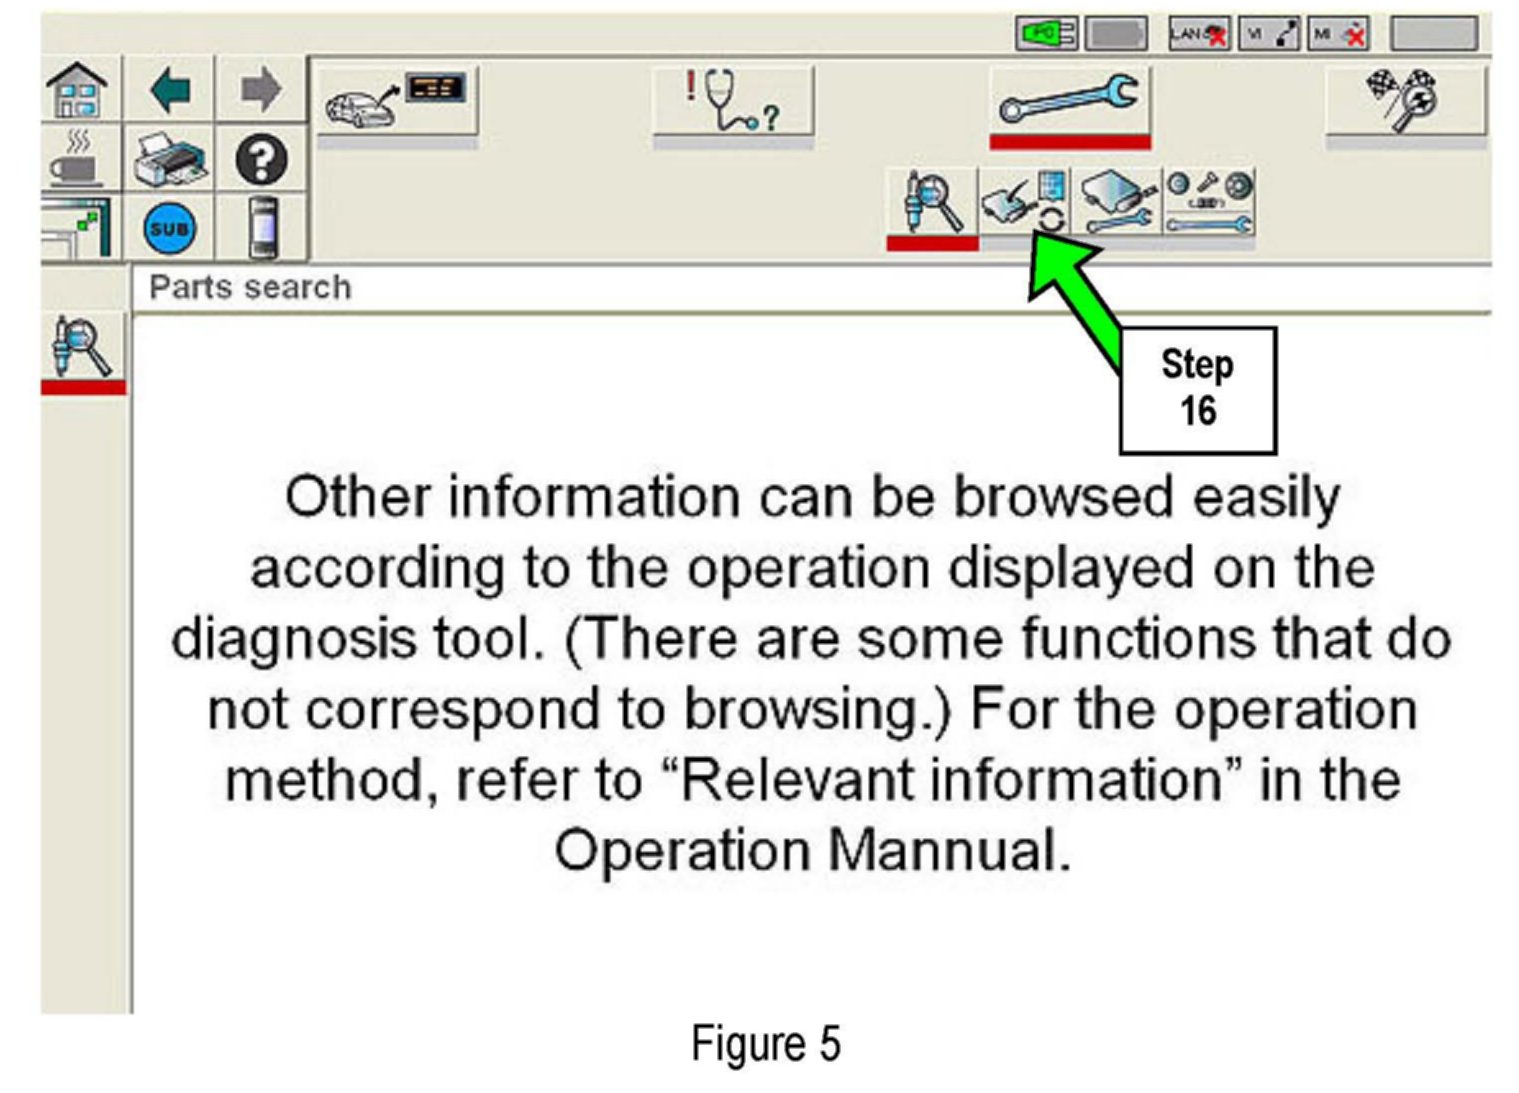
16. Select the "ECM Reprogram" symbol. (See Figure 5.)
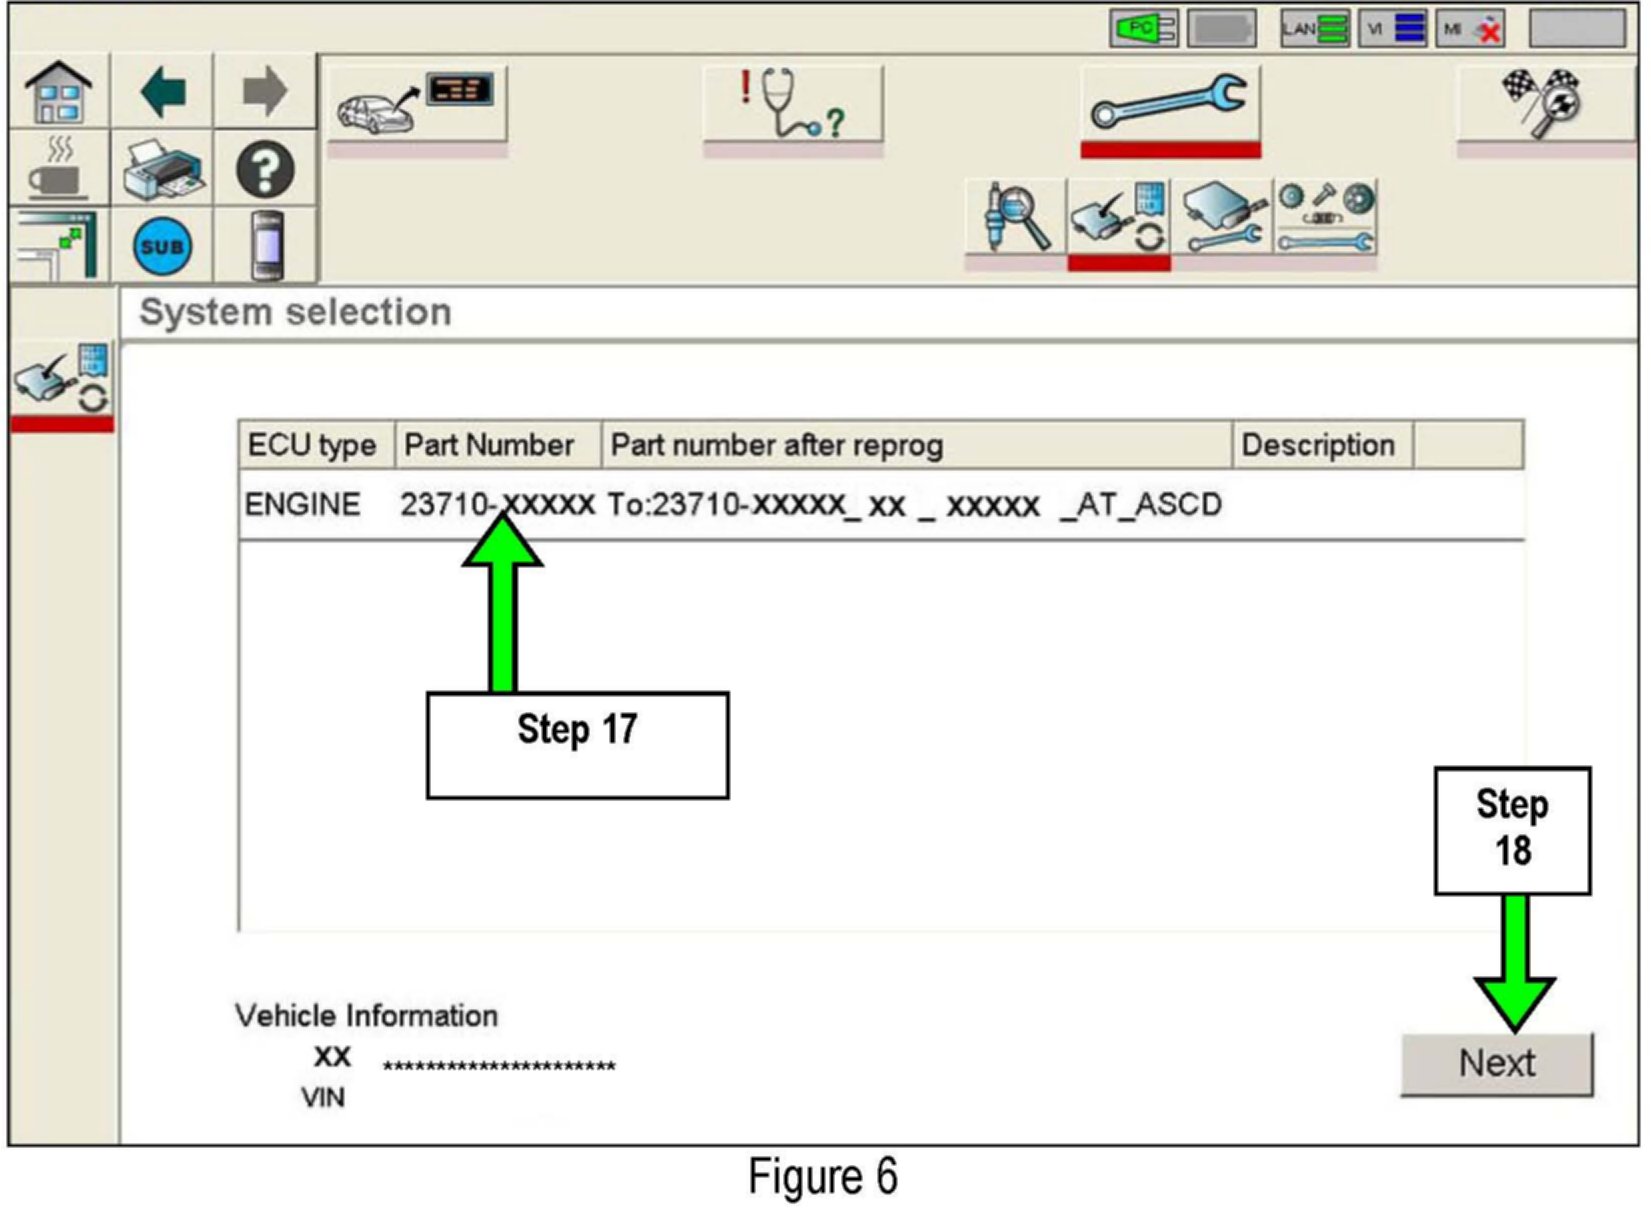
17. Refer to Figure 6 and your C-III screen.
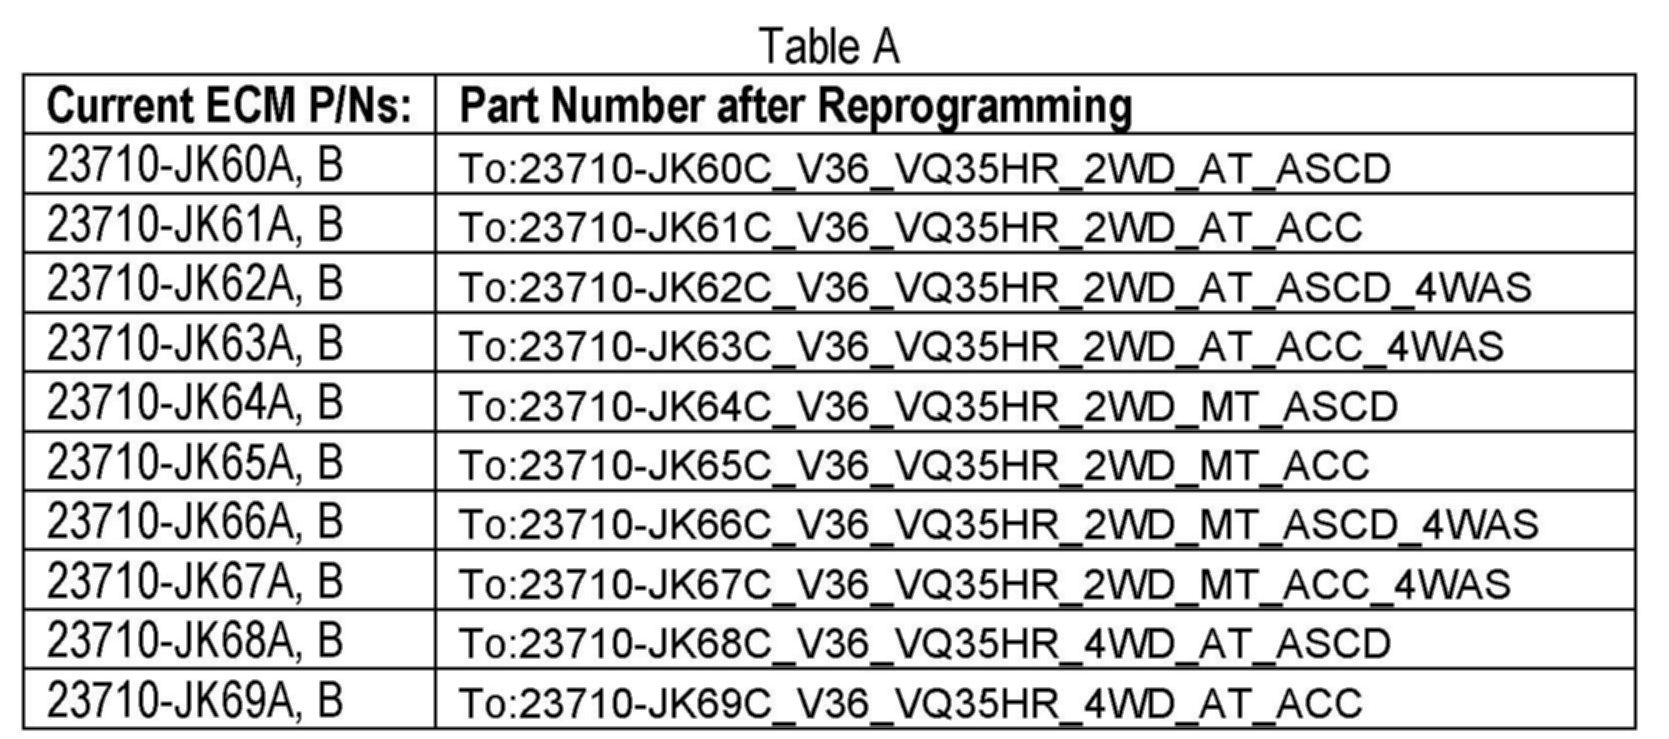
^ If the number in the Part Number column matches one from the Current ECM P/Ns column in Table A below, this bulletin applies.
a. Write the Current ECM P/N from C-III on the Repair Order for future warranty reference.
b. Click on the Part Number line then continue to Step 18.
^ If the number in the Part Number column does not match one from the Current ECM column in Table A or the Part Number line is blank, this bulletin does not apply. Close C-III and refer to ASIST for further diagnostic information.
18. Select Next (see Figure 6).
NOTE:
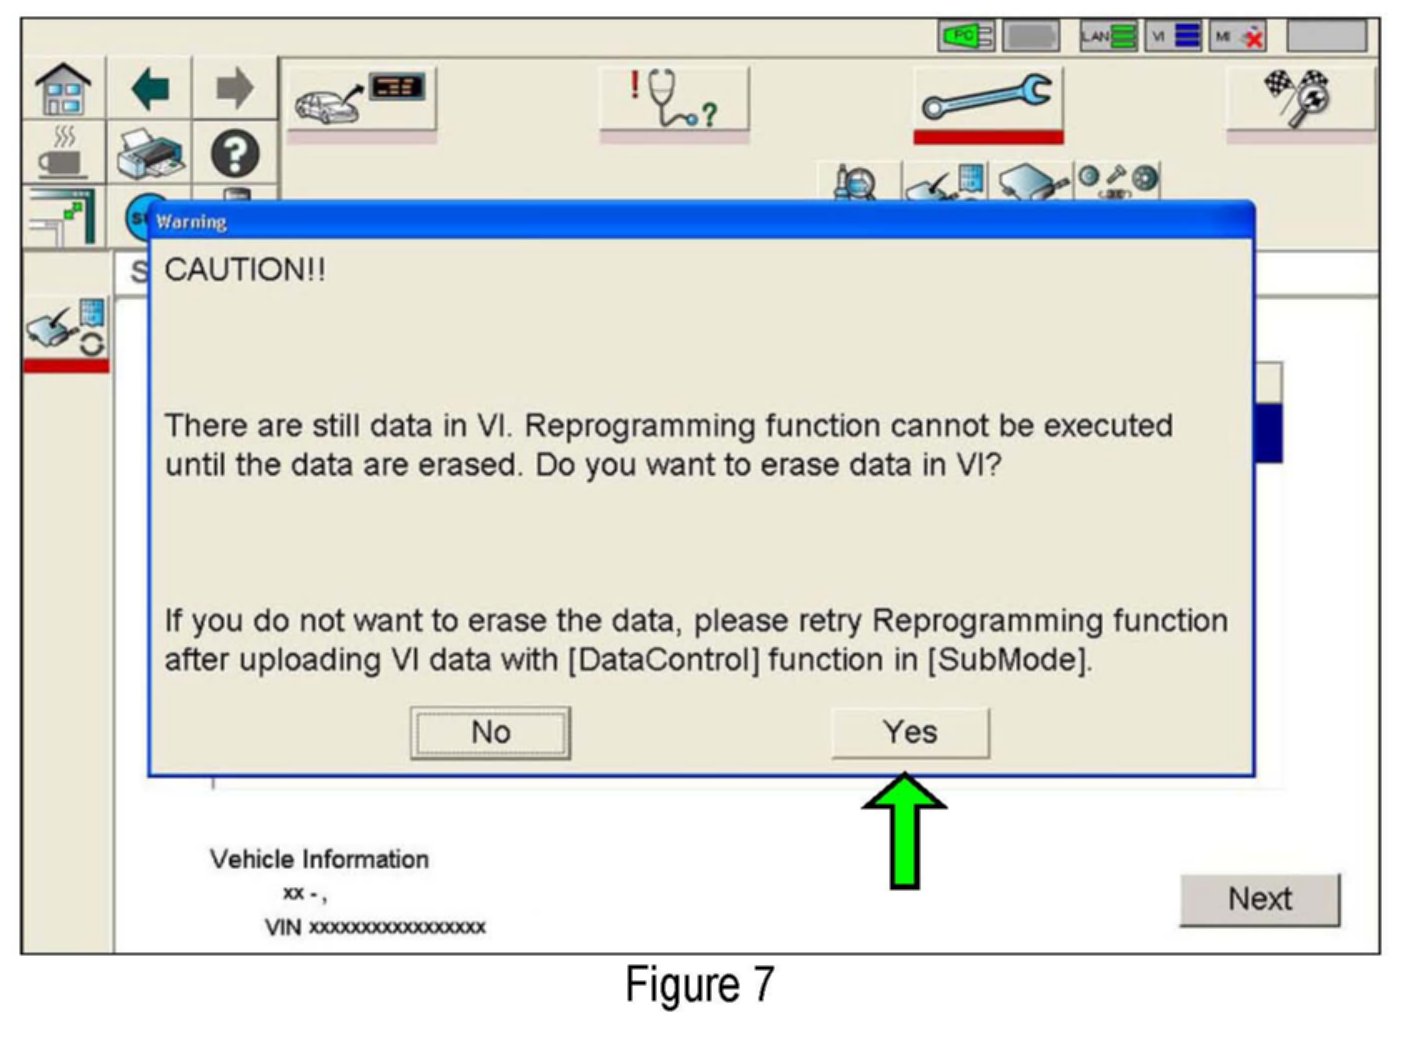
If the screen in Figure 7 appears, there is data stored in the VI. Select "Yes" to proceed with Reprogramming.
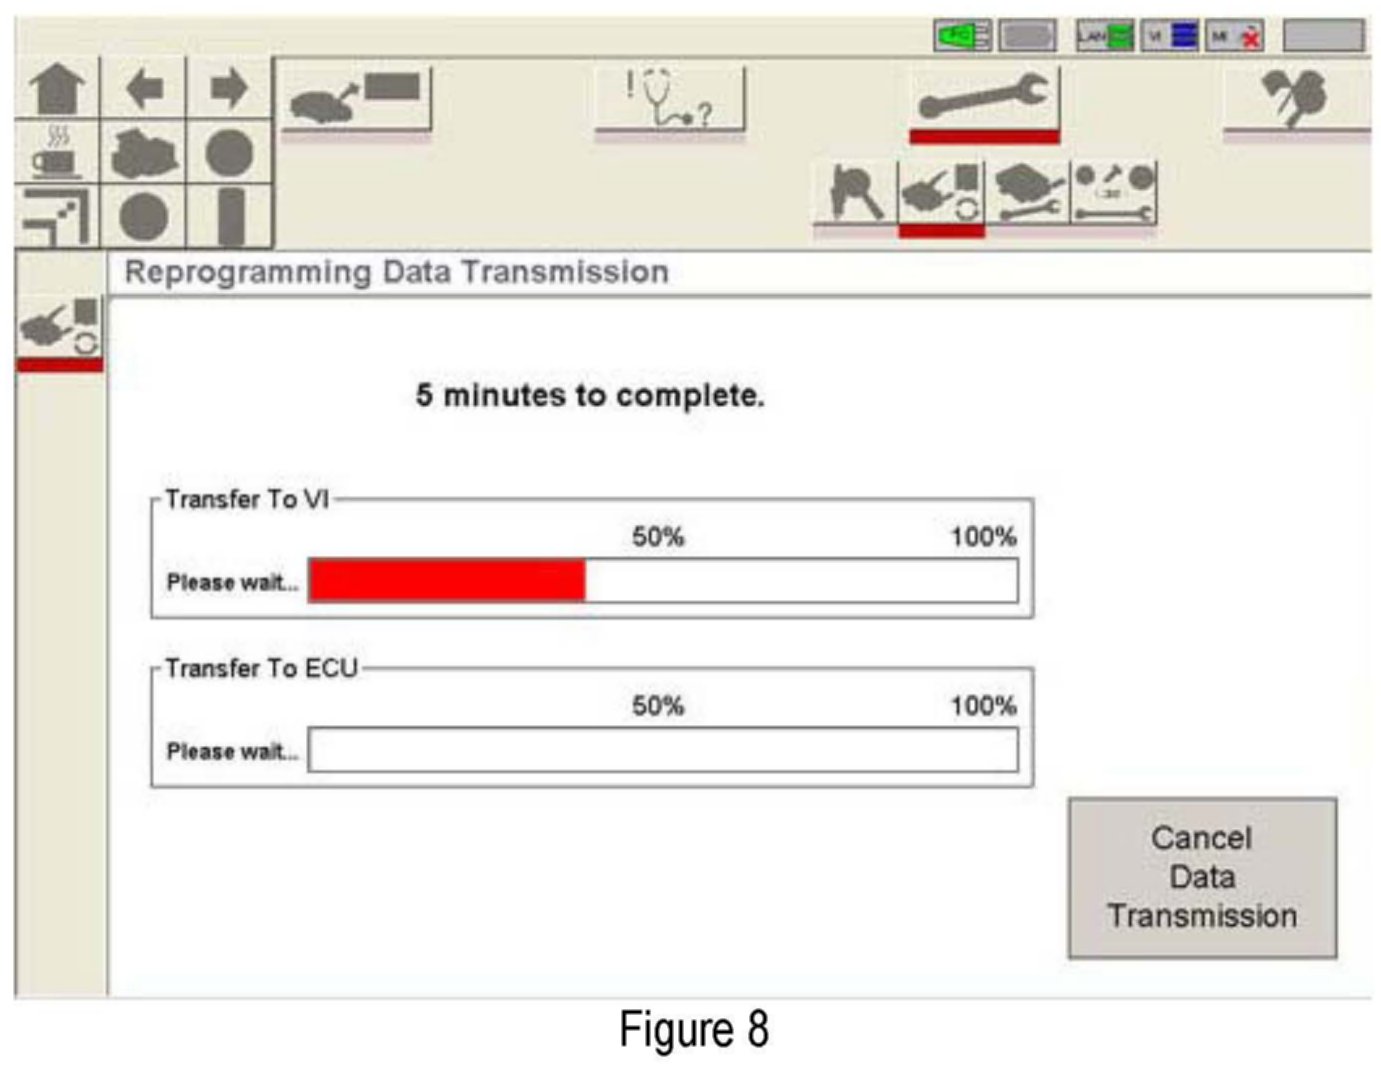
19. The screen in Figure 8 shows during data transfer.
CAUTION:
During data transfer, DO NOT:
^ Disturb the VI, DDL, or USB connections.
^ Try to start the engine or turn the ignition OFF.
^ The engine fans may turn on. This is normal.
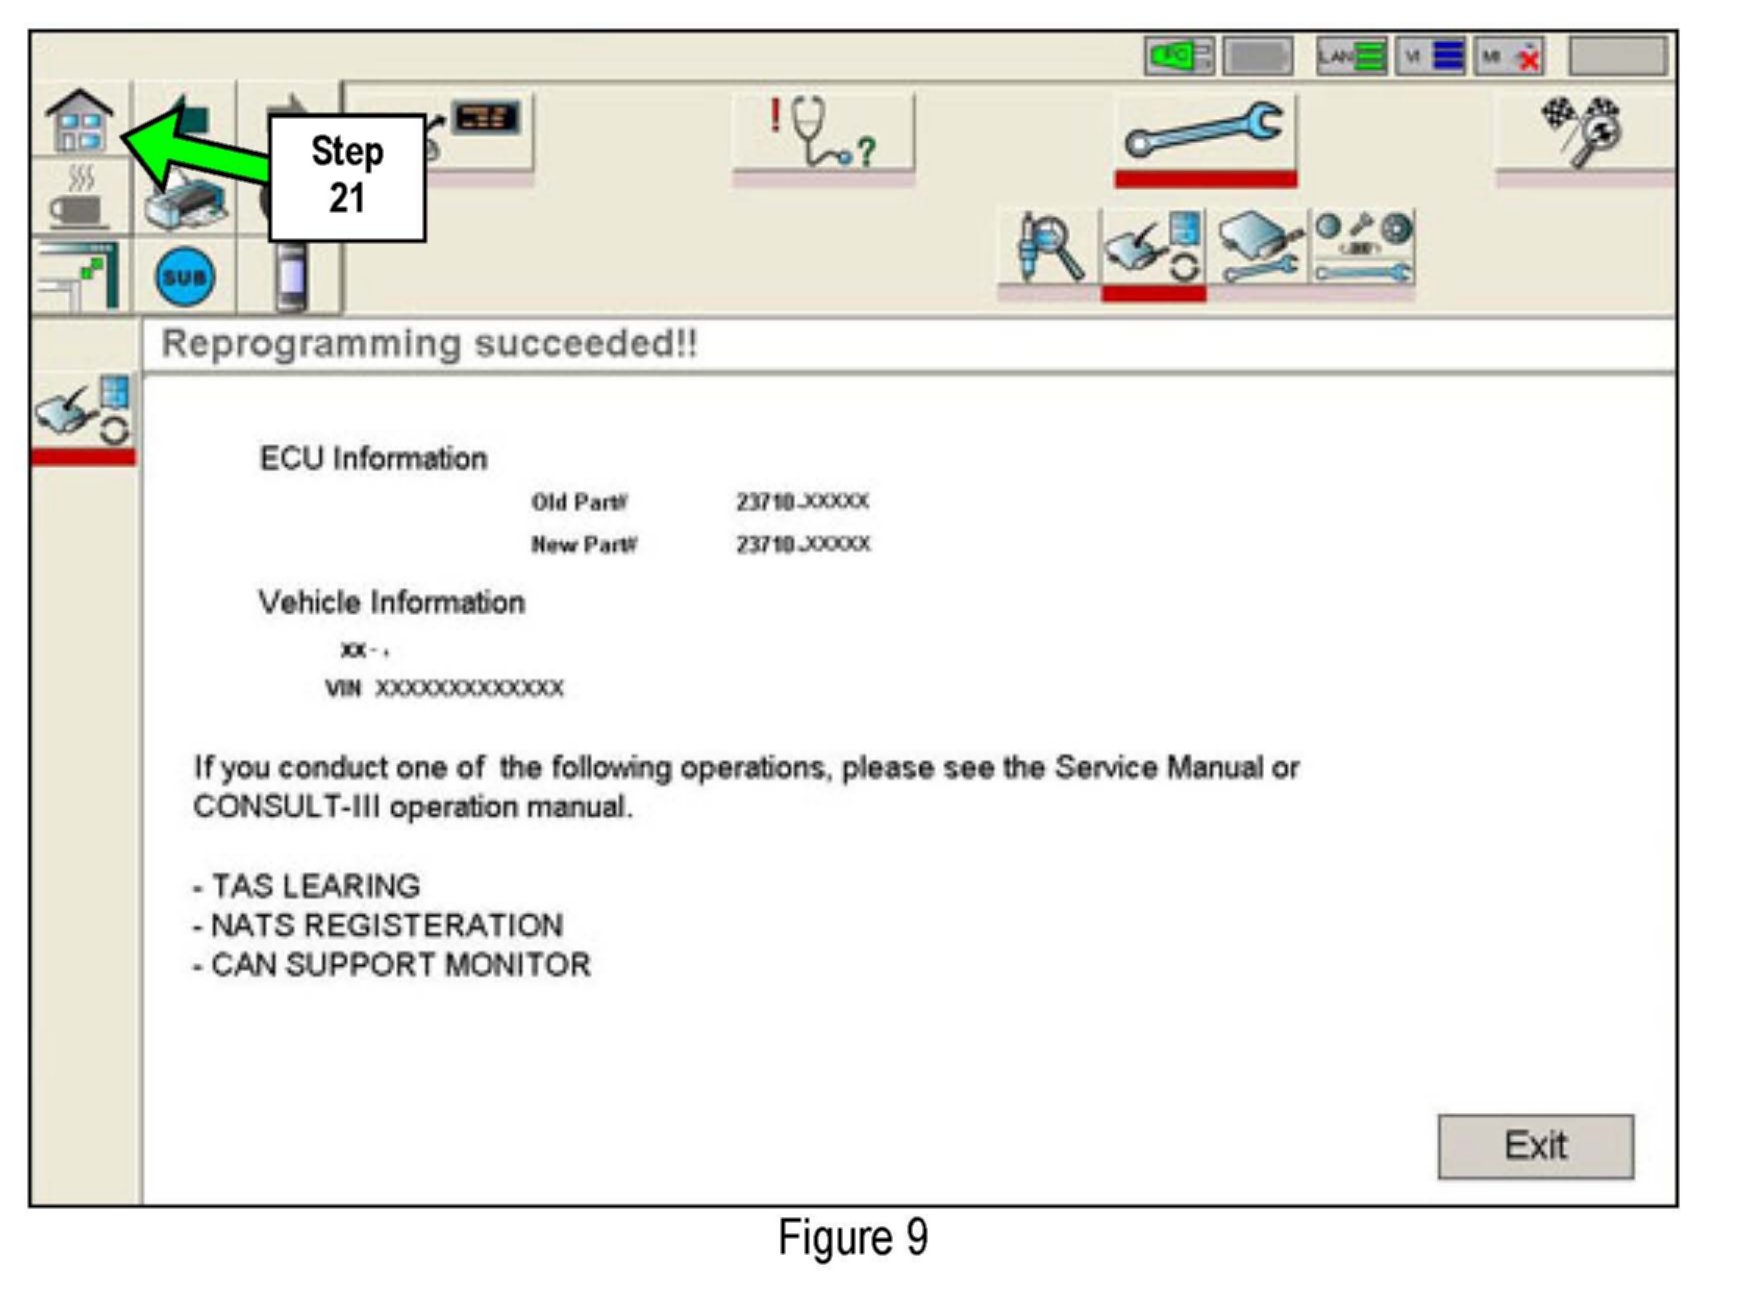
20. When the screen in Figure 9 appears, ECM reprogramming is complete. Print this page and attach it to the Repair Order for Warranty documentation.
NOTE:
During the reprogramming DTCs will set in several systems. DTCs must be erased from all systems.
Erase DTCs from all systems
21. Click on the "Home" icon (see Figure 9).
22. Wait for the "Detecting VI/MI in progress" message to clear.
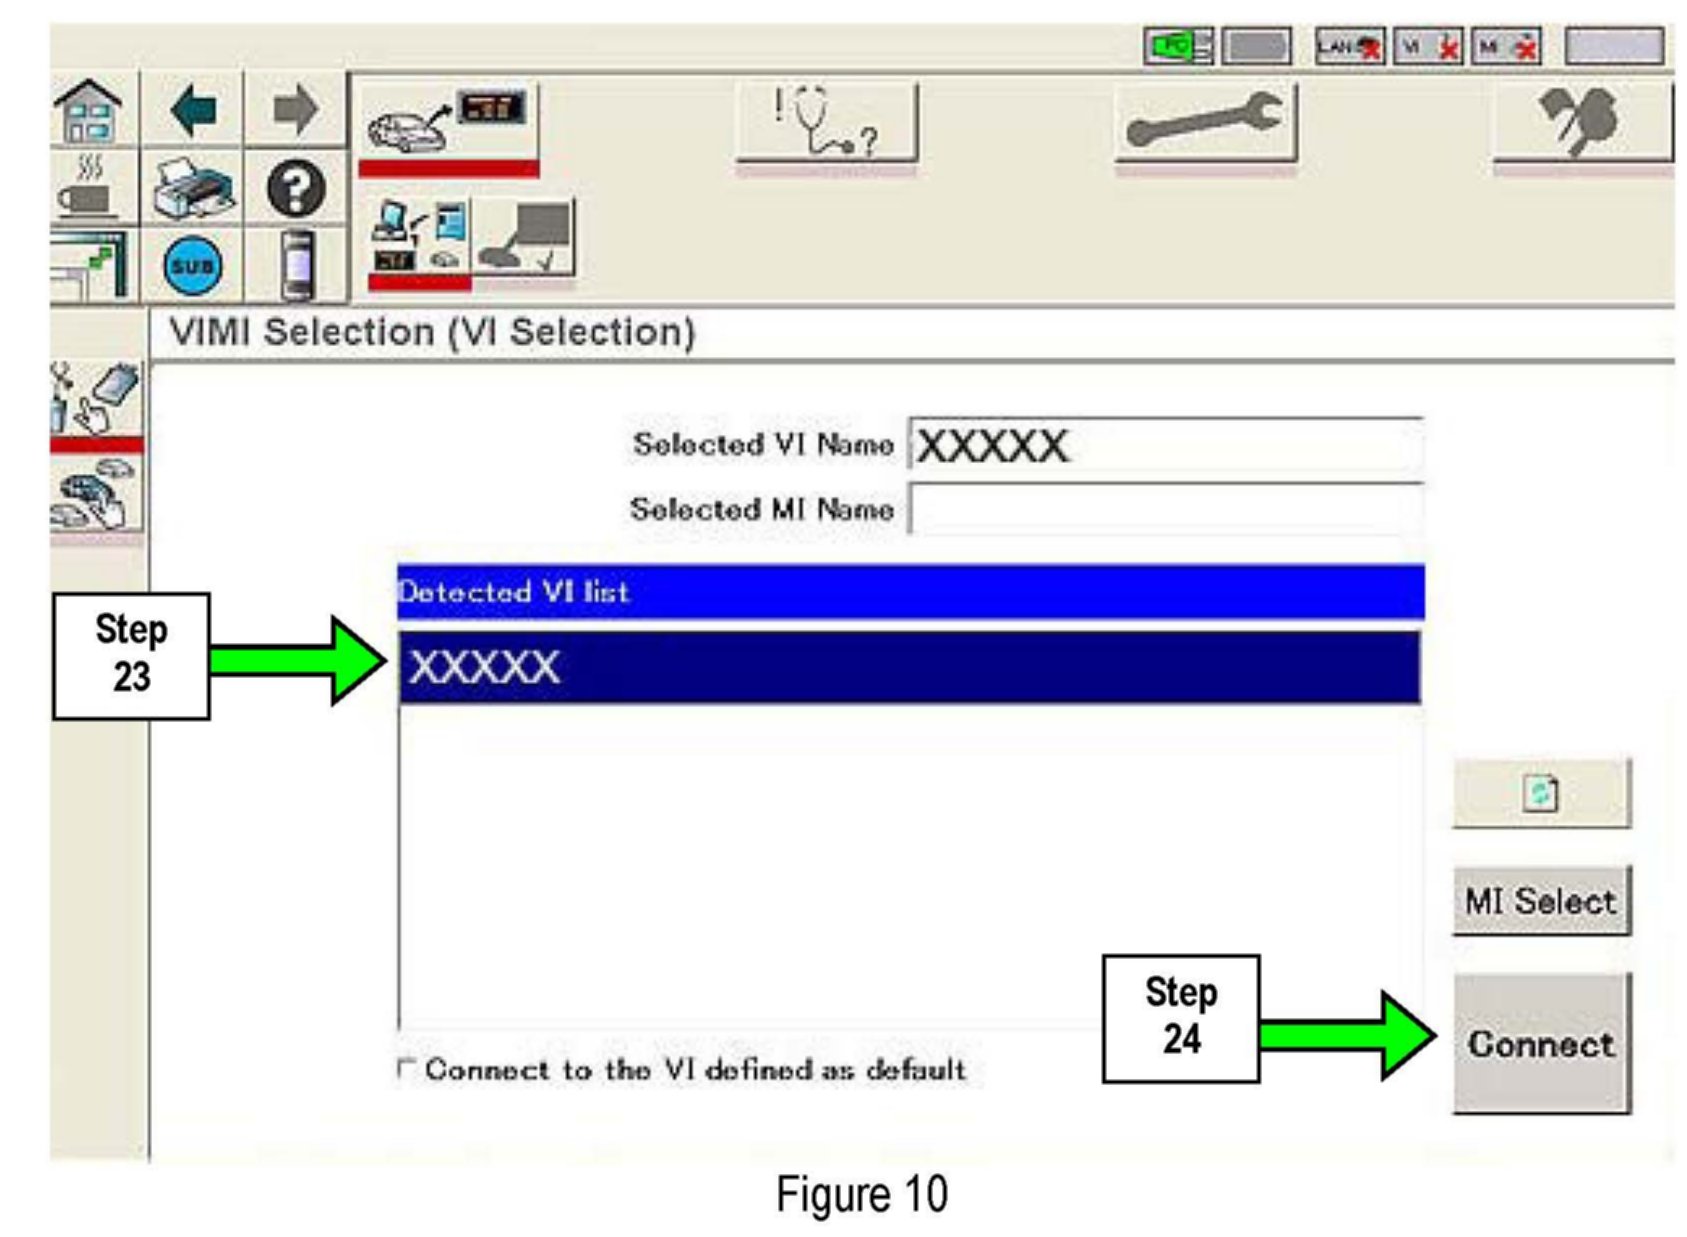
23. Select the detected VI from the list. (See Figure 10.)
24. Select Connect.
25. Wait for the "Checking the firmware version" message to clear.
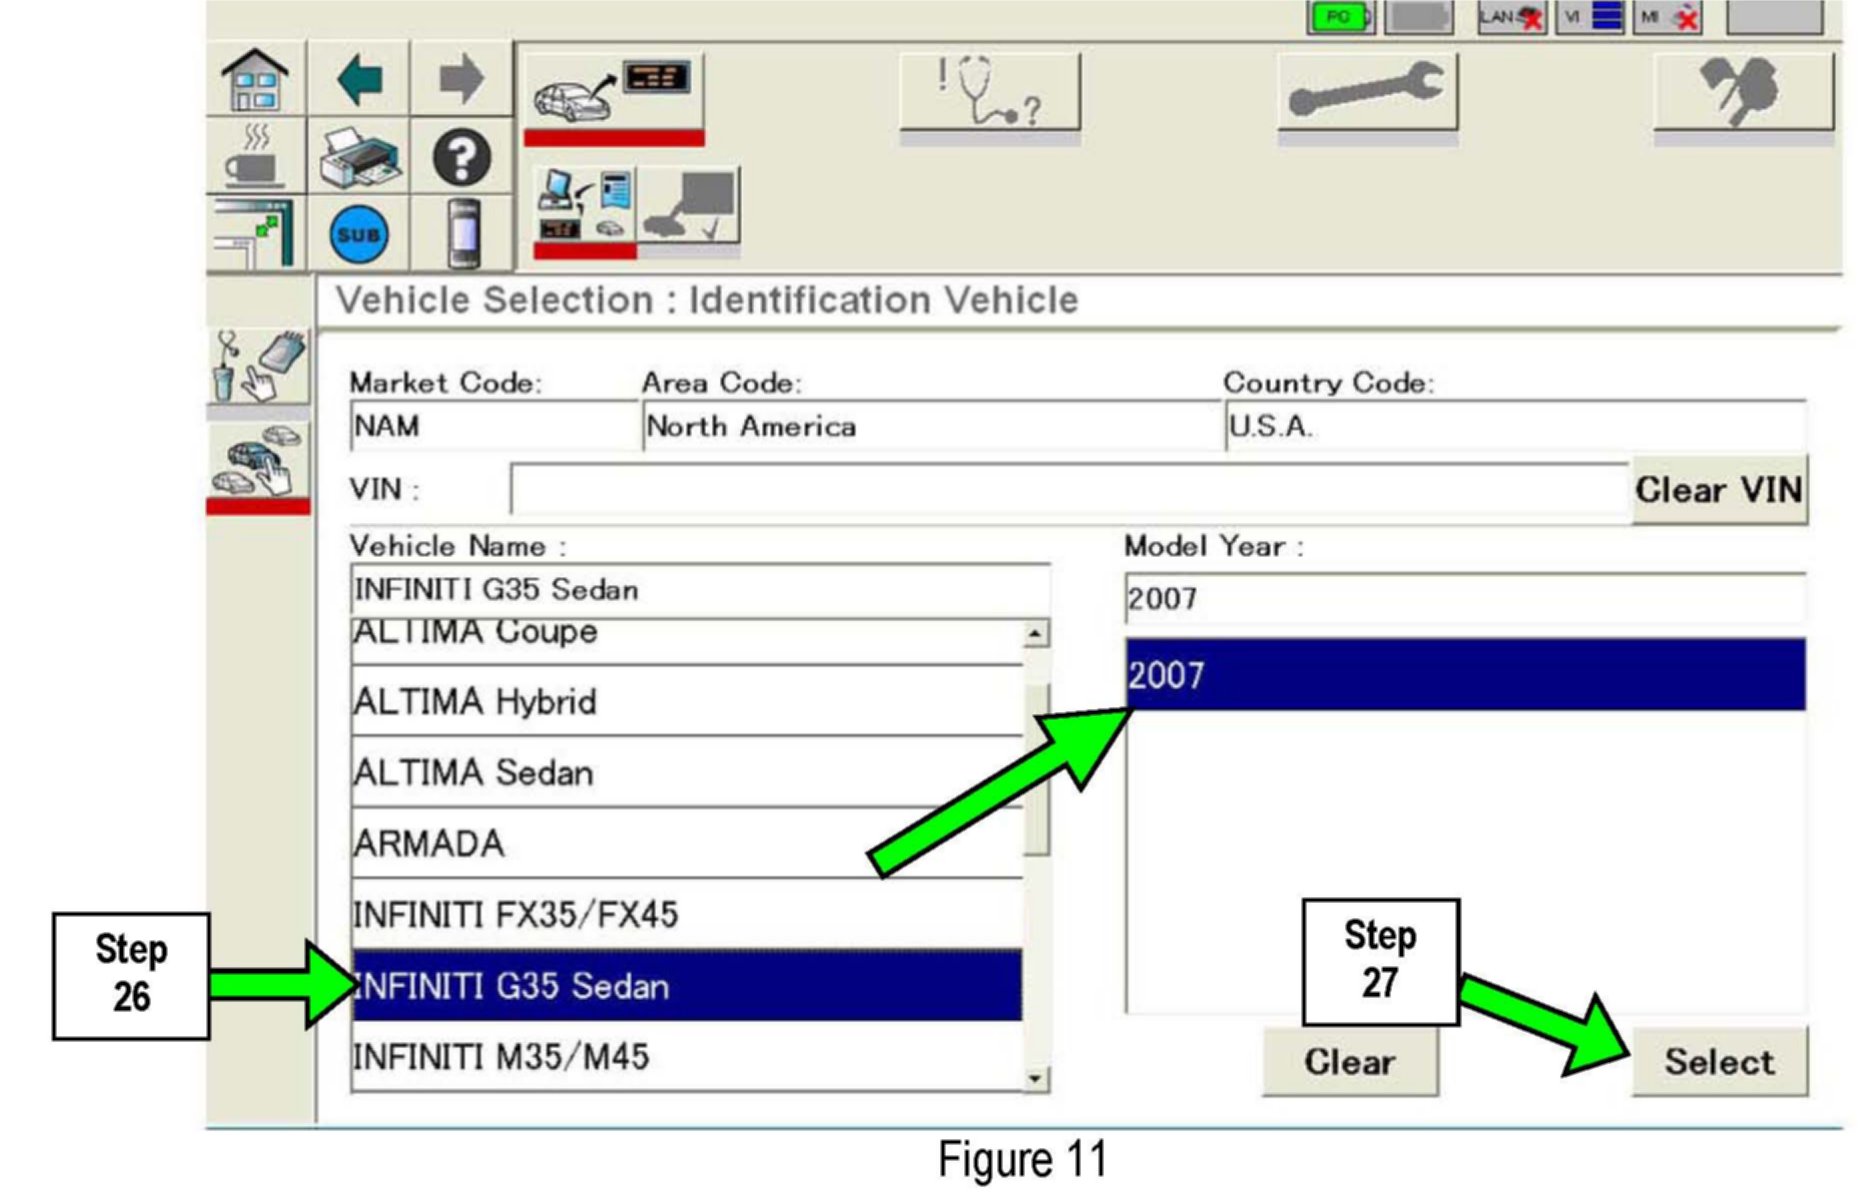
26. Select the correct vehicle from the list (see Figure 11 example).
27. Select Select.
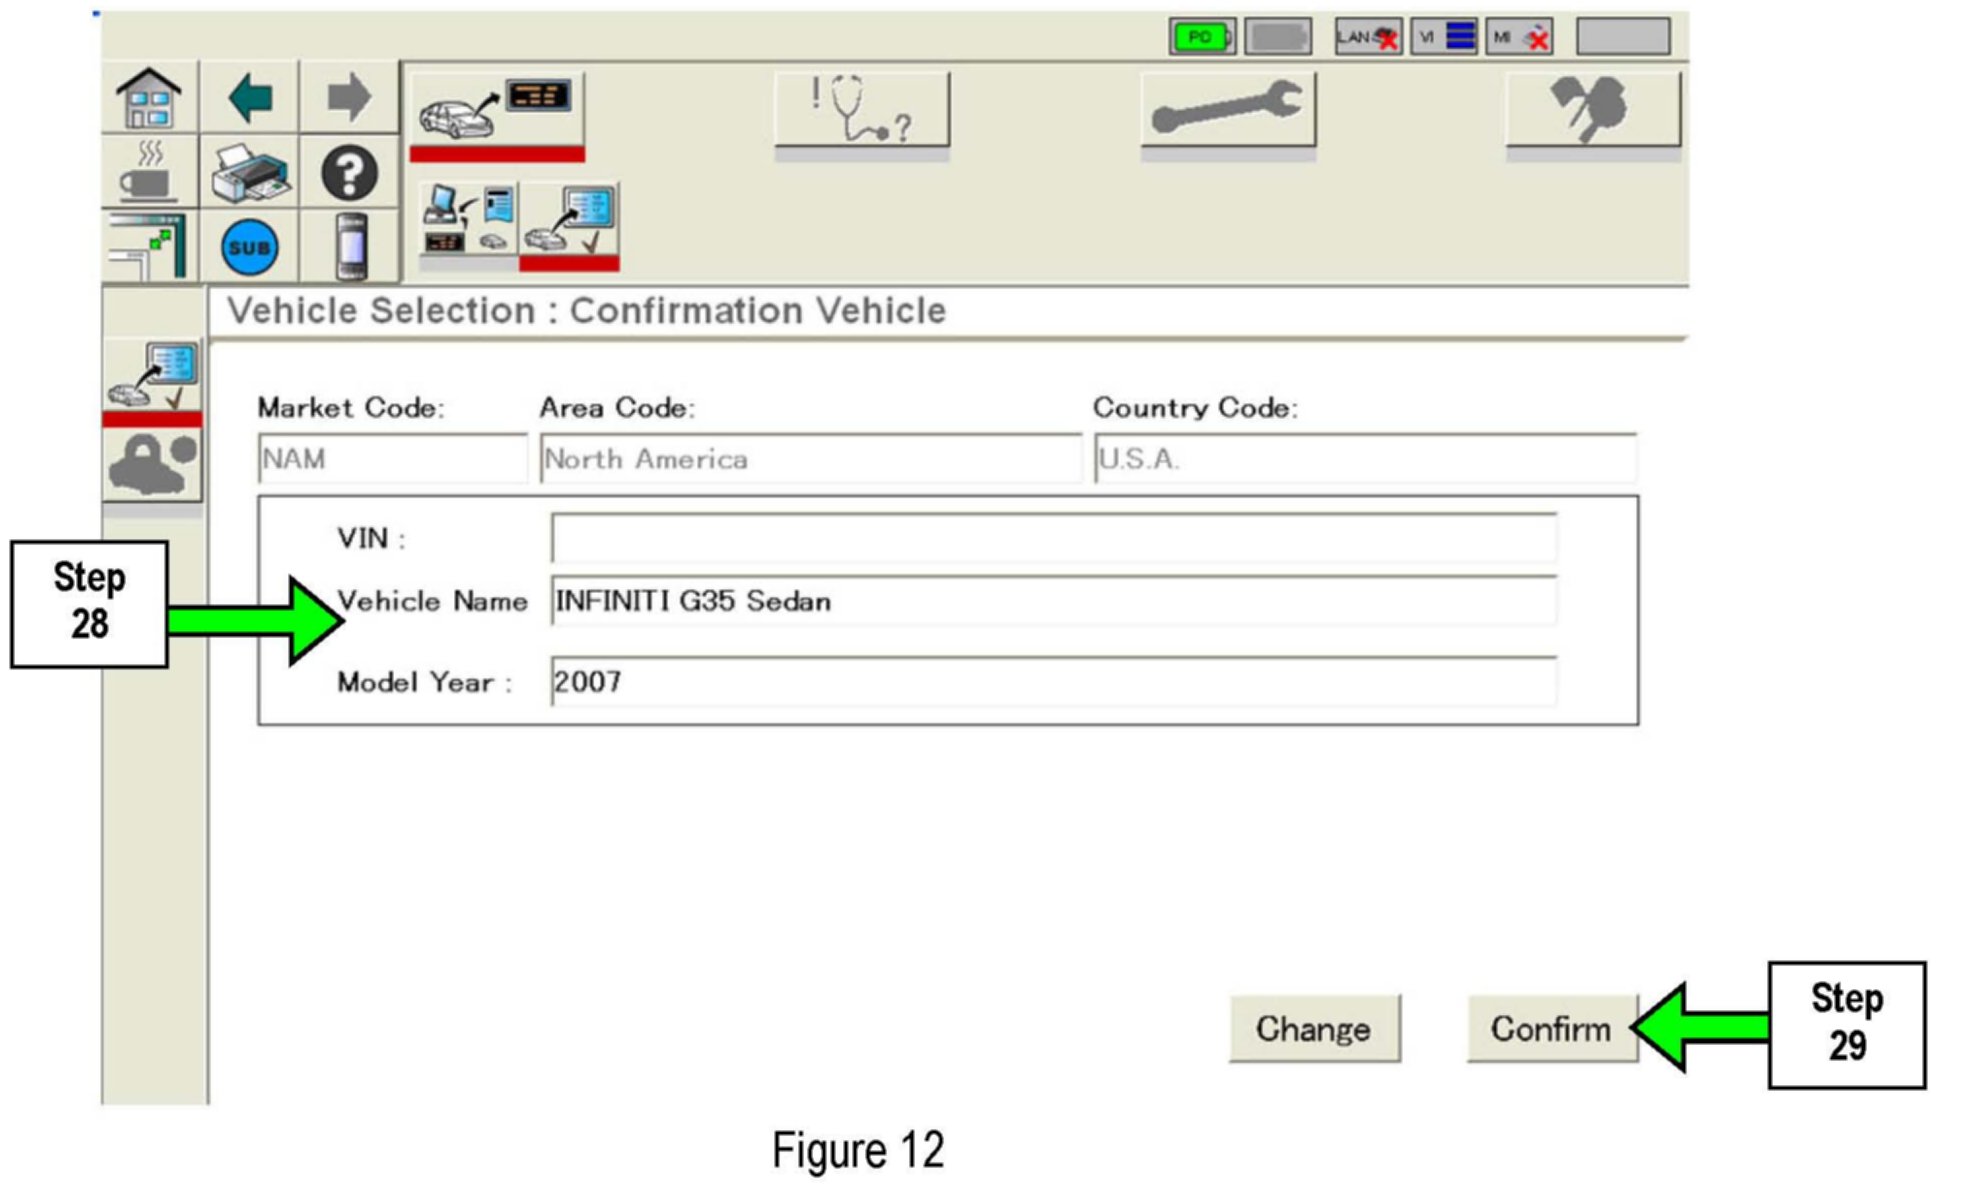
28. Make sure the correct vehicle is displayed (see Figure 12).
29. Select Confirm.
30. Wait for System Call and Diagnosis to complete.
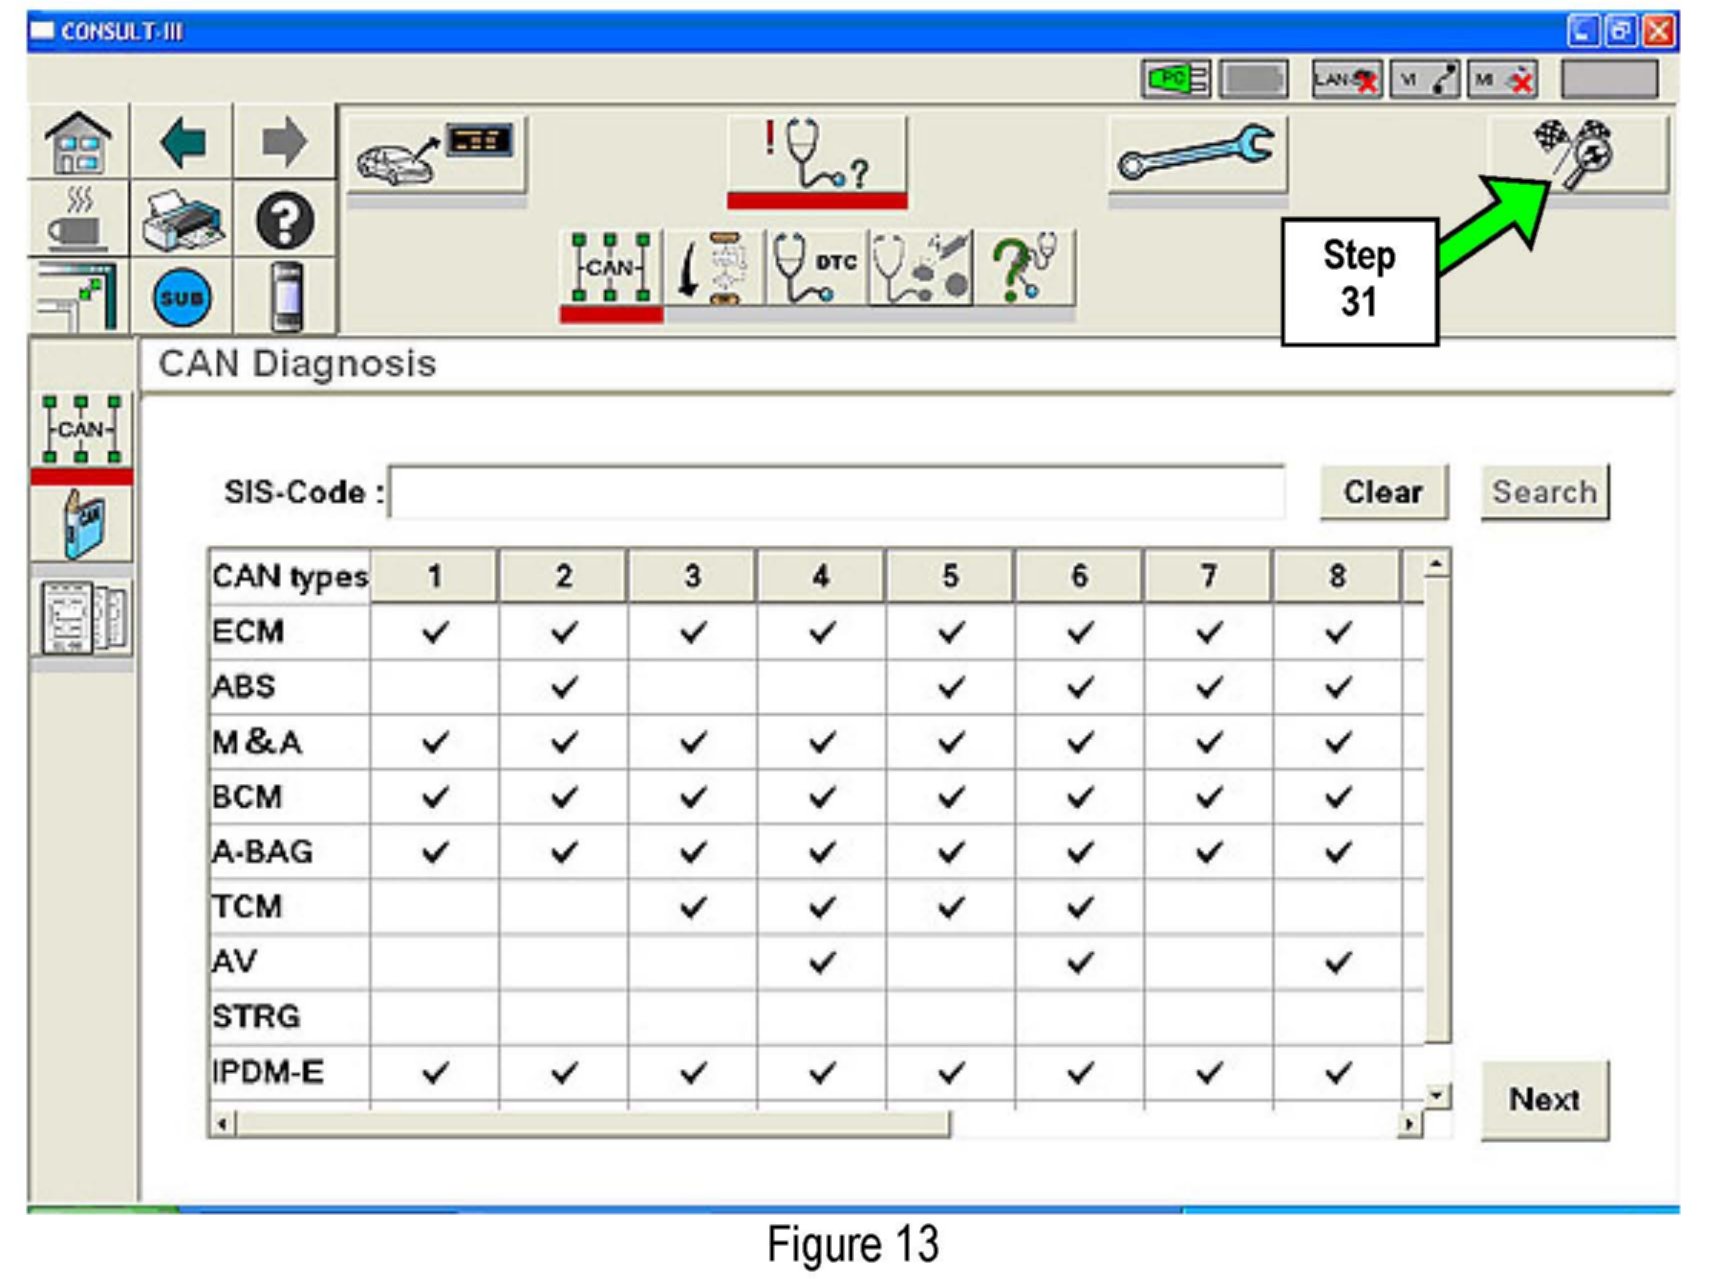
31. When the screen in Figure 13 appears, click on the "Final Check" icon.
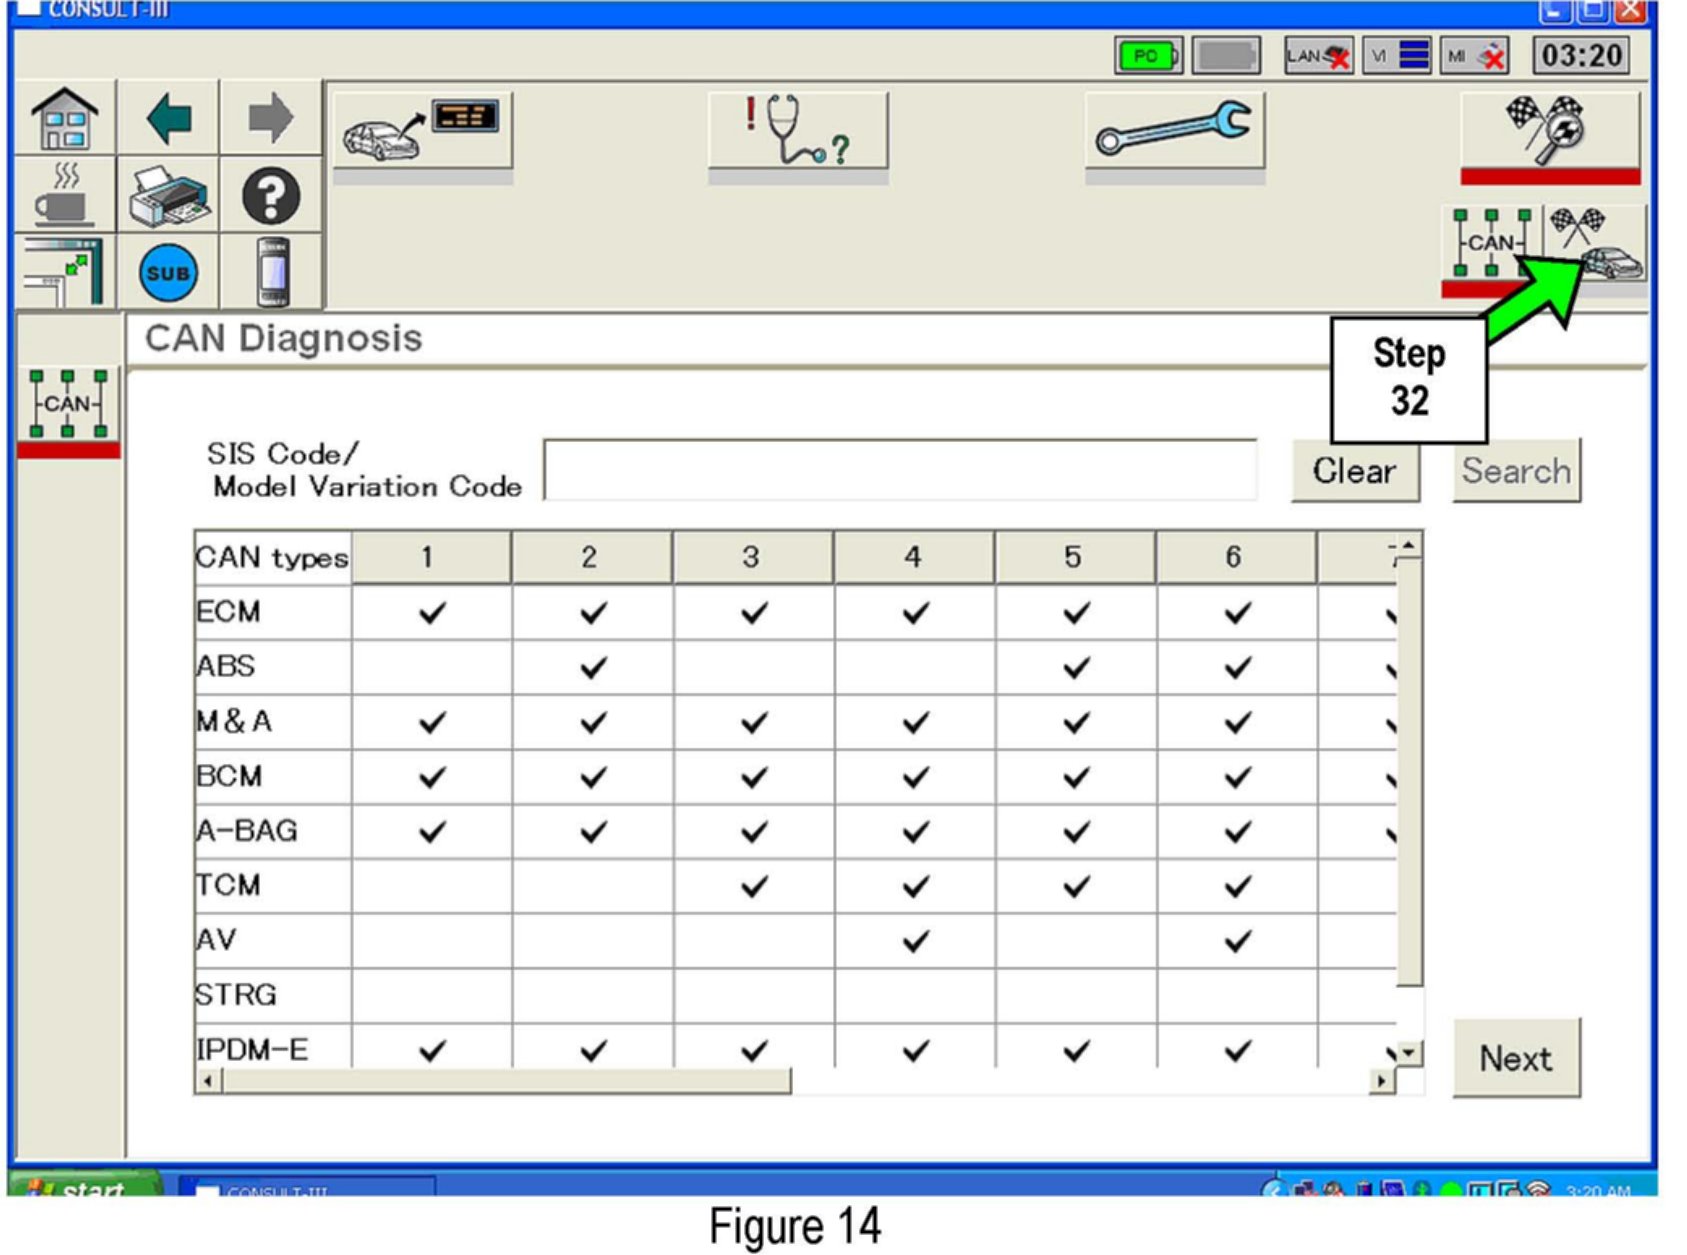
32. CAN diagnosis will run again. When complete click on the "Duplication Test" icon.
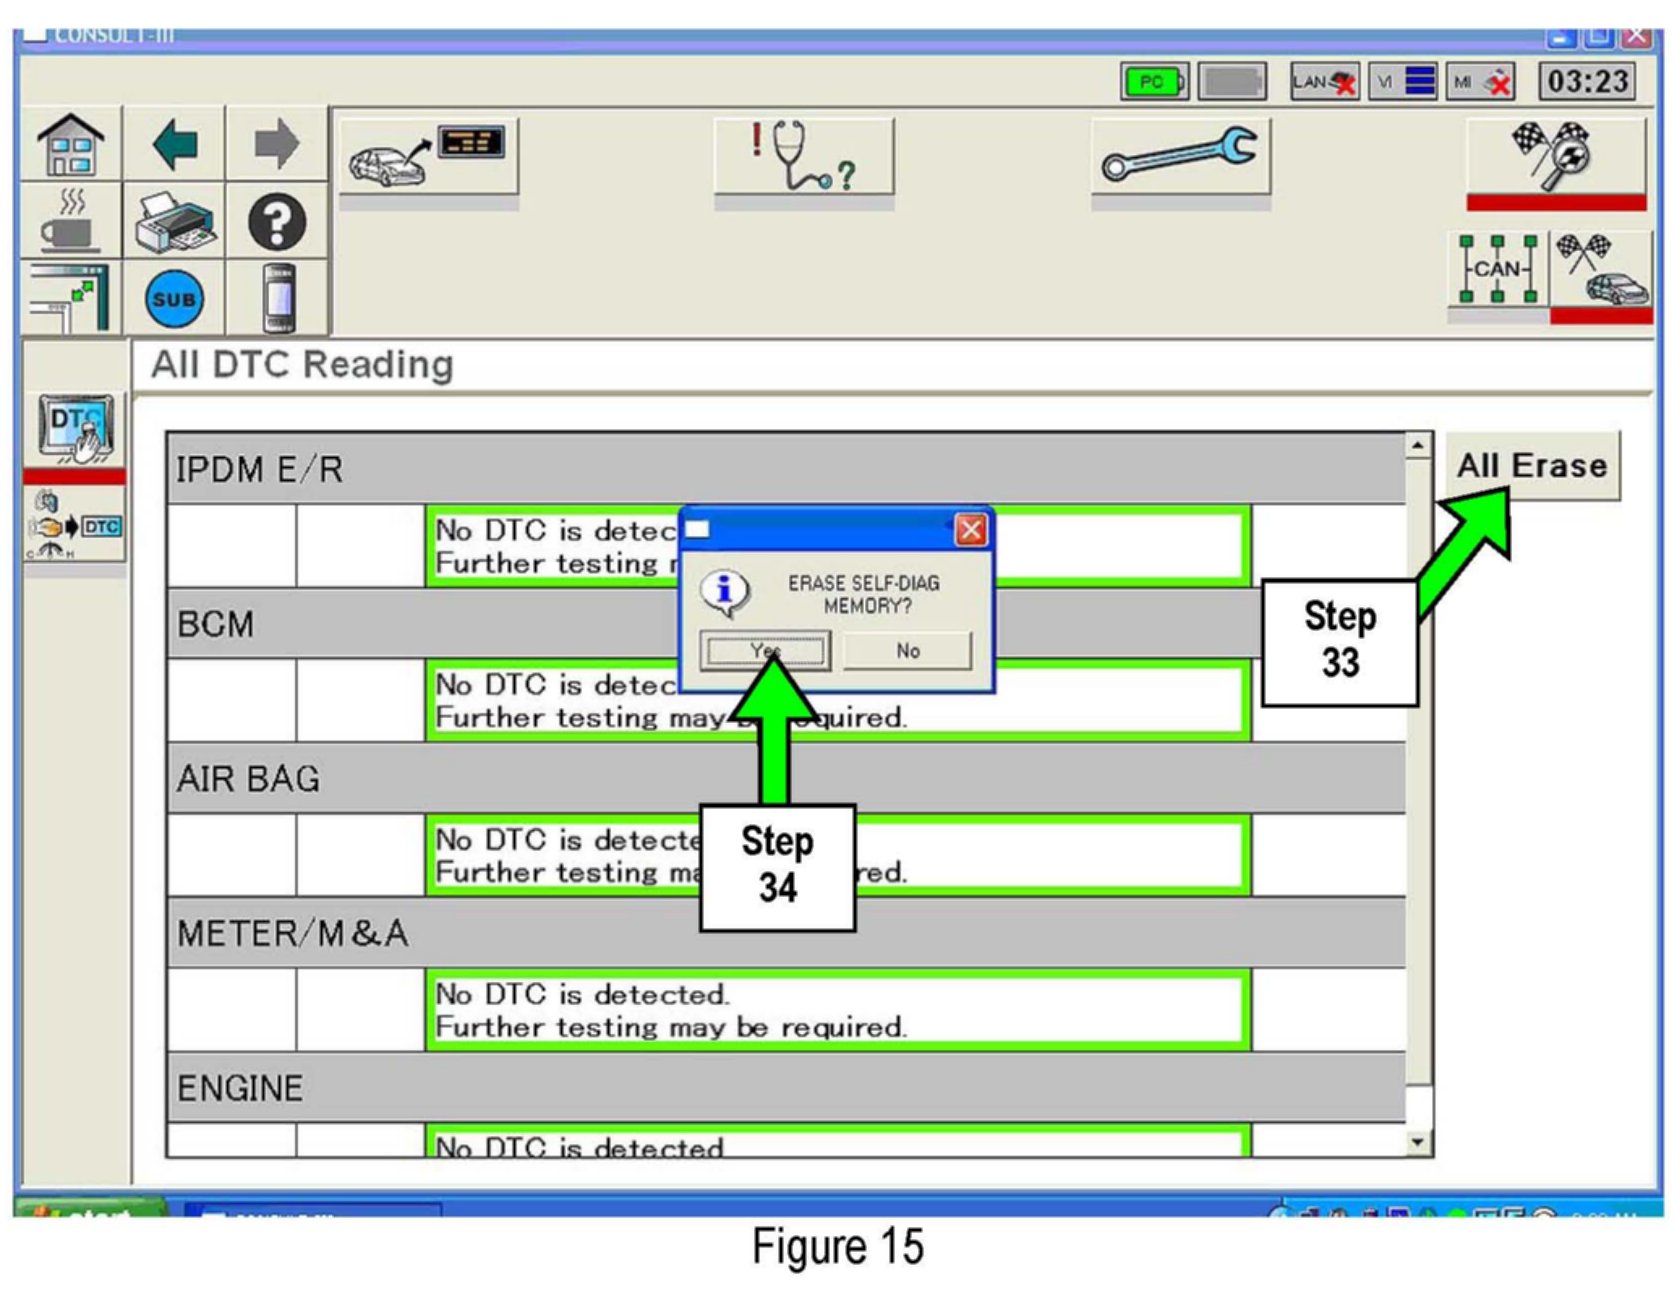
33. When the screen in Figure 15 appears, click on All Erase.
34. Click on Yes.
Reprogramming is finished. Continue with the Service Procedure.
35. Close C-III, then turn the ignition "OFF".
36. Wait more than 10 seconds, then with your foot NOT pressing either the brake (A/T) or clutch (M/T) pedal:
a. Turn the ignition "ON" for 2 seconds, then
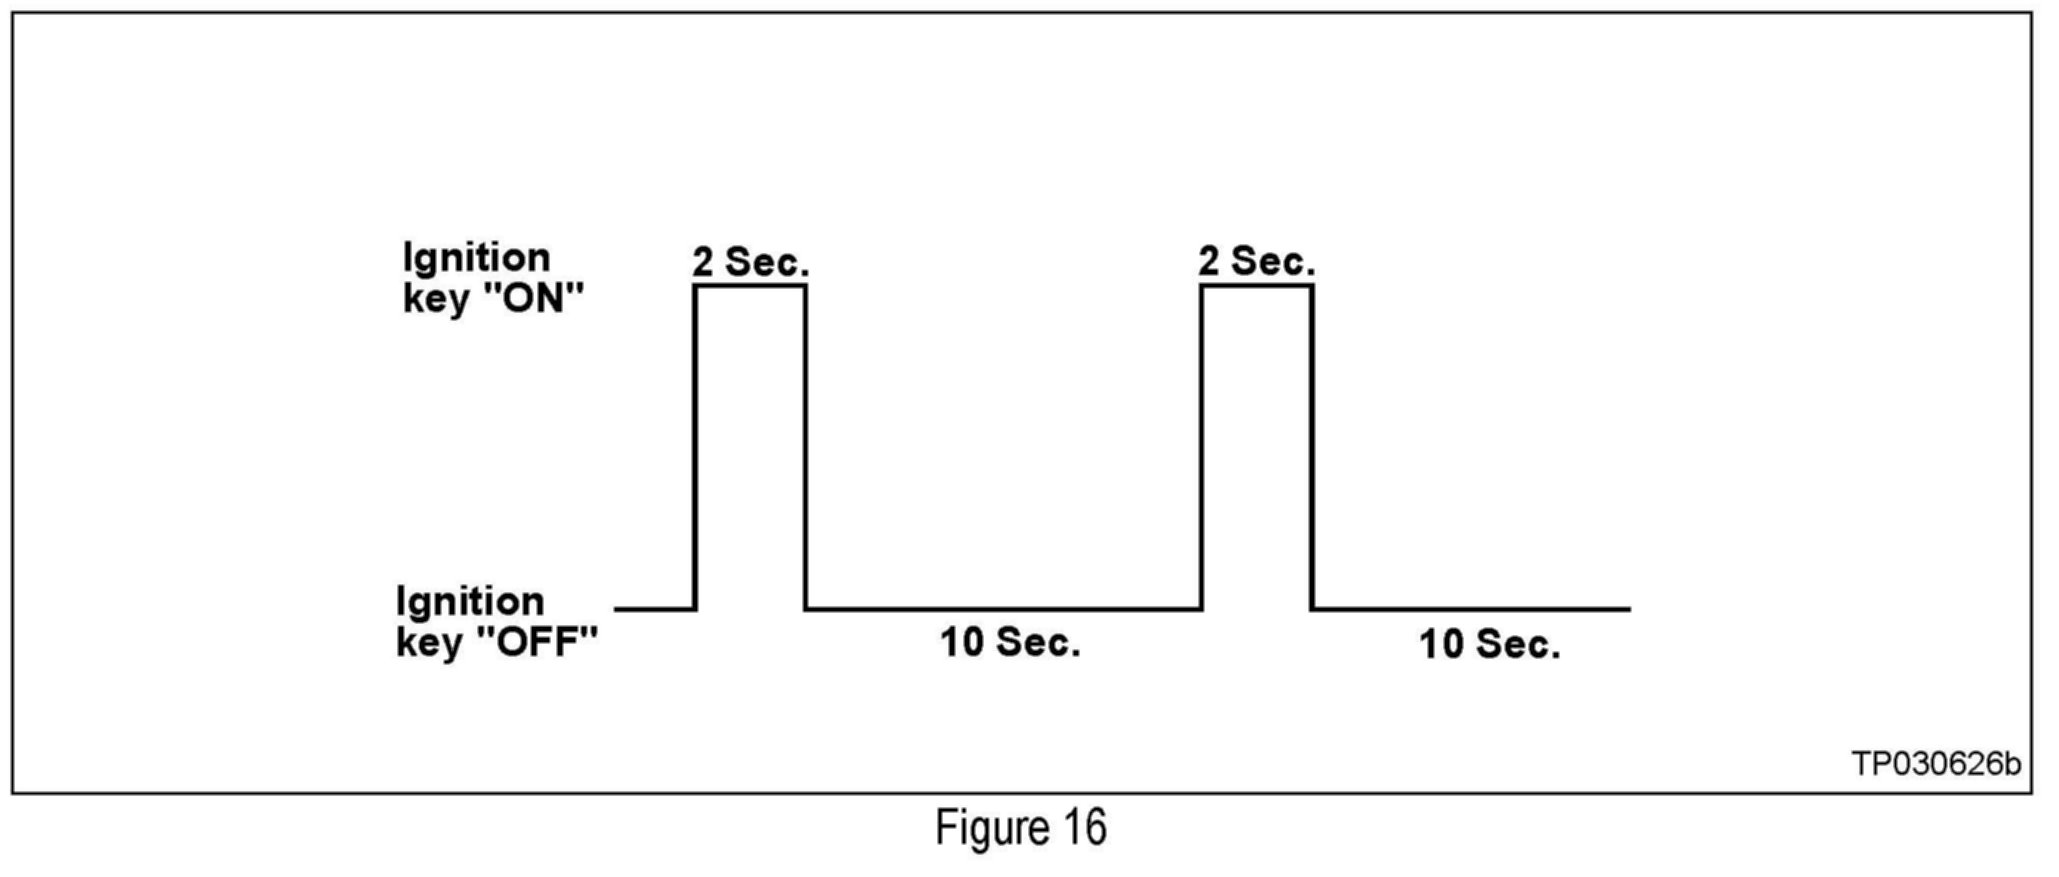
b. Turn the ignition "OFF" again for 10 seconds (see Figure 16).
^ This will reset ECM "self learned" Data.
37. Start the engine and check the idle speed.
^ If idle speed is too low, perform Idle Air Volume Learning (IAVL). See the appropriate Electronic Service Manual (ESM) for this procedure.
NOTE:
If the engine will not idle, hold the engine RPM at about 2000, then slowly bring it down to an idle. IAVL can now be performed.
38. Confirm the engine is operating normally.
39. Make sure the Check Engine light is OFF.
^ If the Check Engine light comes ON, go back to ASIST for further diagnostic information. Refer to the applicable Electronic Service Manual as needed.
^ Diagnosis and repairs beyond the ECM reprogramming are not covered by this bulletin.