Connecting Rod Bearing
CONNECTING ROD BIG END DIAMETER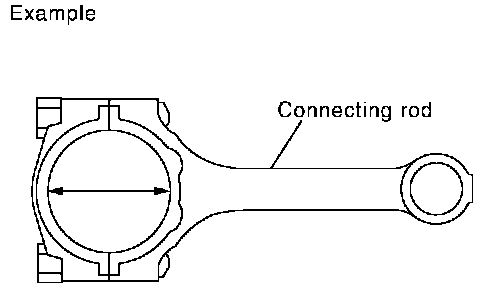
Install connecting rod cap without connecting rod bearing installed, and tightening connecting rod bolts to the specified torque. Refer to "ASSEMBLY" for the tightening procedure.
Measure the inner diameter of connecting rod big end with inside micrometer.
Standard 55.000 - 55.013 mm (2.1654 - 2.1659 inch)
If out of the standard, replace connecting rod assembly.
Connecting Rod Bushing Oil Clearance
(Connecting rod bushing oil clearance) = (Connecting rod bushing inner diameter) - (Piston pin outer diameter)
Standard 0.005 - 0.017 mm (0.0002 - 0.0007 inch)
Limit 0.030 mm (0.0012 inch)
If the measured value exceeds the limit, replace connecting rod assembly and/or piston and piston pin assembly.
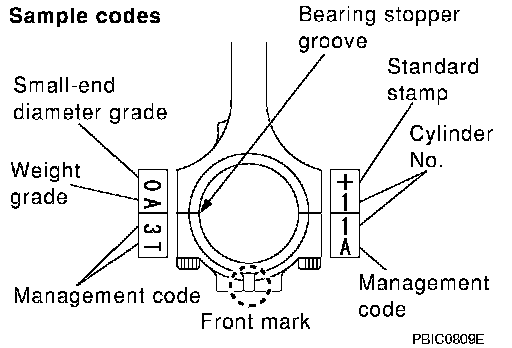
If replacing piston and piston pin assembly, refer to "PISTON TO CYLINDER BORE CLEARANCE".
If replacing connecting rod assembly, refer to "CONNECTING ROD BEARING OIL CLEARANCE" to select connecting rod bearing.
Piston Pin Outer Diameter
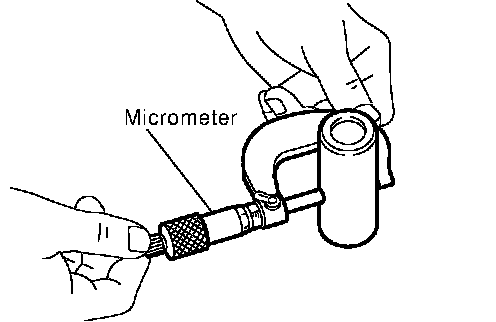
Measure the outer diameter of piston pin with micrometer.
Standard 21.989 - 22.001 mm (0.8657 - 0.8662 inch)
CONNECTING ROD BEARING OIL CLEARANCE
Method by Calculation
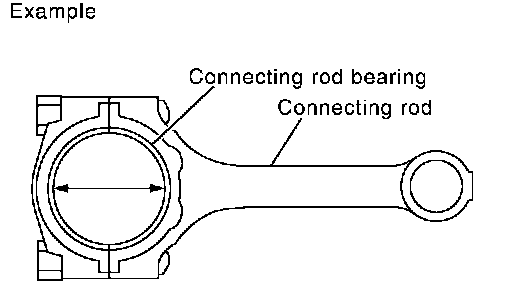
Install connecting rod bearings to connecting rod and cap, and tighten connecting rod bolts to the specified torque. Refer to "ASSEMBLY" for the tightening procedure.
Measure the inner diameter of connecting rod bearing with inside micrometer.
(Bearing oil clearance) = (Connecting rod bearing inner diameter) - (Crankshaft pin journal diameter)
Standard 0.034 - 0.059 mm (0.0013 - 0.0023 inch) (actual clearance)
Limit 0.070 mm (0.0028 inch)
If clearance exceeds the limit, select proper connecting rod bearing according to connecting rod big end diameter and crankshaft pin journal diameter to obtain specified bearing oil clearance. Refer to "HOW TO SELECT CONNECTING ROD BEARING".
Method of Using Plastigage
Remove engine oil and dust on crankshaft pin journal and the surfaces of each bearing completely.
Cut Plastigage slightly shorter than the bearing width, and place it in crankshaft axial direction, avoiding oil holes.
Install connecting rod bearings to connecting rod and cap, and tighten connecting rod bolts to the specified torque. Refer to "ASSEMBLY" for the tightening procedure.
CAUTION: Do not rotate crankshaft.
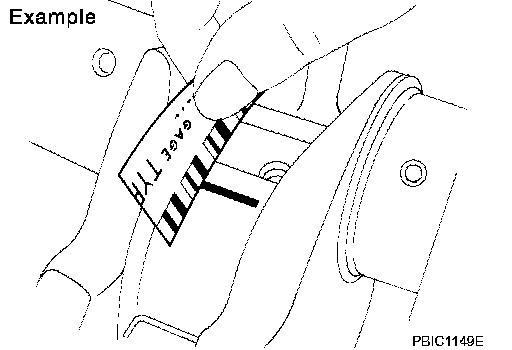
Remove connecting rod cap and bearing, and using scale on Plastigage bag, measure the Plastigage width.
NOTE: The procedure when the measured value exceeds the limit is same as that described in the "Method by Calculation".
CRUSH HEIGHT OF CONNECTING ROD BEARING
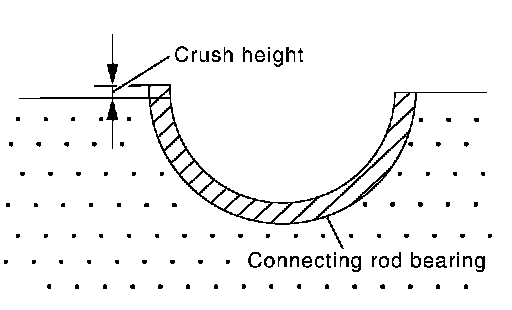
When connecting rod bearing cap is removed after being tightened to the specified torque with connecting rod bearings installed, the tip end of bearing must protrude. Refer to "ASSEMBLY" for the tightening procedure.
Standard There must be crush height.
If the standard is not met, replace connecting rod bearings.

CONNECTING ROD BEARING

Undersize

Connecting Rod Bearing Oil Clearance
CONNECTING ROD BOLT TORQUE
Tighten connecting rod bolt as follows:
a. Apply engine oil to the threads and seats of connecting rod bolts.
b. Tighten bolts.
Tightening Torque 18.6 - 20.6 Nm (1.9 - 2.1 kg-m, 14 - 15 ft. lbs.)
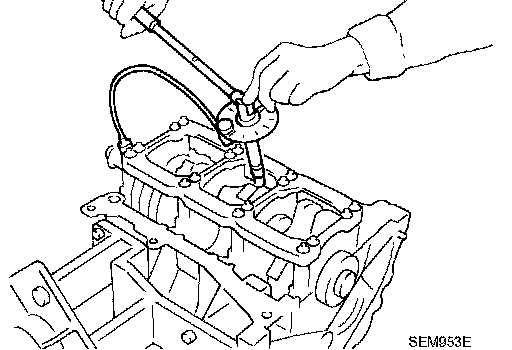
c. Then tighten all bolts 90 to 95 degrees clockwise [target: 90 degrees (Angle tightening)].
CONNECTING ROD BOLT OUTER DIAMETER
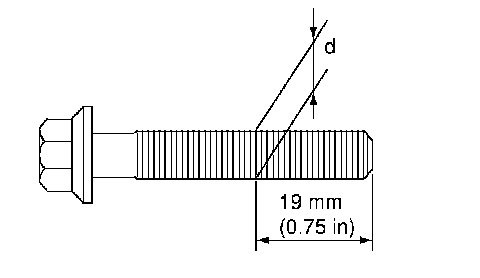
^ Measure the outer diameter "d" at position shown in the figure. If reduction appears in a position other than "d", regard it as "d".
Standard 7.90 - 8.00 mm (0.3110 - 0.3150 inch)
Limit 7.75 mm (0.3051 inch)
When "d" exceeds the limit (when it becomes thinner), replace bolt with new one.