Condenser HVAC: Service and Repair
CondenserREMOVAL
1. Remove engine cover and air cleaner cover. Refer to "ENGINE ROOM COVER".
2. Use a refrigerant collecting equipment (for HFC-134a) to discharge the refrigerant.
3. Remove tower bar, air cleaner assembly, air duct and air inlet pipe. Refer to "FRONT SUSPENSION ASSEMBLY" and "AIR CLEANER AND AIR DUCT".
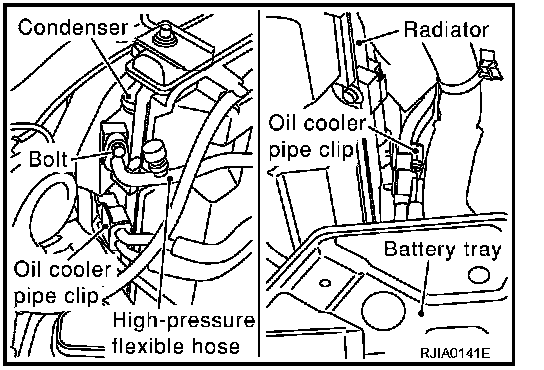
4. Disconnect high-pressure flexible hose and high-pressure pipe from the condenser.
CAUTION: Cap or wrap the open ends of the pipe with a suitable material such as vinyl tape to avoid the entry of air.
5. Remove oil cooler pipe clips from left and right sides of the condenser.
6. Slide condenser up and remove it from the radiator clip.
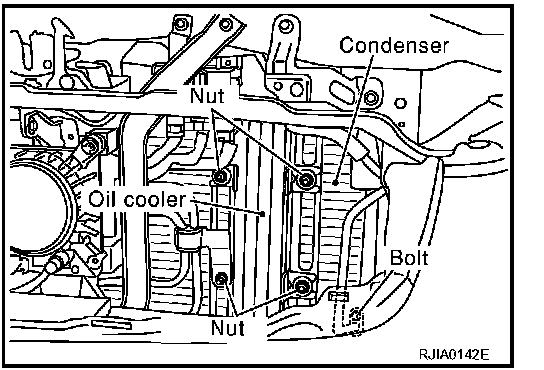
7. Remove oil cooler from the condenser.
8. Remove cooling fan shroud. Refer to "COOLING FAN".
9. Remove front grille, battery, battery tray and radiator mounting bracket. Refer to "FRONT GRILLE", "BATTERY" and "RADIATOR".
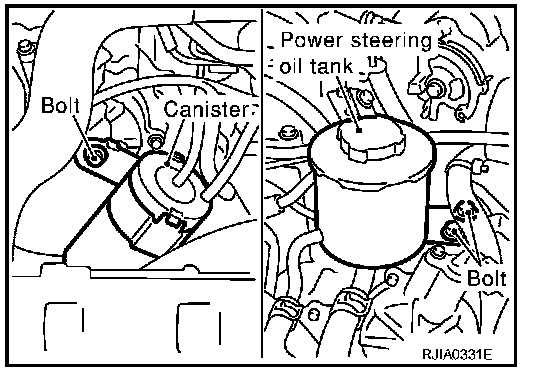
10. Remove power steering oil tank and canister.
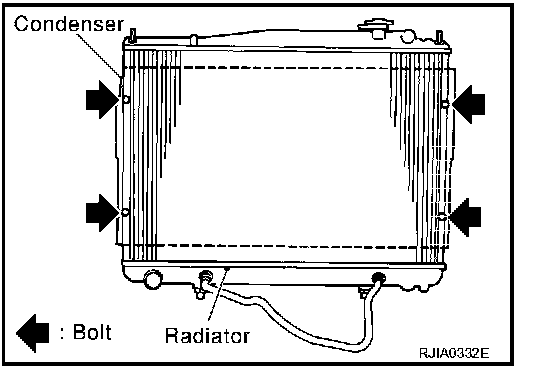
11. Remove mounting bolts from condenser.
12. Slide condenser up and remove it from the radiator clip.
13. Remove radiator from the lower mount, move it to the engine side, then remove condenser between the radiator and the radiator core support.
CAUTION: Be careful not to damage the core surface of the condenser and the radiator.
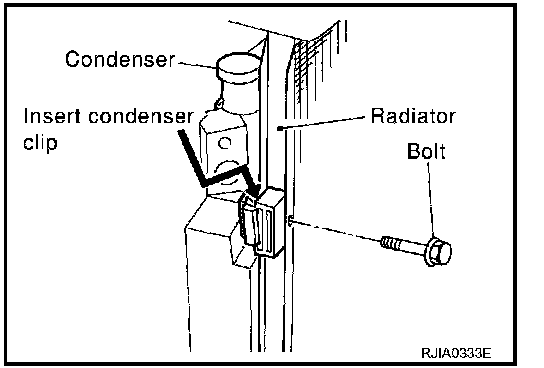
INSTALLATION
Installation is basically the reverse order of removal.
CAUTION:
- Replace high-pressure pipe and high-pressure flexible hose O-rings with new ones. Apply compressor oil prior to installation.
- When pouring refrigerant, check for leaks.
Bolts mounting the high-pressure flexible hose
Tightening torque : 7.8 - 19.6 Nm (0.8 - 1.9 kg-m, 69 - 173 in-lb)
Bolts mounting the high-pressure pipe
Tightening torque : 2.9 - 5.9 Nm (0.29 - 0.6 kg-m, 26 - 52 in-lb)
Bolts mounting the condenser
Tightening torque : 3.82 - 4.51 Nm (0.39 - 0.46 kg-m, 34 - 39 in-lb)