Blower Motor Replacement
1. Remove the blower motor from the blower unit. It will not be reused.2. Remove the auto amplifier.
3. Reinstall the blower unit back into the vehicle.
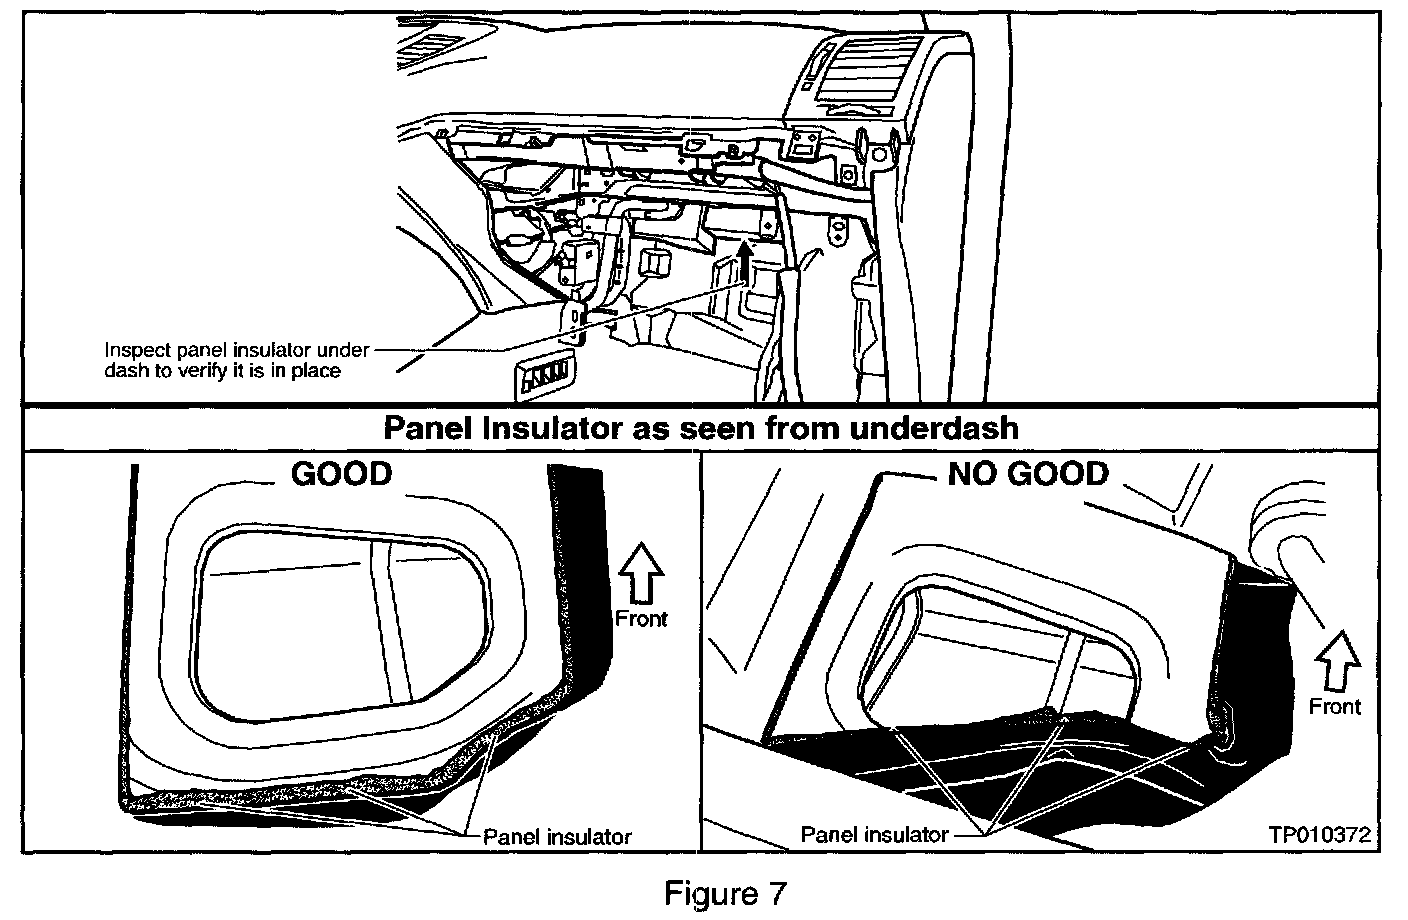
NOTE:
Before reinstalling the blower unit, inspect the panel insulator under the dash. If it is out of place, mold it back in place before completing the following steps (see Figure 7).
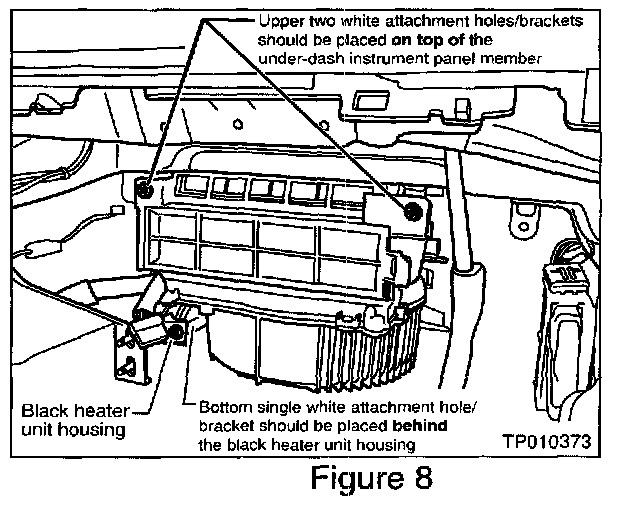
NOTE:
When reinstalling the blower unit, make sure the upper two white attachment holes/brackets on the blower unit are placed on top of the under-dash instrument panel member (see Figure 8). Make sure the bottom single white attachment hole/bracket on the blower unit is placed behind the black heater unit housing (see Figure 8).
4. Install the ventilation air filter (micro filter) provided in the A/C Service kit.
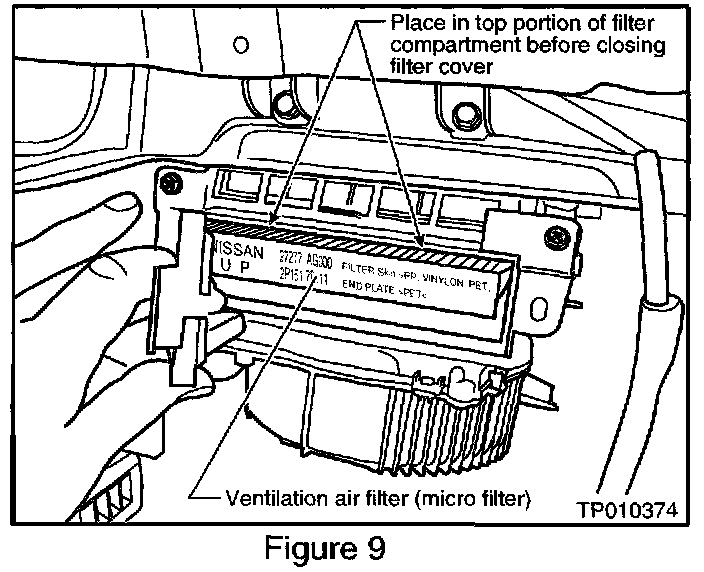
NOTE:
Ensure that the filter is properly placed in the top portion of the filter compartment before snapping the filter cover back in place (see Figure 9).
5. Install the replacement blower motor provided in the A/C Service kit.
6. Reinstall the auto amplifier.
7. Reconnect the intake actuator harness.
8. Reinstall and reconnect all remaining parts removed/disconnected in steps 3 through 7 under Evaporator Seal Application procedure.
NOTE:
DO NOT reinstall the glove box upper woodgrain instrument finisher removed in step 3A. This part will be reinstalled after A/C Ventilator Grilles Replacement is completed.
9. Proceed to A/C Ventilator Grilles Replacement.