Front Engine Plate: Service and Repair
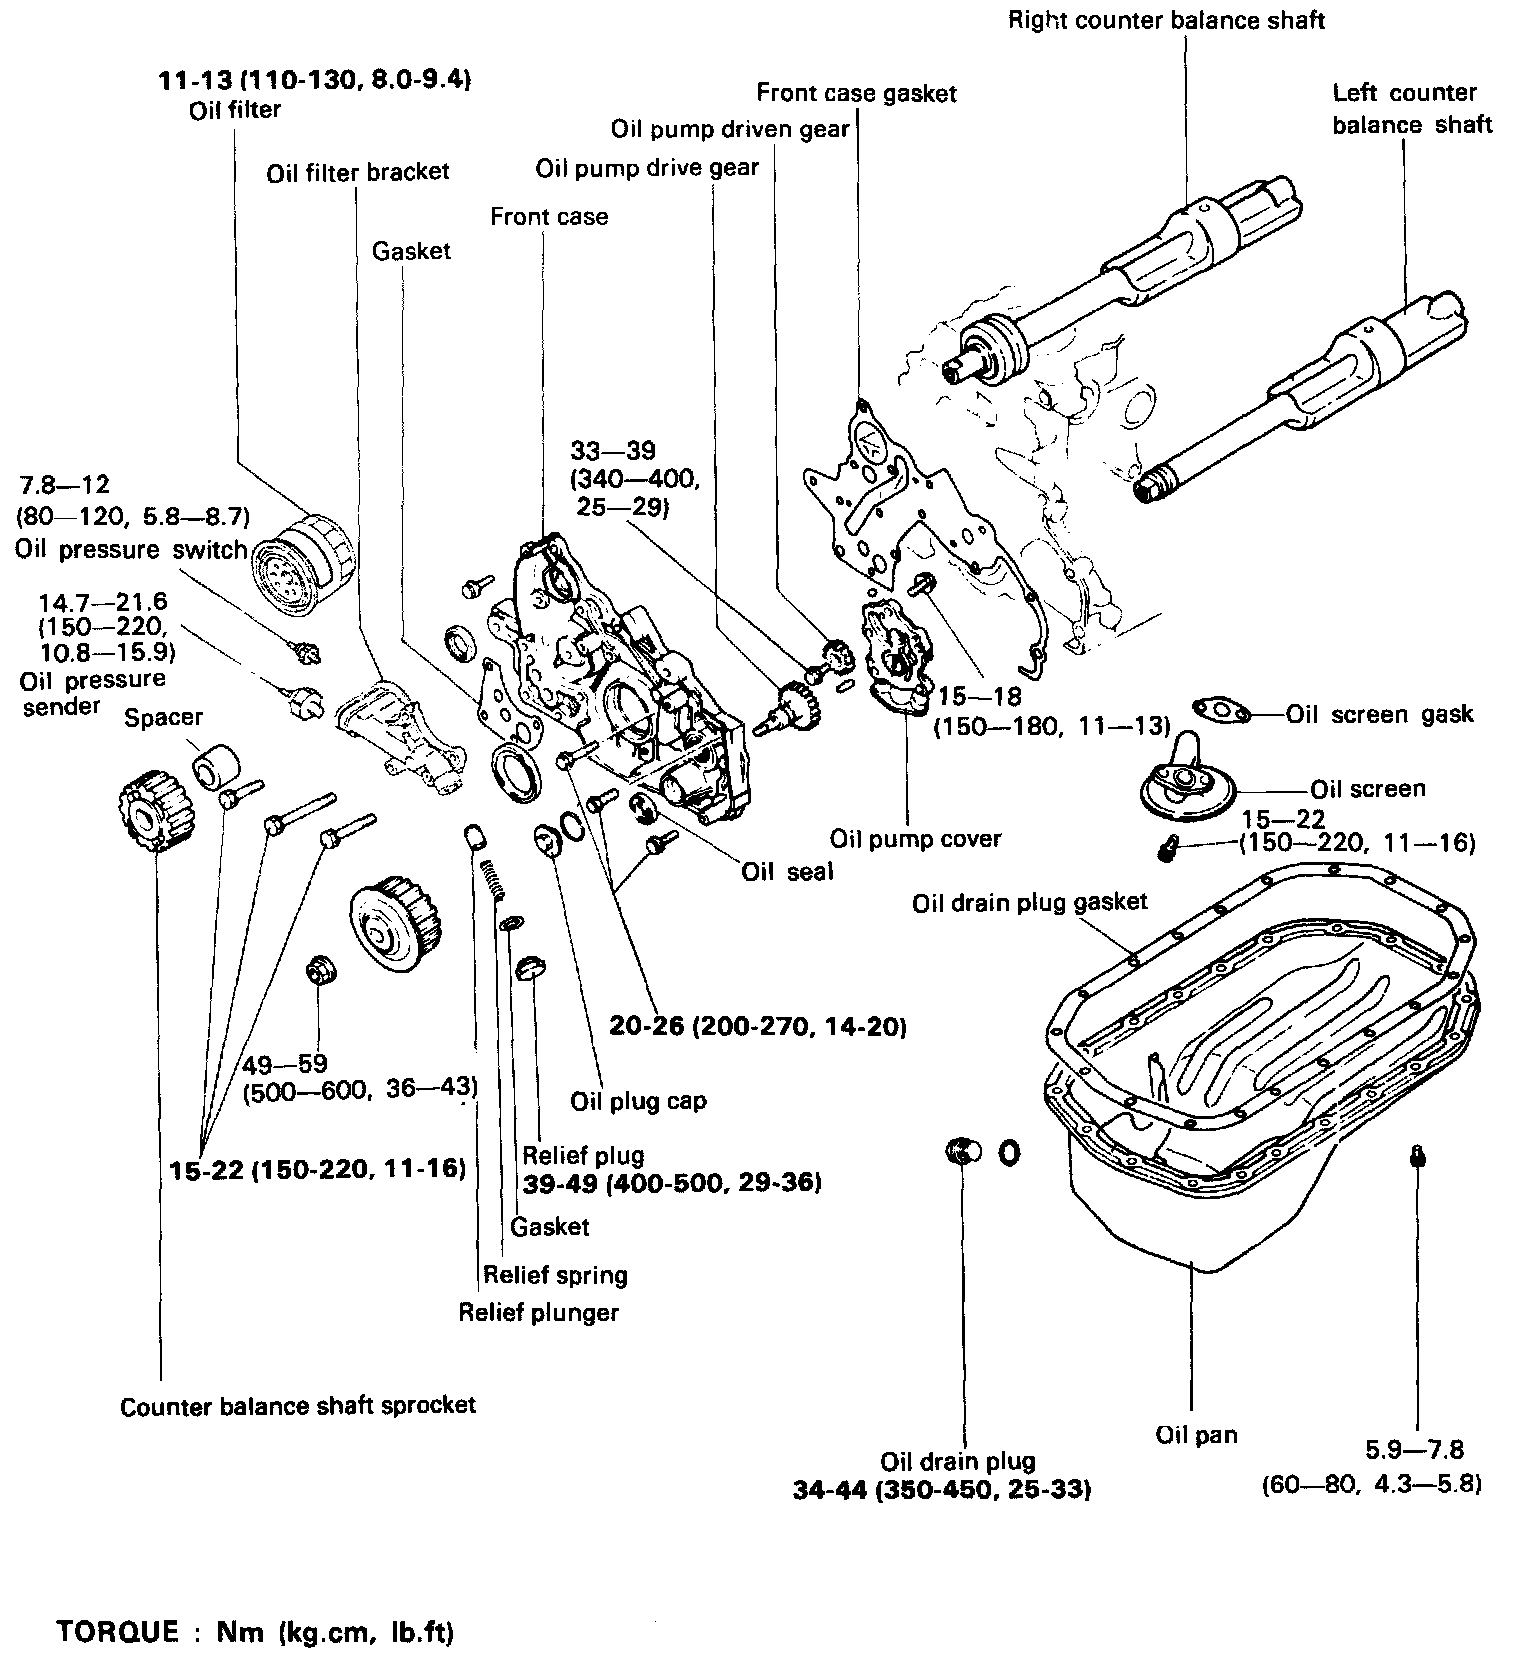
FRONT CASE, OIL PUMP AND COUNTER BALANCE SHAFT
COMPONENTS
REMOVAL
1. Remove the oil filter.
2. Remove the oil pan.
3. Remove the oil screen and gasket.
4. Remove the relief plunger and gasket, and then take off the relief spring and relief valve from the oil filter bracket.
5. Remove the four bracket securing bolts and remove the oil filter bracket and gasket.
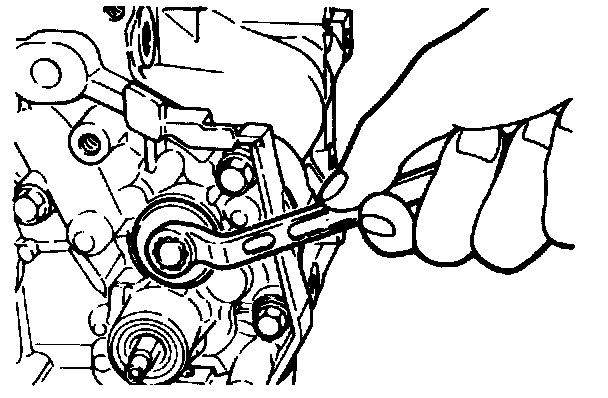
6. Remove the oil plug cap from the oil pump portion of front case.
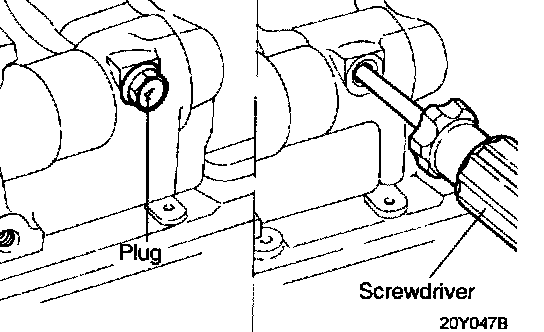
7. Remove the left side cylinder block plug and insert a screwdriver with an 8 mm (0.32 in.) diameter shaft into plug hole.
Screwdriver shaft must be inserted more than 60 mm (2.4 in.)
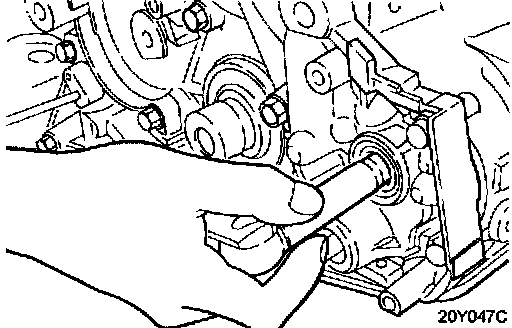
8. Remove the oil pump driven gear and left counter balance shaft retaining bolt.
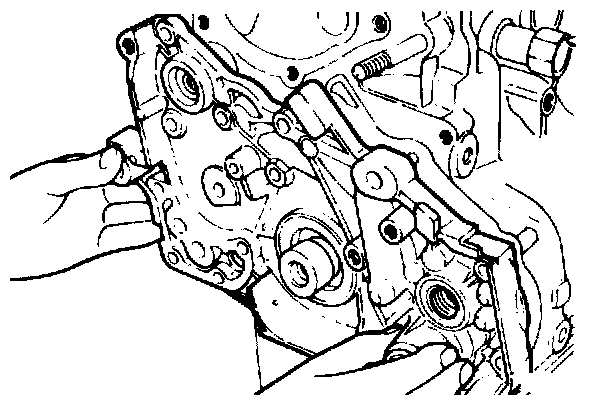
9. Remove the front case mounting bolts and remove front case assembly and gasket.
10. Remove the two counter balance shafts from the cylinder block.
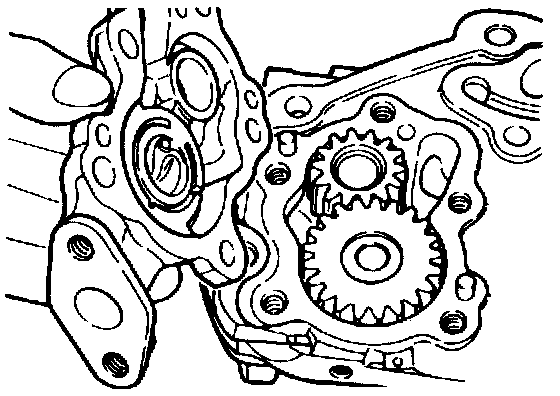
11. Remove the oil pump cover from the front case.
12. Remove the oil pump gears from front case.
INSPECTION
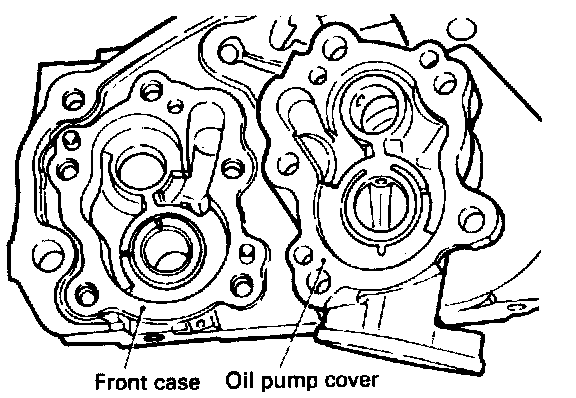
Oil Pump
1. Visually check gear contact surfaces of front case and oil pump cover for step wear. If front case~ or pump cover has excessive step wear, replace front case assembly.
2. Check the oil passage of front case and oil pump cover for clogging and clean if necessary.
Counter Balance Shaft
Check journals for wear or seizure.
If excessive wear or seizure is evident, check bearing as well.
If necessary, replace counter balance shaft, bearing or both.
Oil Seals
Check front case oil seals for damaged or worn lips. Replace defective seals.
Relief Plunger and Spring
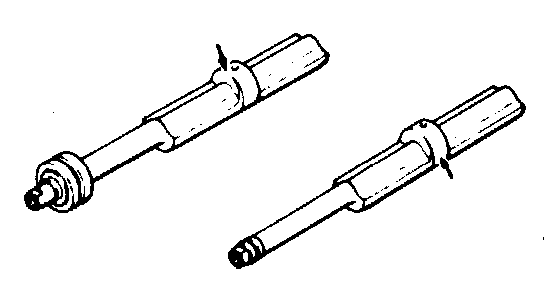
1. Insert the relief plunger into the oil filter bracket and check for smooth operation. Clean or repair if necessary.
2. Check free length of spring, replace springs which are excessively collapsed.
Relief spring free length 46.6 mm (1.835 in.)
COUNTER BALANCE SHAFT BEARING REPLACEMENT
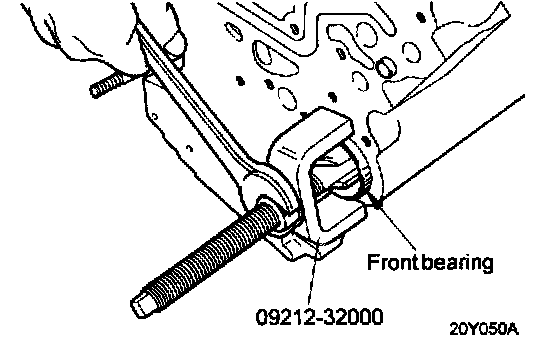
1. Using special tool (0921 2-32000), remove right counter balance shaft front bearing from cylinder block.
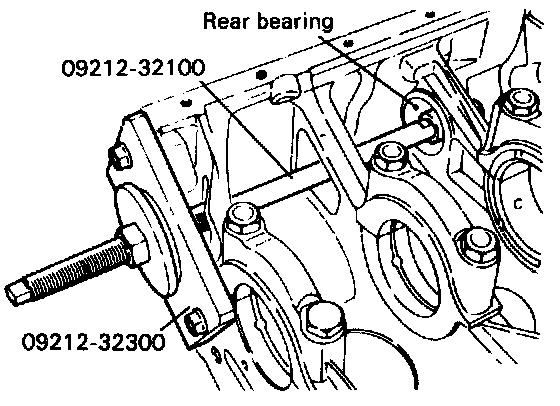
2. Using special tool (09212-32100), remove left counter balance shaft rear bearing from cylinder block. At this time, install special tool (09212-32300) on front surface of cylinder block to hold bearing puller.
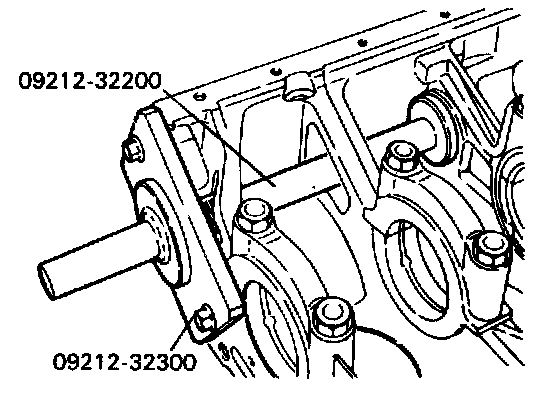
3. Using special tool (09212-32200), install left counter balance shaft rear bearing attaching special tool (09212- 32300) as at the time of removal.
CAUTION: Before bearing is installed, apply engine oil to inner surface of bearing.
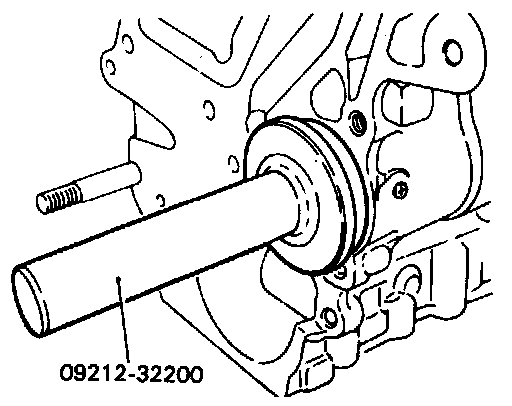
4. Using special tool (09212-32200), install right counter balance shaft front bearing.
INSTALLATION
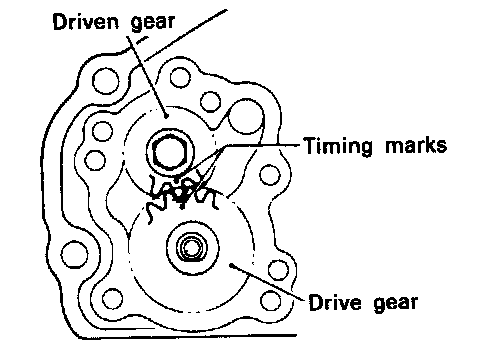
1. Timing mark is found on reverse side of each gear.
2. Install oil pump cover and tighten five bolts.
Tightening torque
Oil pump cover bolt
15-18 Nm (150-180 kg.cm, 11-13 lb.ft)
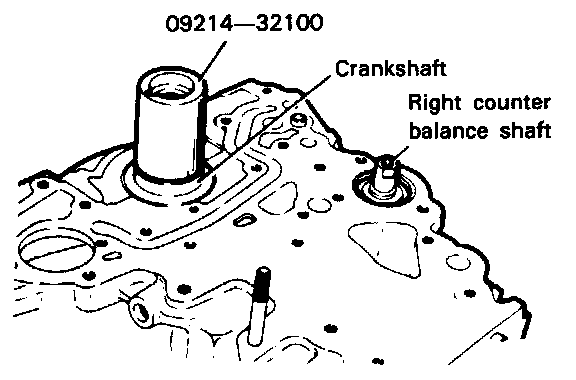
3. Insert left counter balance shaft in oil pump driven gear and temporarily tighten bolt.
4. Install special tool (09214-32100) on crankshaft front end and apply engine oil around. Oil seal guide has a conical periphery. Install guide so that its smaller diameter end will face front of engine.
NOTE: If crankshaft front oil seal is already mounted to front case, use this special tool (09214-32100) for protection of oil seal.
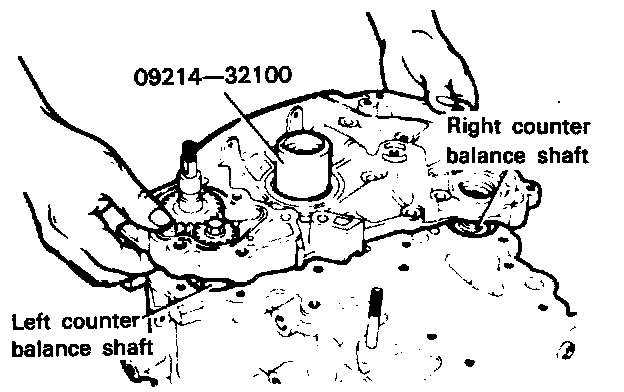
5. Install right counter balance shaft into cylinder block.
6. Install new front case gasket.
7. While inserting left counter balance shaft into cylinder block, install front case.
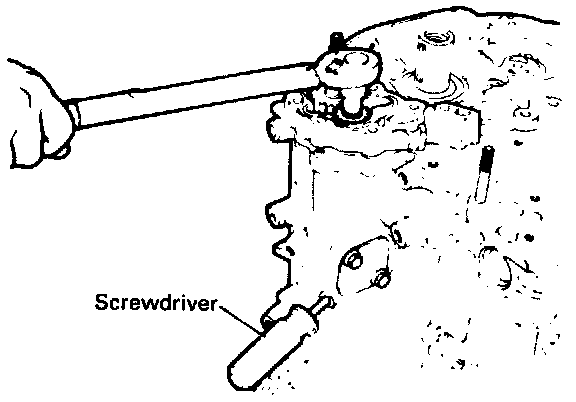
8. Insert screwdriver through plug hole in left side of cylinder block to keep shaft in position, and then tighten.
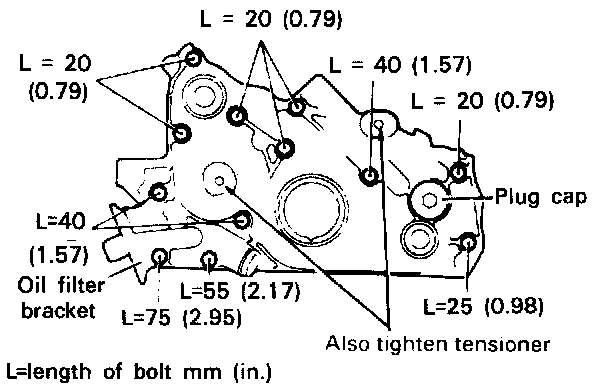
9. Install oil filter bracket and gasket and tighten front case mounting bolts.
Tightening torque
Front case bolts
20-26 Nm (200-270 kg.cm, 14-20 lb.ft)
Oil filter bracket bolt
15-22 Nm (150-220 kg.cm, 11-16 lb.ft)
10. Install plug cap.
11. Install the relief plug and gasket, and tighten plug.
12. Install the oil screen and gasket.
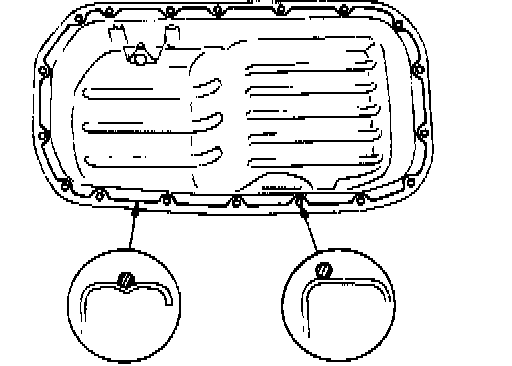
13. Clean gasket surfaces of cylinder block and oil pan.
14. Apply sealant into groove of oil pan flange.
CAUTION: Make the first cut from the end of the nozzle furnished with sealant to apply sealant approx. 4 mm in thickness. After application of sealant, do not exceed 15 minutes before installing the oil pan.
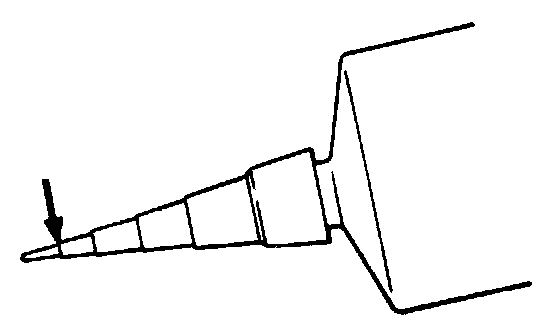
15. Install the oil pan and tighten the bolts to the specified torque.