Fluid Filter - CVT: Service and Repair
Service Information
CVTF Filter Removal and Installation
Removal
1. Vehicle - Lift
1. Raise the vehicle on a lift, and make sure it is securely supported.
2. Splash Shield
1. Remove the splash shield (A).
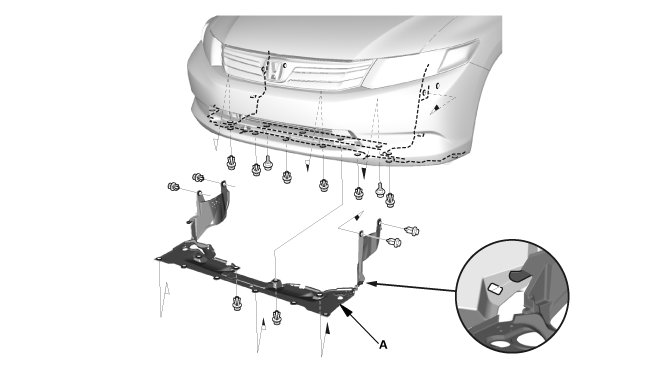
3. Engine Under Cover Front as Needed
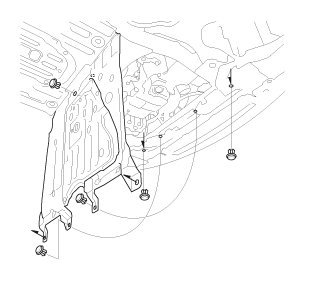
1. Remove the front engine under cover as needed.
4. CVTF - Drain
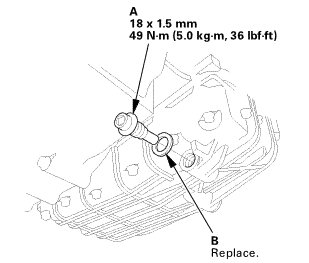
1. Remove the drain plug (A), and drain the CVT fluid (CVTF).
2. Remove metal particles from the magnetic surface of the drain plug.
3. Reinstall the drain plug with a new sealing washer (B).
5. CVTF Filter
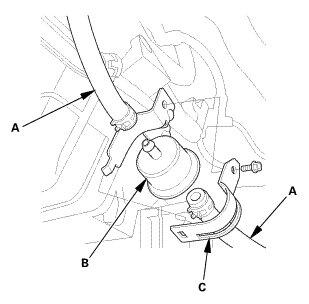
1. Disconnect the CVTF cooler hoses (A) from the CVTF filter (B).
2. Remove the CVTF filter bracket (C) and the CVTF filter.
Installation
1. CVTF Filter
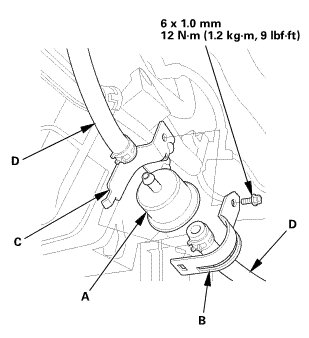
1. Secure the CVTF filter (A) on its holder bracket (B), and install the CVTF filter and holder bracket together to the CVTF filter bracket (C).
2. Connect the CVTF cooler hoses (D) to the CVTF filter.
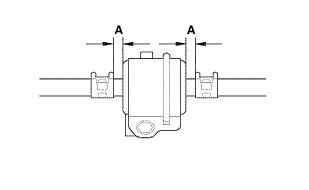
3. Secure the CVTF cooler hoses over the CVTF cooler lines with the clips at appropriate points in reference to the following list.
NOTE: When installing the hose clips, make sure they do not interfere with the surrounding parts.

2. Engine Under Cover Front as Needed
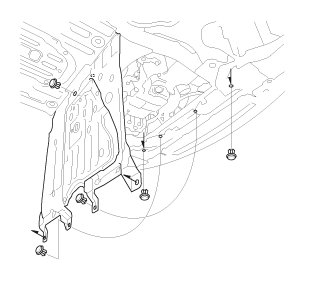
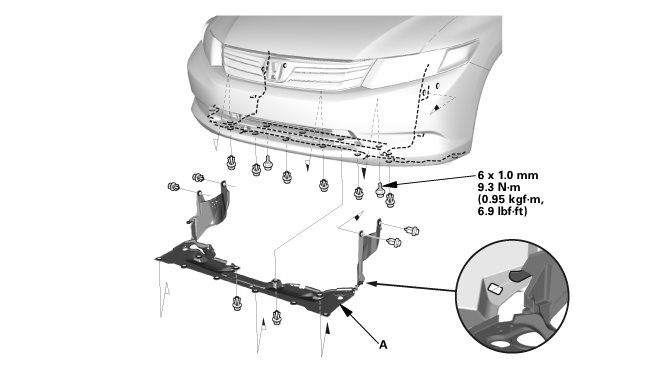
1. Install the front engine under cover.
3. Splash Shield
1. Install the splash shield (A).
4. CVTF - Refill
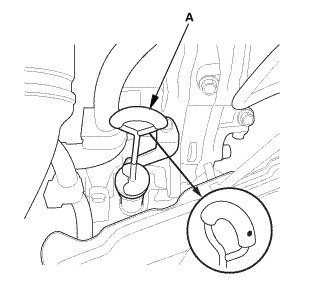
1. Remove the dipstick (yellow loop) (A) from the dipstick tube.
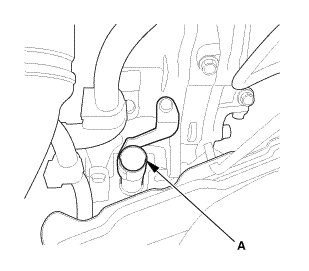
2. Refill the transmission with the recommended fluid through the dipstick tube opening (A) to bring the fluid level between the upper mark and the lower mark of the dipstick. Always use Honda CVTF. Using a non-Honda CVTF can affect shift quality.

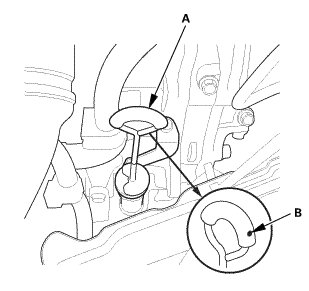
3. Insert the dipstick (A) with the dot (B) on the handle facing to the left of the vehicle.
5. Maintenance Minder Reset
1. After completing the entire procedure, select the individual maintenance item you wish to reset with the HDS. (See the Maintenance Minder General Information)
6. CVT Fluid Level - Check
NOTE:
* Keep all foreign particles out of the transmission.
* Check the CVTF level within 60-90 seconds after turning the engine off.
* Higher CVTF level may be indicated if the radiator fan comes on twice or more.
1. Park the vehicle on the level ground.
2. Start the engine, and warm it up to normal operating temperature (the radiator fan comes on twice), and turn the engine off.
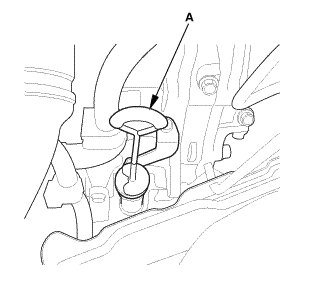
3. Remove the dipstick (yellow loop) (A) from the dipstick tube, and wipe it with a clean cloth.
4. Insert the dipstick back into the dipstick tube.
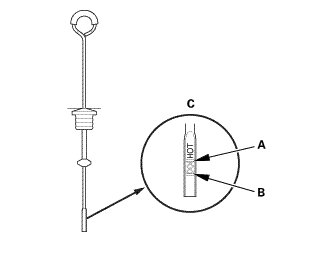
5. Remove the dipstick, and check the CVTF level. It should be between the upper mark (A) and the lower mark (B) on the HOT level in tip of the dipstick (C).
6. If the CVT fluid level is below the lower mark, check for fluid leaks at the transmission, the CVTF filter, the CVTF cooler hoses, and the CVTF cooler lines. If a problem is found, fix it before filling the transmission with CVTF.
NOTE: If the vehicle is driven when the CVTF level is below the lower mark, one or more of these symptoms may occur:
* Noise from transmission in D, S, L, and R.
* Engine runs, but vehicle does not move in any position.
* No shift to a higher ratio or lower ratio.
* Flares while driving.
* Excessive shock when accelerating and decelerating.
* Vehicle does not creep on a flat road in D, S, and L.
* Late shift after shifting from N to D or N to R.
* Unstable rpm while driving.
* Stall speed high.
7. If the level is above the upper mark, drain the CVTF to proper level.
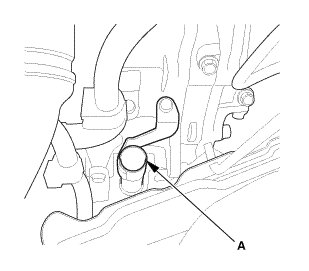
8. If necessary, fill the transmission with CVTF through the dipstick tube opening (A) to bring the fluid level between the upper mark and the lower mark of the dipstick. Do not fill the fluid above the upper mark. Always use Honda CVTF. Using a non-Honda CVTF can affect shift quality.
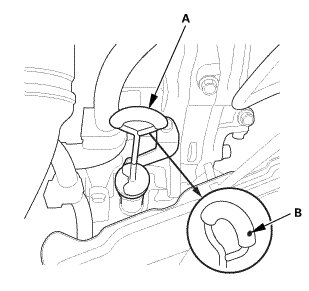
9. Insert the dipstick (A) with the dot (B) on the handle facing to the left of the vehicle.