Overhaul
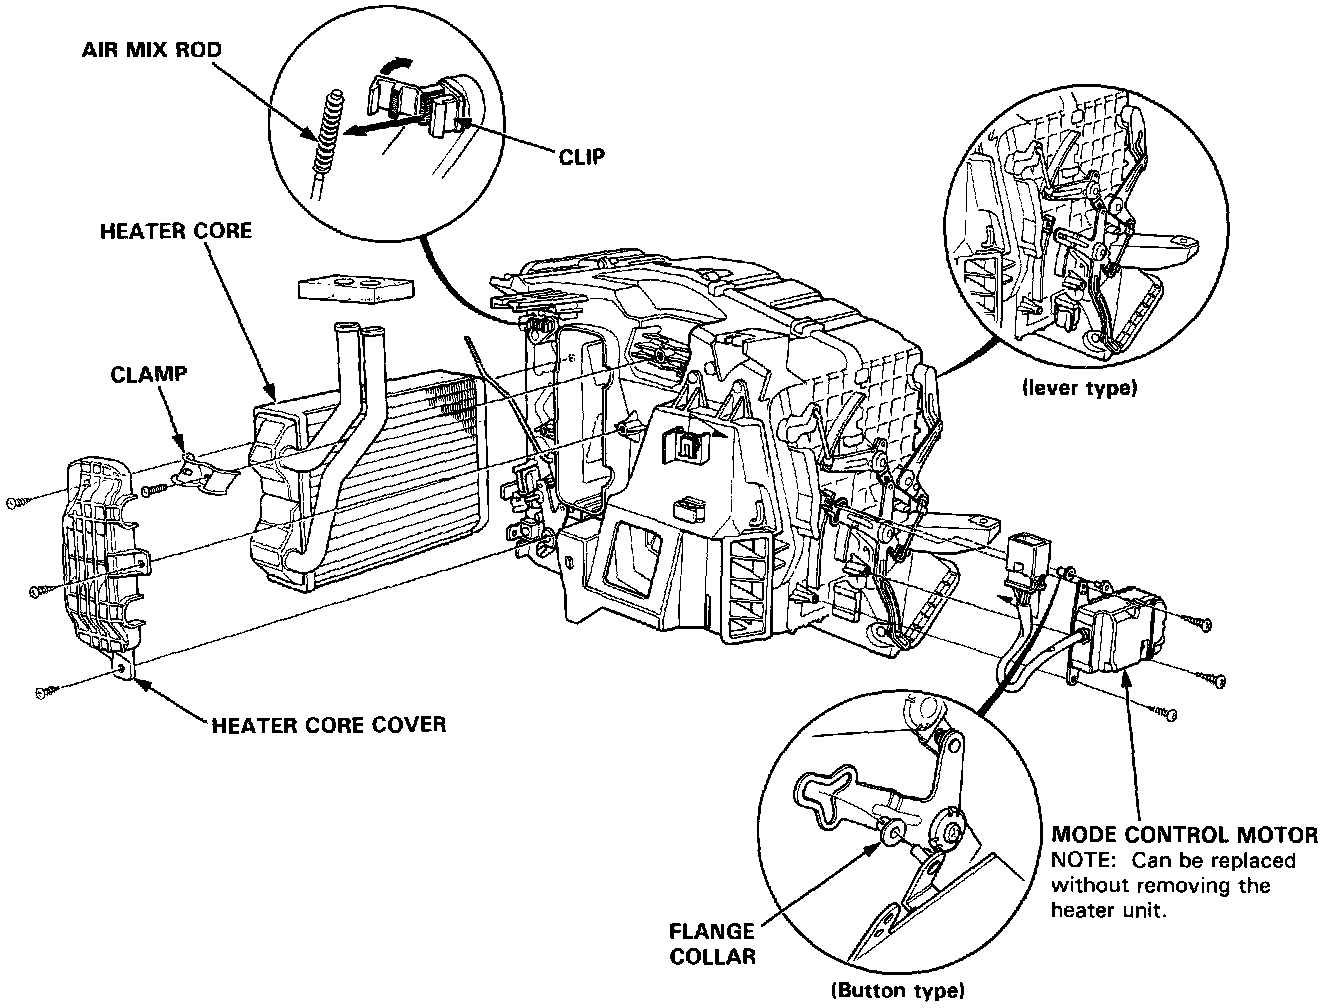
HEATER CORE REPLACEMENT
1. Remove the heater unit.
2. Remove the air mix rod from the clip.
3. Remove the three self-tapping screws and heater core cover.
4. Remove the self-tapping screw and clamp.
5. Pull out the heater core from the heater unit.
6. Install in the reverse order of removal.
7. After installing heater unit, make the following adjustments:
- Heater linkage (see below)
- Air mix rod and control cable
- Heater valve cable
- Mode control cable (lever type only)
MODE CONTROL MOTOR REPLACEMENT, (BUTTON TYPE ONLY)
- When installing the mode control motor, be careful when connecting the linkage.
- Try the mode control motor in every mode for two minutes, and make sure the motor operates correctly in each mode.
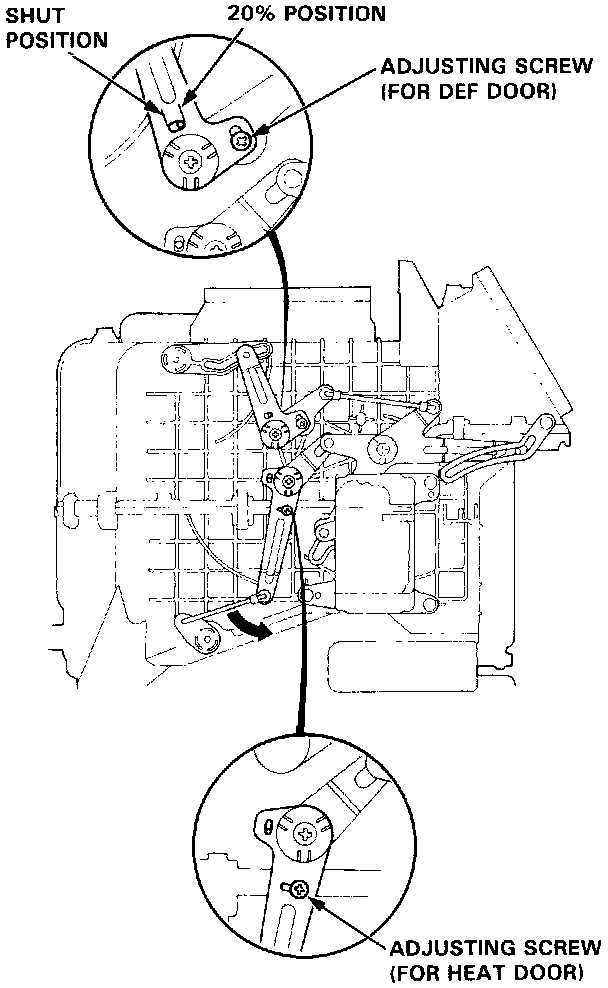
HEATER LINKAGE ADJUSTMENT, BUTTON TYPE
DEF Door Adjustment: Set the mode control switch on HEAT for adjusting DEF leak (shut-20%)
1. Loosen the adjusting screw.
2. Adjust the heater linkage as shown.
3. Tighten the adjusting screw.
HEAT Door Adjustment
1. Loosen the adjusting screw.
2. Adjusting the heater linkage as shown.
3. Tighten the adjusting screw.
NOTE: When HEAT door is closed, air should not leak from the HEAT door.

HEATER LINKAGE ADJUSTMENT, LEVER TYPE
HEAT Door Adjustment
1. Loosen the adjusting screw.
2. Adjust the heater linkage as shown.
3. Tighten the adjusting screw.
NOTE: When HEAT door is closed, air should not leak from the HEAT door.