Front
REMOVAL1. Check fluid level in brake master cylinder reservoir. Remove brake fluid until brake master cylinder reservoir is half-full. Discard removed fluid.
2. Raise vehicle on hoist.
3. Remove wheel and tire. Use care to avoid damage or interference with bleeder screw during removal.
4. Remove two caliper bolts and discard.
NOTE: It is not necessary to disconnect hydraulic connections.
5. Lift disc brake caliper away from front disc brake rotor using a rotating motion.
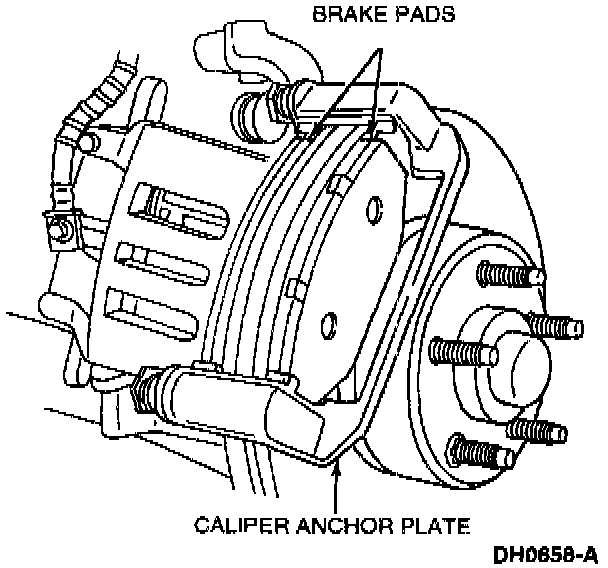
6. Remove outer and inner brake pad and lining from the front disc brake caliper anchor plate.
7. Remove the pad slippers.
8. Support the disc brake caliper assembly in a manner that will not stretch or damage the front brake hose.
9. Inspect both disc brake rotor braking surfaces. Minor scoring or buildup of brake pad and lining material does not require machining or replacement of the front disc brake rotor.
INSTALLATION
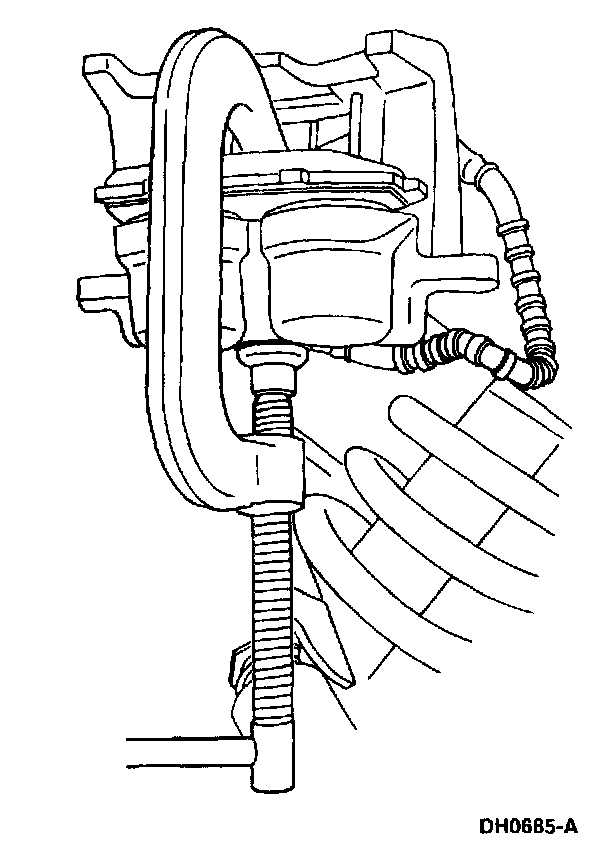
1. Use a C-clamp and wood block or used brake pad to seat caliper pistons in the caliper bores. This must be done to provide clearance for disc brake caliper assembly to fit over front disc brake rotor during installation.
NOTE: Make sure to use all parts supplied with the brake pads.
2. Install the pad slippers.
3. Install the brake pads in the front disc brake caliper anchor plate.
4. Install disc brake caliper to front disc brake caliper anchor plate with caliper bolts. Tighten lower bolt first to 28 - 6 Nm (21 - 26 ft. lbs.). Tighten upper bolt to 28 - 36 Nm (21 - 26 ft. lbs.).
5. Make sure disc brake pad anti-rattle spring and disc brake pad anti-rattle clip is seated in caliper lining inspection opening. Disc brake pad anti-rattle clip must be installed from the lining side.
6. Inspect disc brake caliper / front disc brake caliper anchor plate assembly to make sure brake pads and linings are properly installed.
7. Inspect disc brake caliper locating pin and locating pin boots. If disc brake caliper locating pin is binding, remove and clean. Lubricate with Silicone Brake Caliper Grease and Dielectric Compound D7AZ-19A331-A or equivalent meeting Ford specification ESE-M 1C 171-A.
8. Install wheel and tire assembly, using Rotunda Accutorq Lug Nut Sockets 164-R0303 or equivalent on 1/2 inch drive air impact wrench or torque wrench to tighten lug nuts to 115 - 142 Nm (85 - 104 ft. lbs.).
CAUTION: Failure to tighten lug nuts in a star pattern can result in high rotor runout, which will speed up the development of brake roughness, shudder and vibration.
9. Lower vehicle.
10. Pump brake pedal several times to position brake pads and linings. Refill brake master cylinder reservoir with High Performance DOT-3 Motor Vehicle Brake Fluid C6AZ-19542-AB or DOT-3 equivalent meeting Ford specification ESA-M6C25-A as necessary.
11. Road test vehicle.