Installation
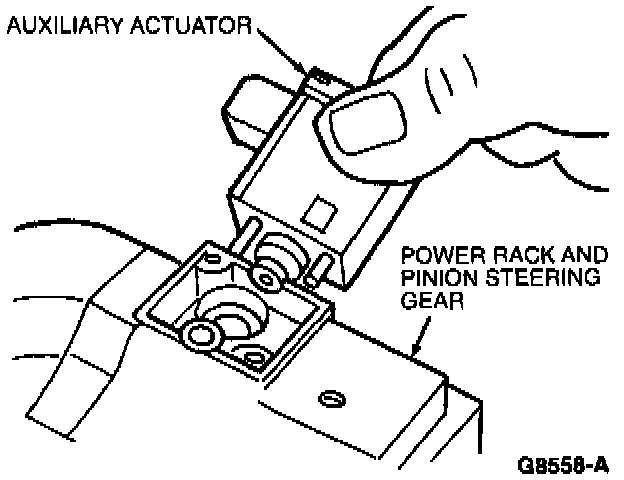
1. Position power steering auxiliary actuator on power rack and pinion steering gear.
NOTE: Make sure the two seals between the actuator housing and the steering gear housing assembly are in place when positioning the actuator on the power rack and pinion steering gear.
2. Install power steering auxiliary actuator. Install four mounting screws.
3. Install electrical connectors to power steering auxiliary actuator.
4. Position power rack and pinion steering gear into front sub-frame.
5. Install tie rod ends onto front wheel spindle tie rod.
6. Install push-pin retainers at top of heat shield.
7. Install tie rod ends to RH front wheel knuckle and LH front wheel knuckle. Install nuts and tighten to 47-63 Nm (35-46 ft. lbs.). Install new cotter pin.
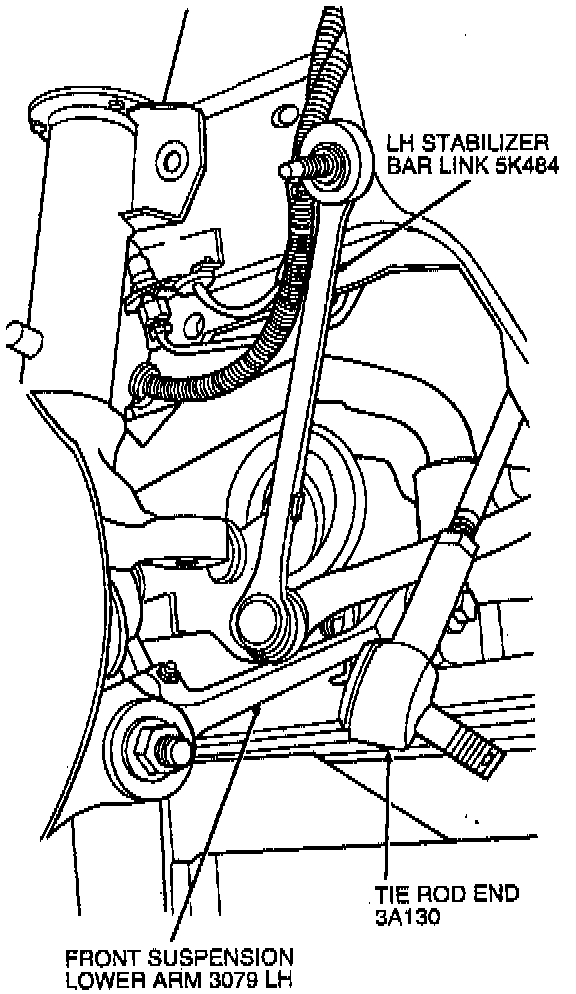
8. Install LH stabilizer bar link.
9. Lower hoist until front sub-frame contacts body.
10. Install rear sub-frame retaining bolts. Tighten to 135-195 Nm (100-143 ft. lbs.).
11. Install power steering short rack-to-sub-frame nuts and tighten to 97-132 Nm (72-97 ft. lbs.).
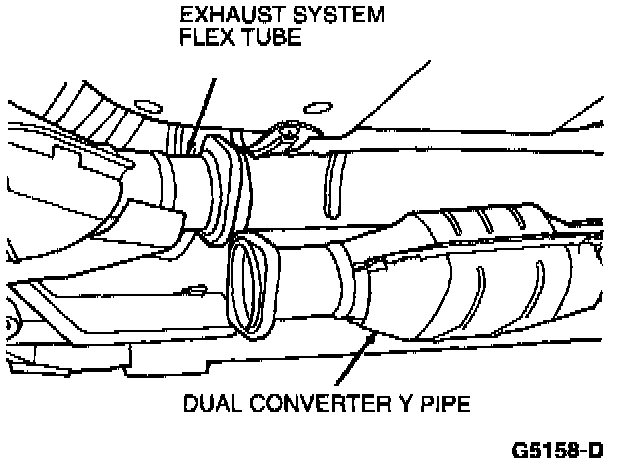
12. Install exhaust system flex tube to dual converter Y pipe. Connect heated oxygen sensor wiring harness.
13. Install tire and wheel assemblies. Tighten lug nuts to 115-142 Nm (85-104 ft. lbs.).
14. Remove jackstands and lower vehicle.
15. From inside vehicle, push steering column tube boot end out of vehicle and install over power rack and pinion steering gear.
16. Install steering column intermediate shaft coupling to power rack and pinion steering gear. Tighten bolt to 41-51 Nm (31-37 ft. lbs.).
17. Install inner steering column tube boot to cowl panel.
18. Install steering column intermediate shaft coupling to steering column lower yoke.
19. Fill power steering system with Premium Power Steering Fluid E6AZ-19582-AA or equivalent meeting Ford specification ESW-M2C33-F.
20. Reconnect battery ground cable.
21. Bleed power steering system.
22. Check system for leaks and proper operation.
23. Adjust toe setting.