Shift Linkage: Service and Repair
REMOVALNOTE: The automatic transmission linkage system incorporates a polyurethane plastic grommet to connect the various rods, levers, and adjusting stud. Whenever a rod is disconnected from a grommet type connector, the old grommet must be removed and a new one installed.
Transmission On Bench
Removing Or Installing Shift Linkage Grommet:
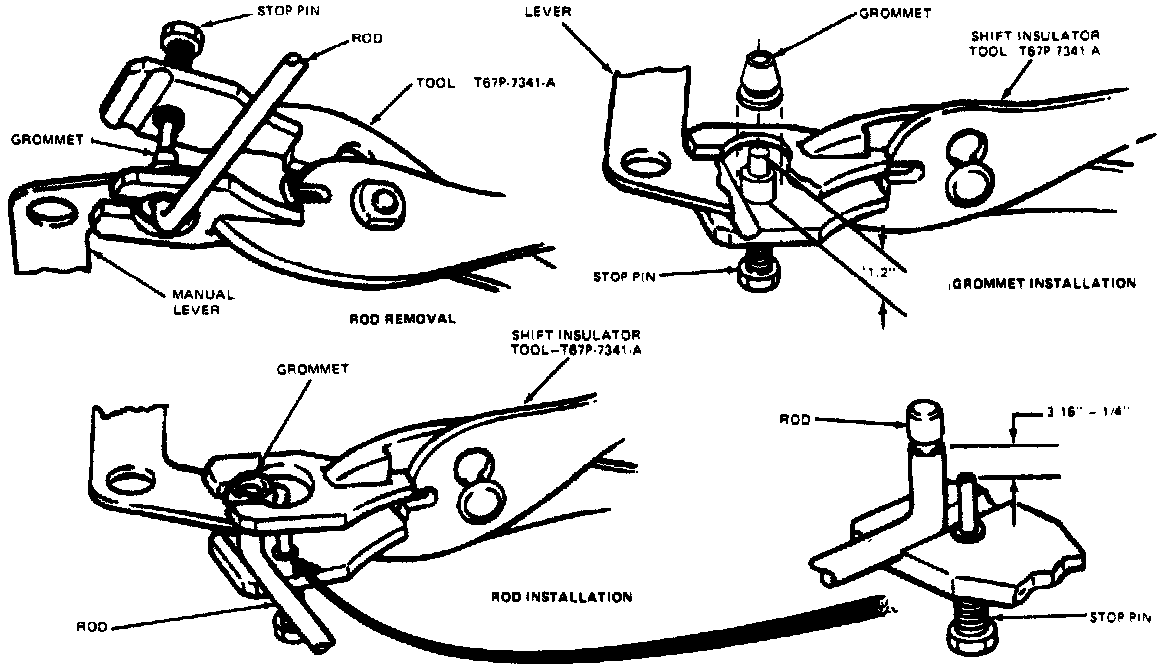
1. Place lower jaw of shift linkage insulator T67P-7341-A or equivalent between lever and rod, then position stop pin against end of control rod and force rod out of grommet.
2. Remove grommet from lever by cutting off large shoulder with sharp knife.
3. Adjust stop pin to 1/2 inch and coat outside of grommet with suitable multi-purpose lubricant.
4. Place a new grommet on the stop Pin and force it into the lever hole, then turn grommet several times to ensure it is properly seated.
5. Squeeze rod into bushing until stop-washer seats against grommet.
Transmission in Vehicle
Removing Or Installing Shift Linkage Grommet In Limited Space Situations:
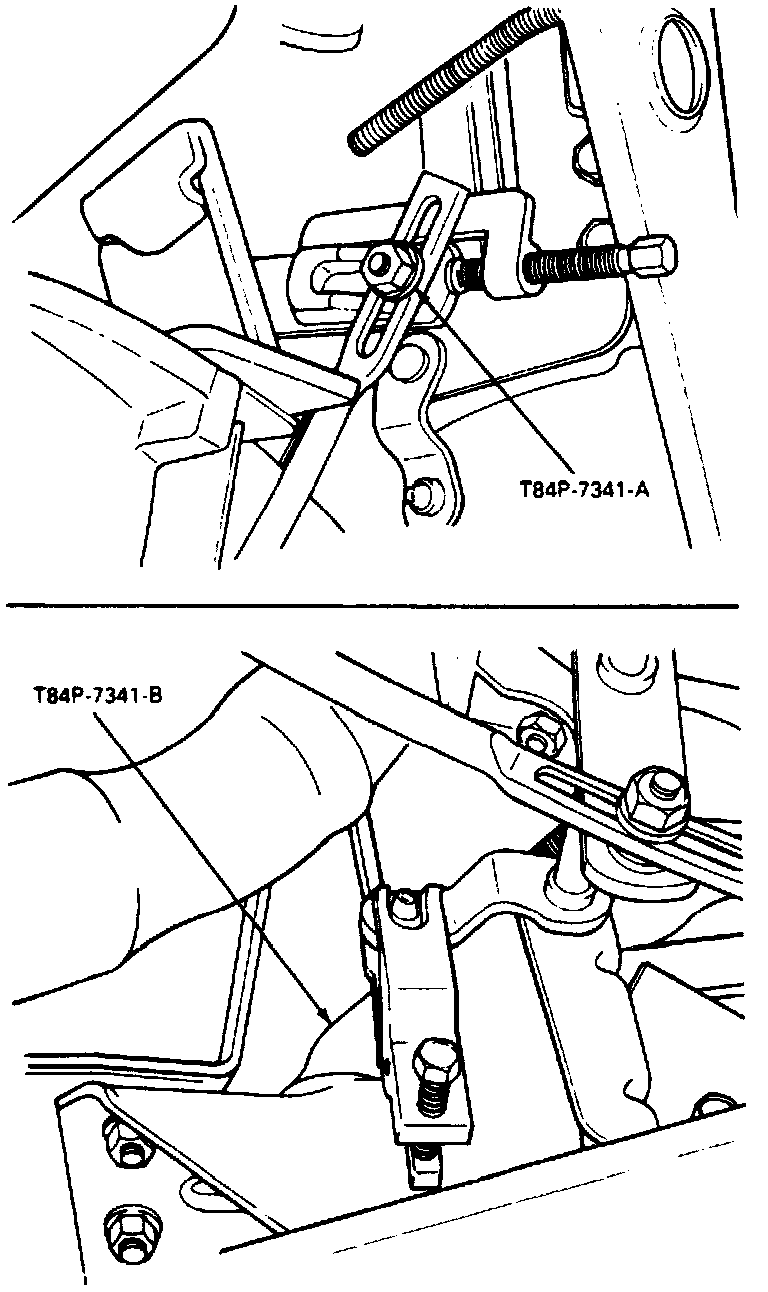
1. Disconnect linkage from grommet, then position shift linkage grommet remover T84P-7341-A or equivalent, and rotate screw in tool until grommet is forced out of lever.
2. Adjust stop on shift linkage grommet replacer T84P-4341-B or equivalent, to 1/2 inch, then coat outside of new grommet with suitable multi-purpose lubricant.
3. Position grommet on lever and install grommet replacer on lever, rotate screw to force grommet into position. Turn grommet several times to ensure it is fully seated.
4. Connect linkage and tighten attaching nuts.