Removal
VALVE BODYREMOVAL
NOTE: If valve body is replaced or reconditioned, the PCM Quick Learn Procedure must be performed.
NOTE: The Engine Cradle Crossmember assembly must be partially lowered to gain access to and remove the Valve Body assembly.
1. Disconnect battery negative cable.
Fig. 390 Battery:
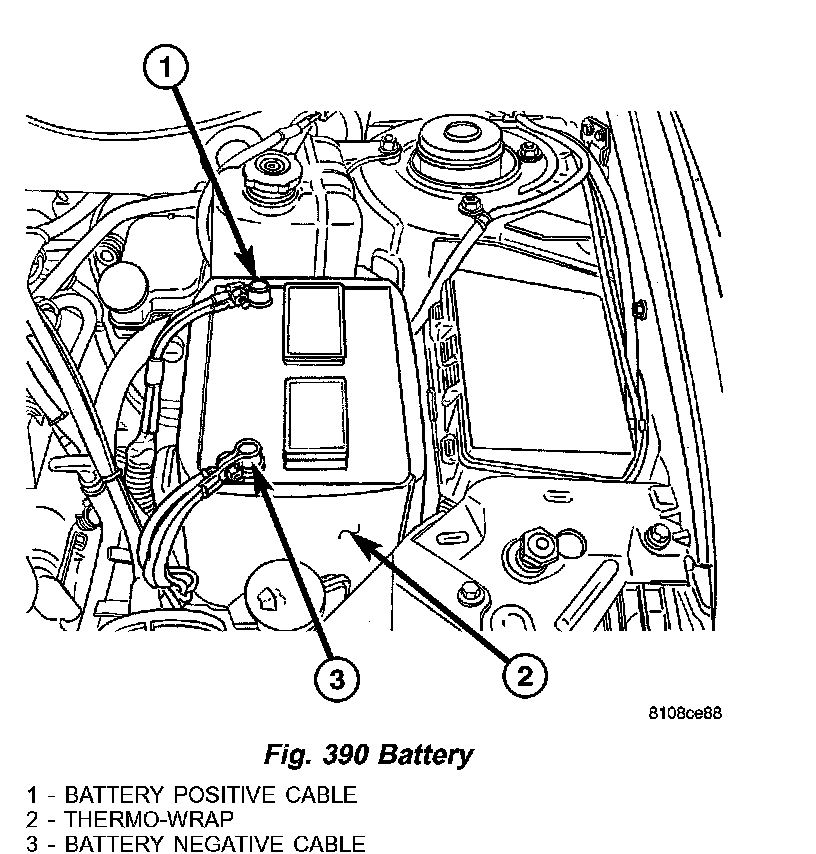
Fig. 391 Battery Tray:
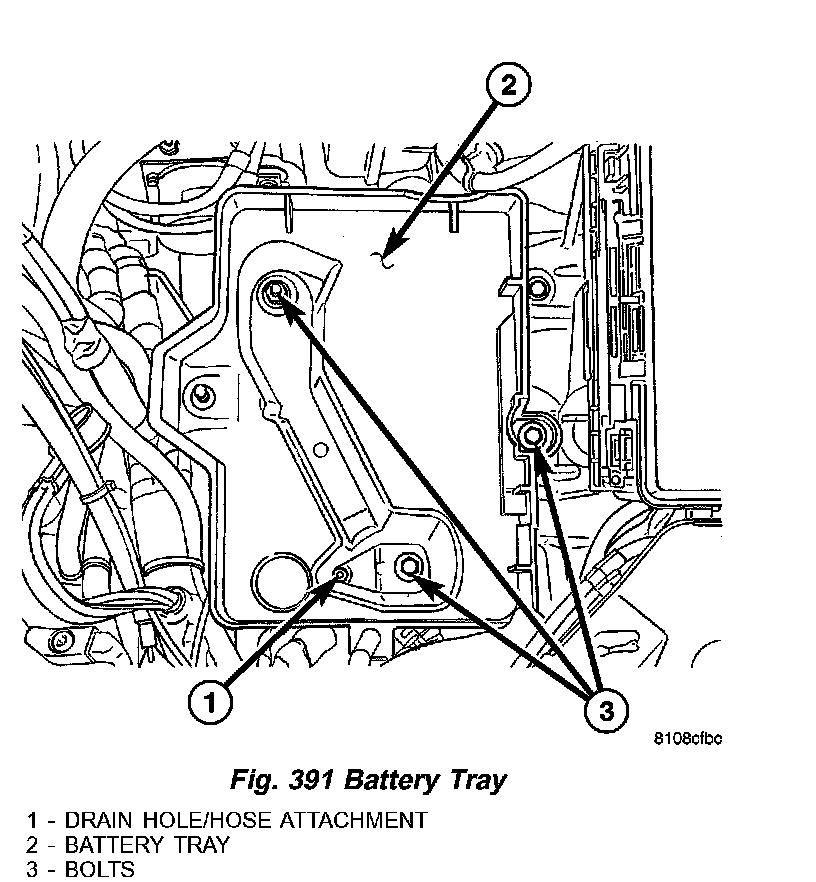
2. Remove battery and tray (Fig. 390) (Fig. 391).
Fig. 392 Engine Support Fixture 8534B:
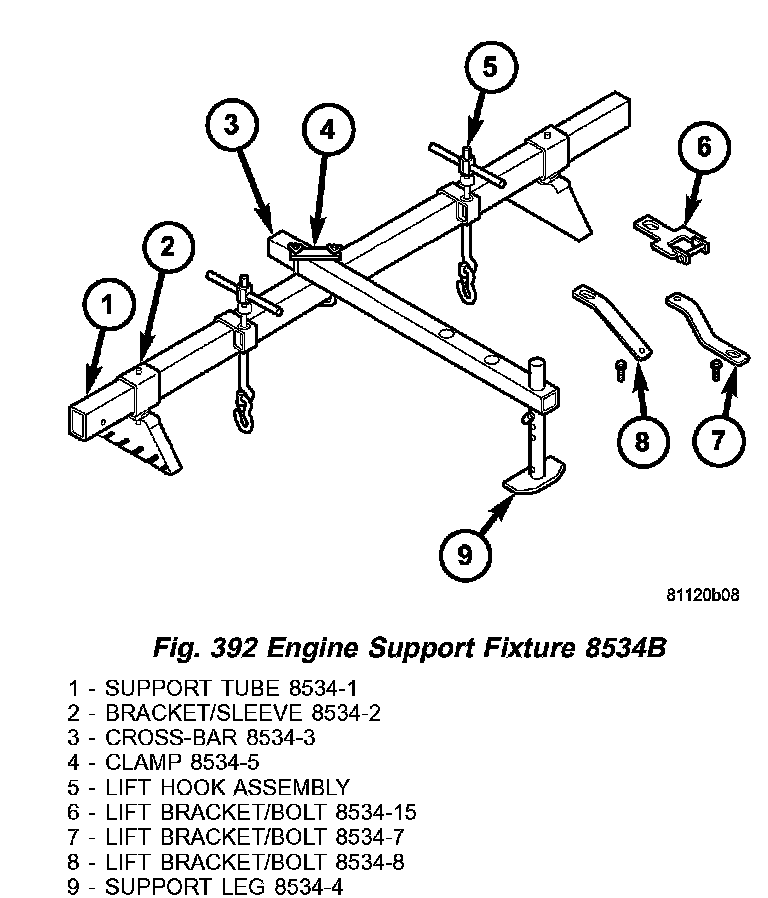
3. Install overhead powertrain support fixture (Tool 8534B and adapter kit 8534-12) (Fig. 392):
Fig. 393 Lift Bracket 8534-8:
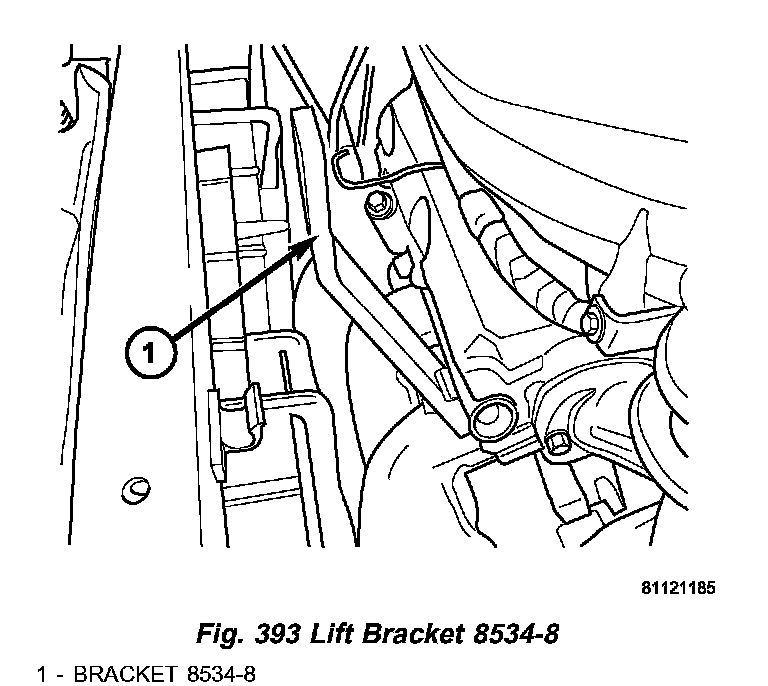
a. Remove engine oil dipstick tube-to-cylinder head fastener (Fig. 393). Install lift/support bracket 8534-8 and secure with dipstick tube bolt.
Fig. 394 Lift Bracket 8534-7:
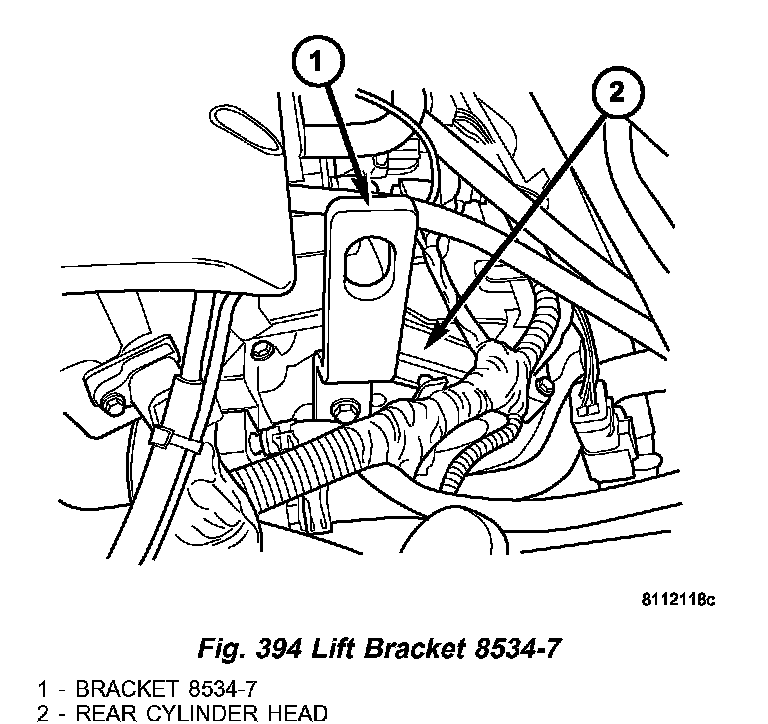
b. Disconnect coolant temperature sensor (at thermostat housing). Remove engine harness-to-cylinder head bolt. Position harness out of the way. Install and secure lift/support bracket and bolt 8534-7 as shown in (Fig. 394).
Fig. 395 Support Tube and Sleeve/Brackets:
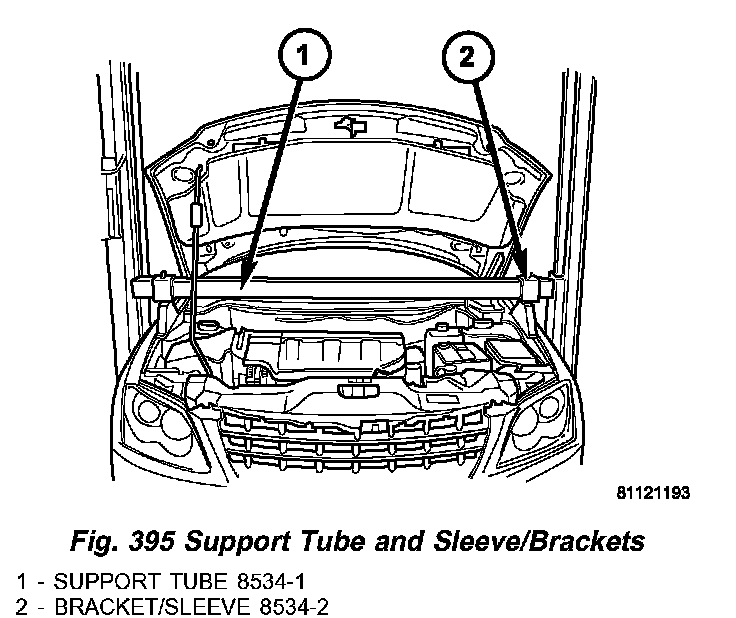
c. Assemble 8534-2 mounting bracket/sleeve assemblies to support tube 8534-1 and install to vehicle, allowing brackets to rest on inner fender ledges (Fig. 395).
Fig. 396 Crossbar and Support Leg:
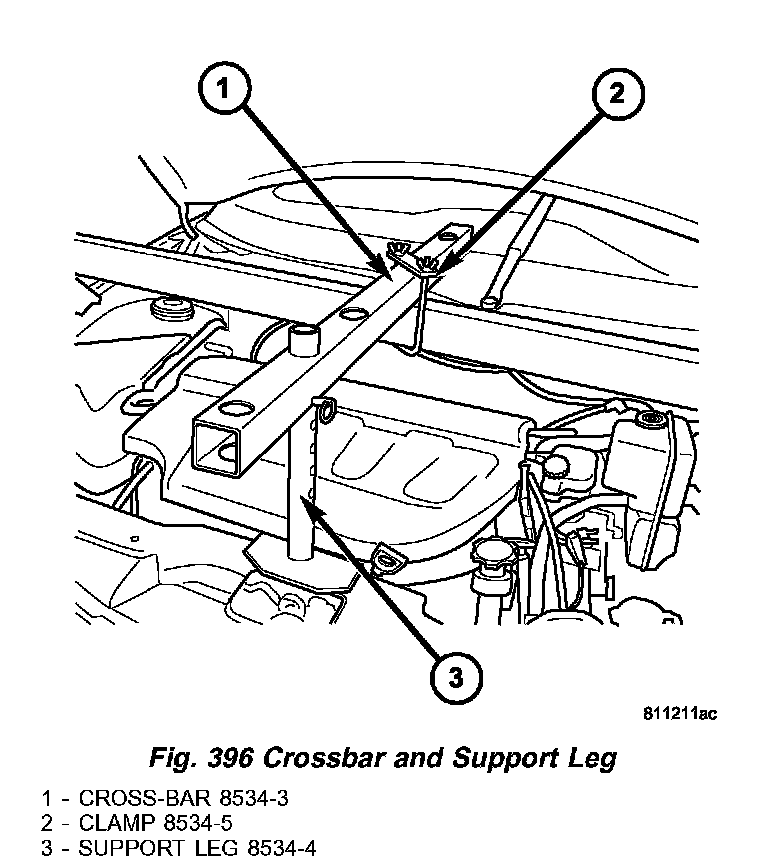
d. Assemble cross-bar 8534-3, clamp 8534-5 and support leg 8534-4 to support tube, allowing support leg to rest on radiator upper support (Fig. 396).
Fig. 397 Clamp 8534-5:
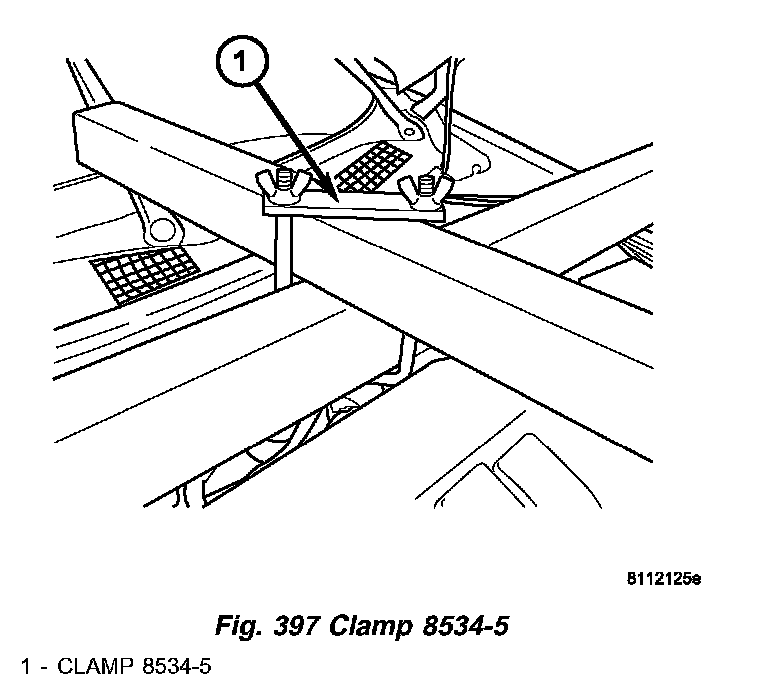
Fig. 398 Torque Thumb Screw and Pivot Nut:
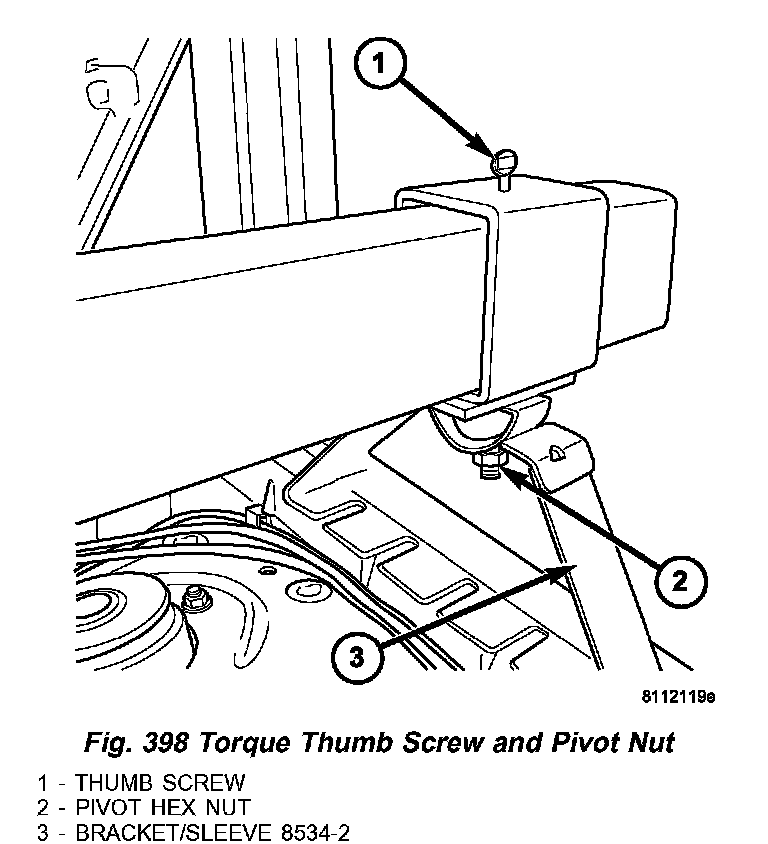
e. Tighten cross-bar-to-support tube clamp 8534-5 (Fig. 397), as well as mounting bracket/ sleeve 8534-2 thumb screw and hex nut to secure fixture (Fig. 398).
Fig. 399 T-Handle, Bracket, and Hook Assy at Rear Lift Bracket:
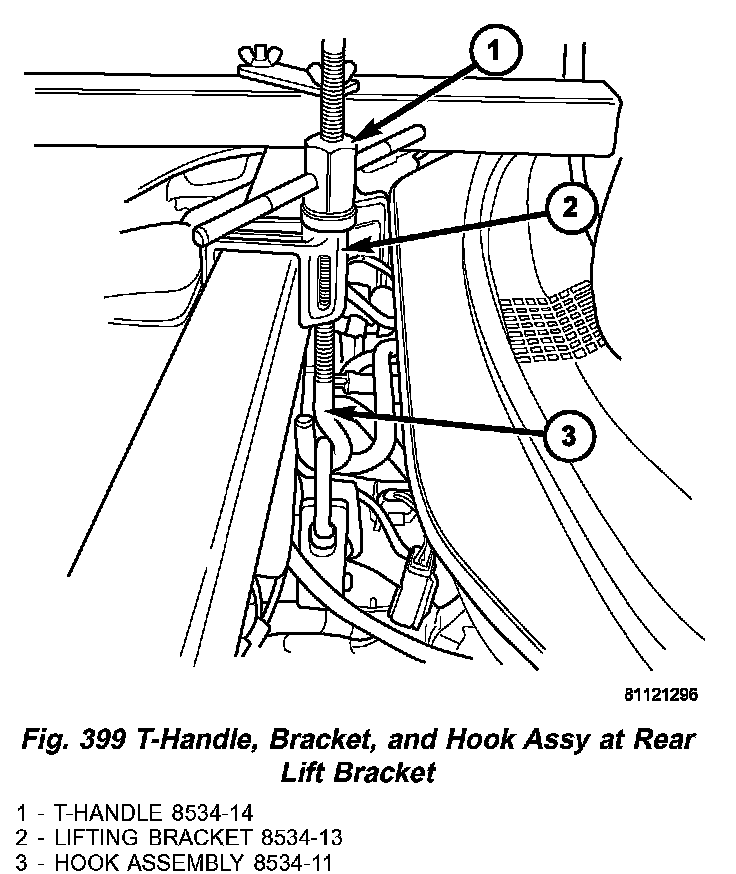
Fig. 400 T-Handle, Bracket, and Hook Assy at Front Lift Bracket:
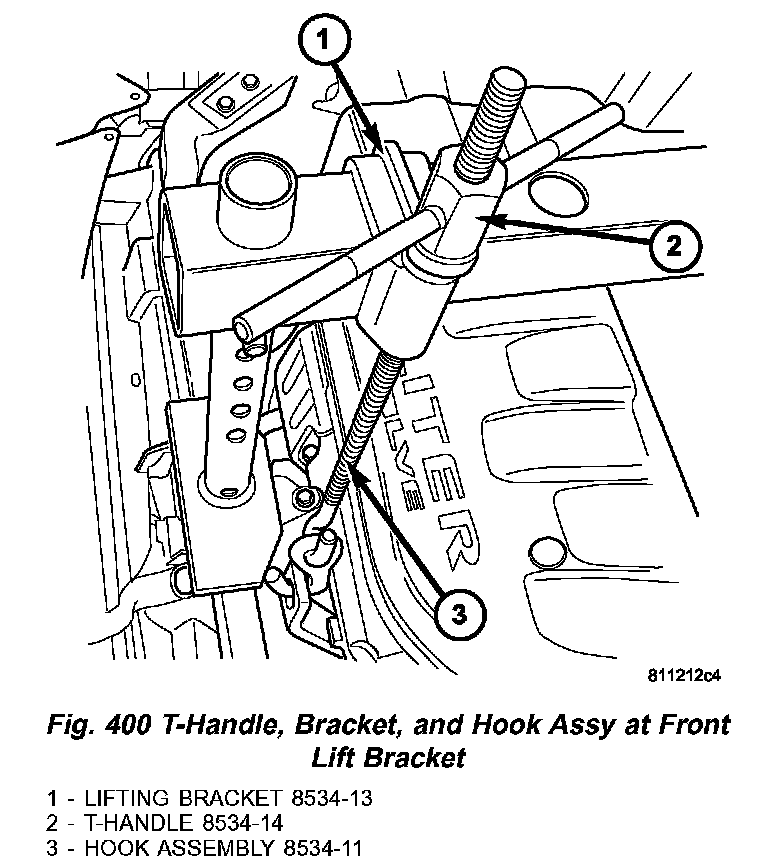
Fig. 401 Engine Support Fixture 8534B:
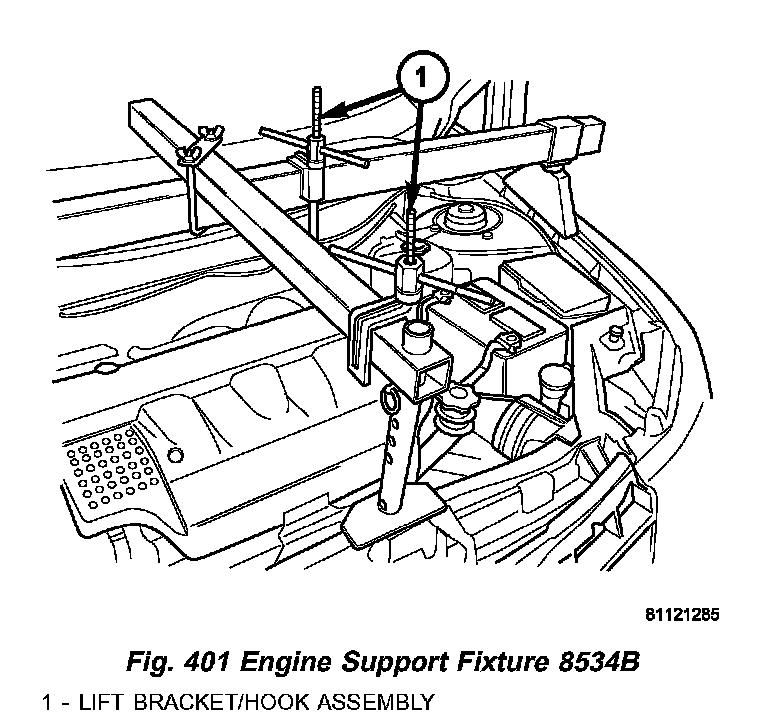
f. Install lift bracket/hook assemblies as shown in (Fig. 399) (Fig. 400) (Fig. 401). Tighten t-handles just enough to build tension between the fixture and drivetrain.
4. Disconnect gearshift cable from manual valve lever.
5. Remove manual valve lever from manual shaft.
6. Raise vehicle on hoist.
7. Remove engine mount (front and rear) to engine cradle crossmember nuts.
8. Place scribe marks at engine cradle crossmember and body for alignment upon reassembly.
9. Support cradle at rear with screw jack or equivalent. Partially remove engine cradle crossmember-to-body bolts, lowering cradle at rear enough to facilitate cradle pivoting.
10. Support cradle at front with screw jack or equivalent. Remove engine cradle crossmember-to-body bolts. Lower cradle at front approximately 10 inches to facilitate valve body removal.
Fig. 402 Oil Pan Bolts:
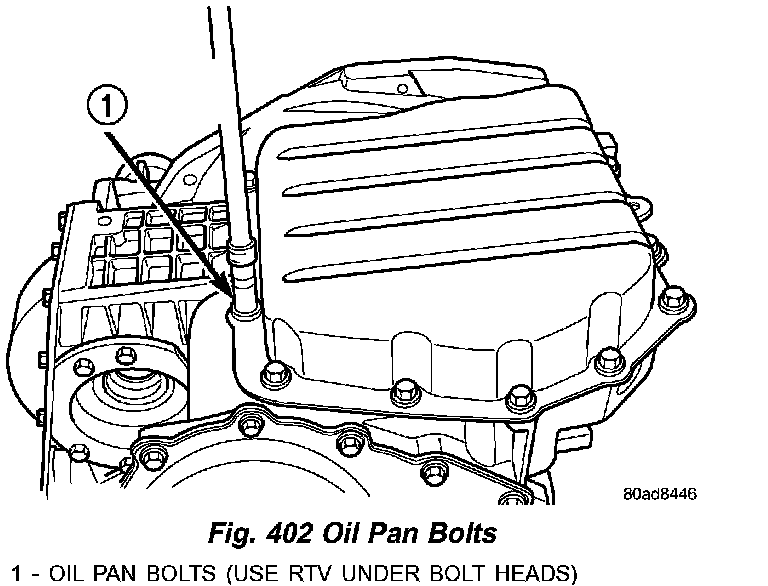
11. Remove oil pan bolts (Fig. 402).
Fig. 403 Oil Pan:
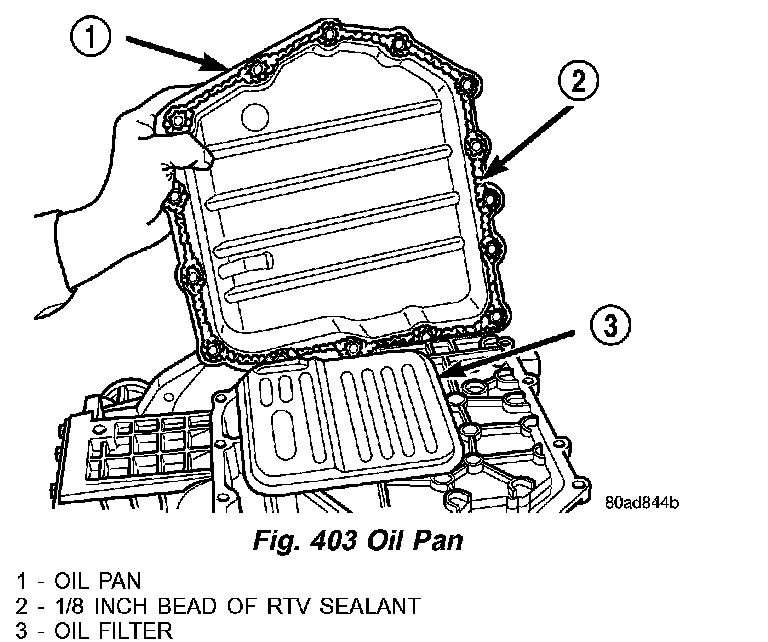
12. Remove oil pan (Fig. 403).
Fig. 404 Oil Filter:
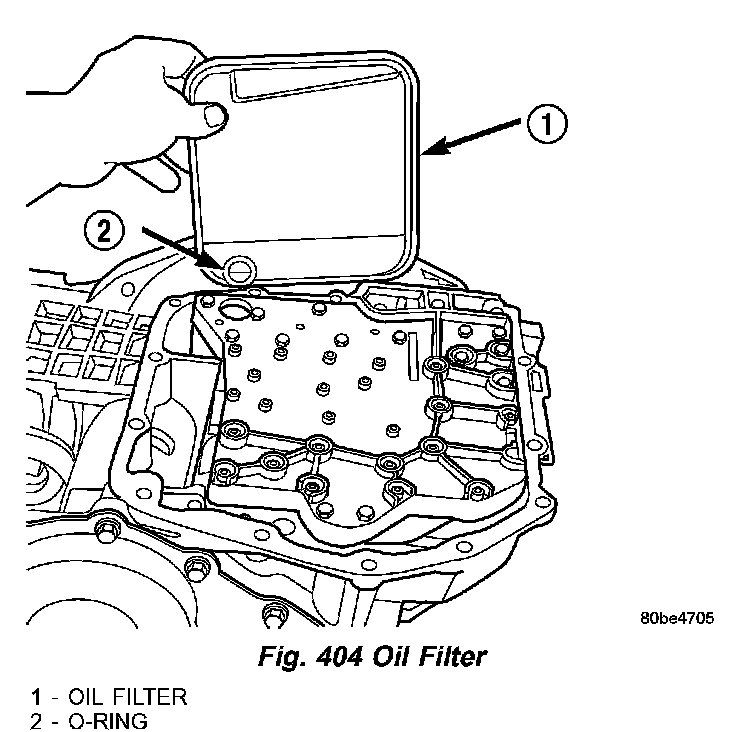
13. Remove oil filter (Fig. 404).
Fig. 405 Valve Body Attaching Bolts:
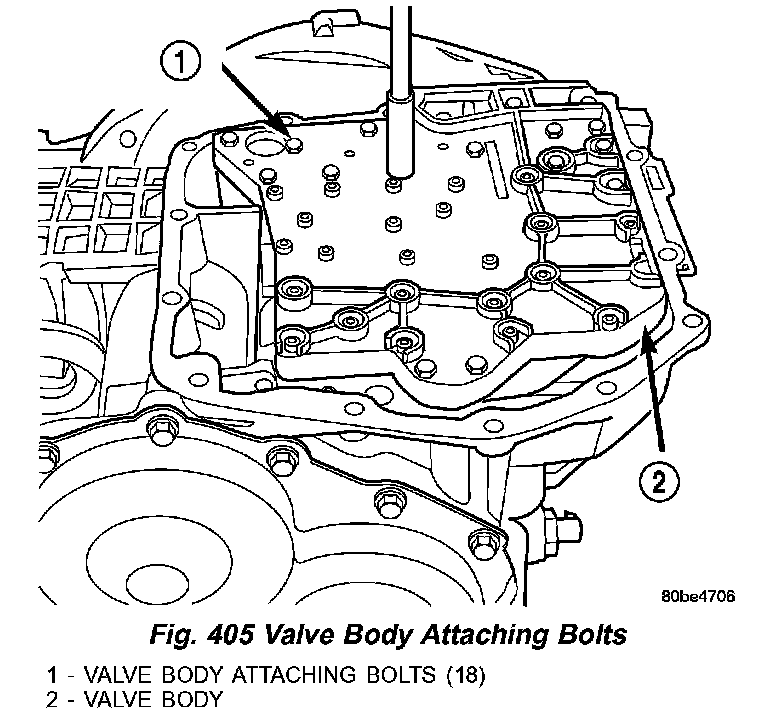
14. Remove the valve body-to-transaxle case bolts (Fig. 405).
NOTE: To ease removal of the valve body, turn the manual valve lever fully clockwise to low or first gear.
Fig. 406 Push Park Rod Rollers from Guide Bracket:
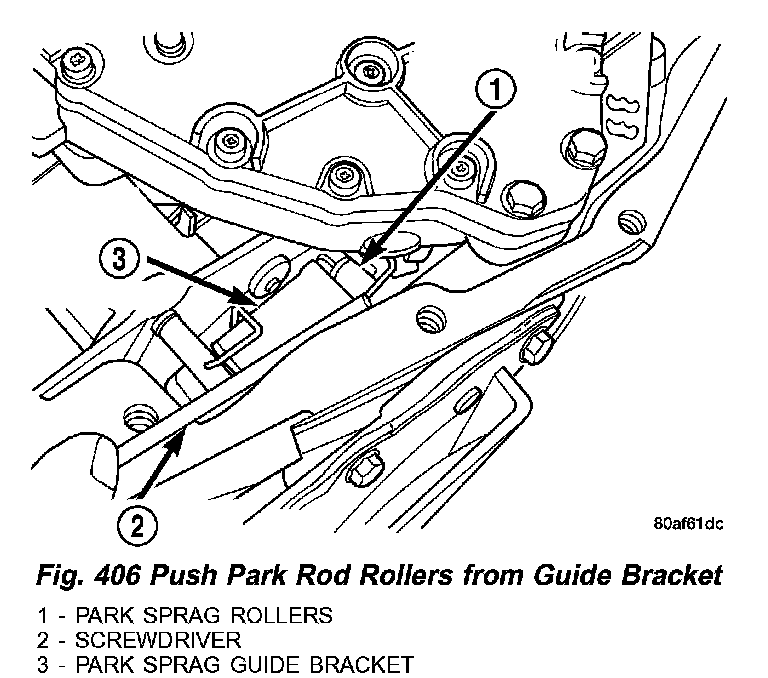
Fig. 407 Valve Body Removal/Installation:
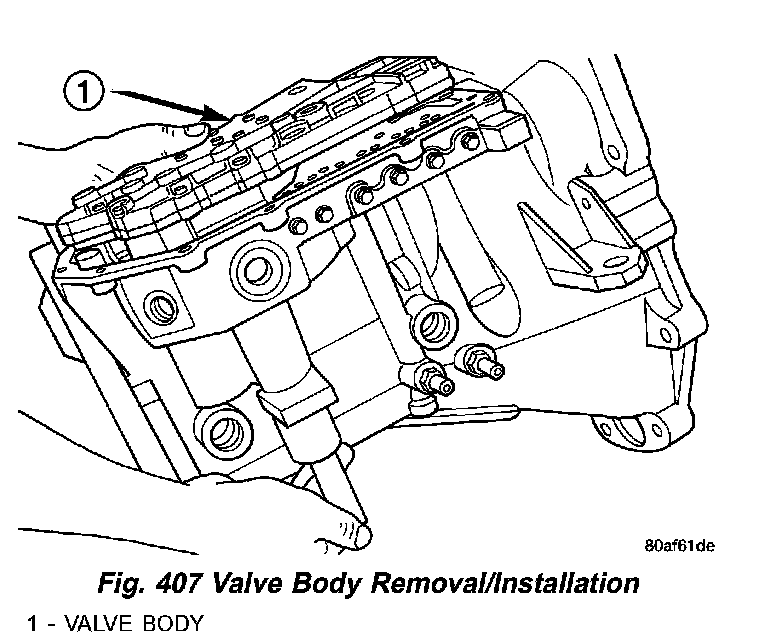
15. Remove park rod rollers from guide bracket and remove valve body from transaxle (Fig. 406) (Fig. 407). Note position of accumulator and springs upon removal for assembly reference.
CAUTION: The valve body manual shaft pilot may distort and bind the manual valve if the valve body is mishandled or dropped.