Floor Console Ducts Replacement
REMOVAL1. Remove the front and rear center floor console covers.
2. Disconnect and isolate the battery negative cable.
Floor Console Base And Duct Assembly:
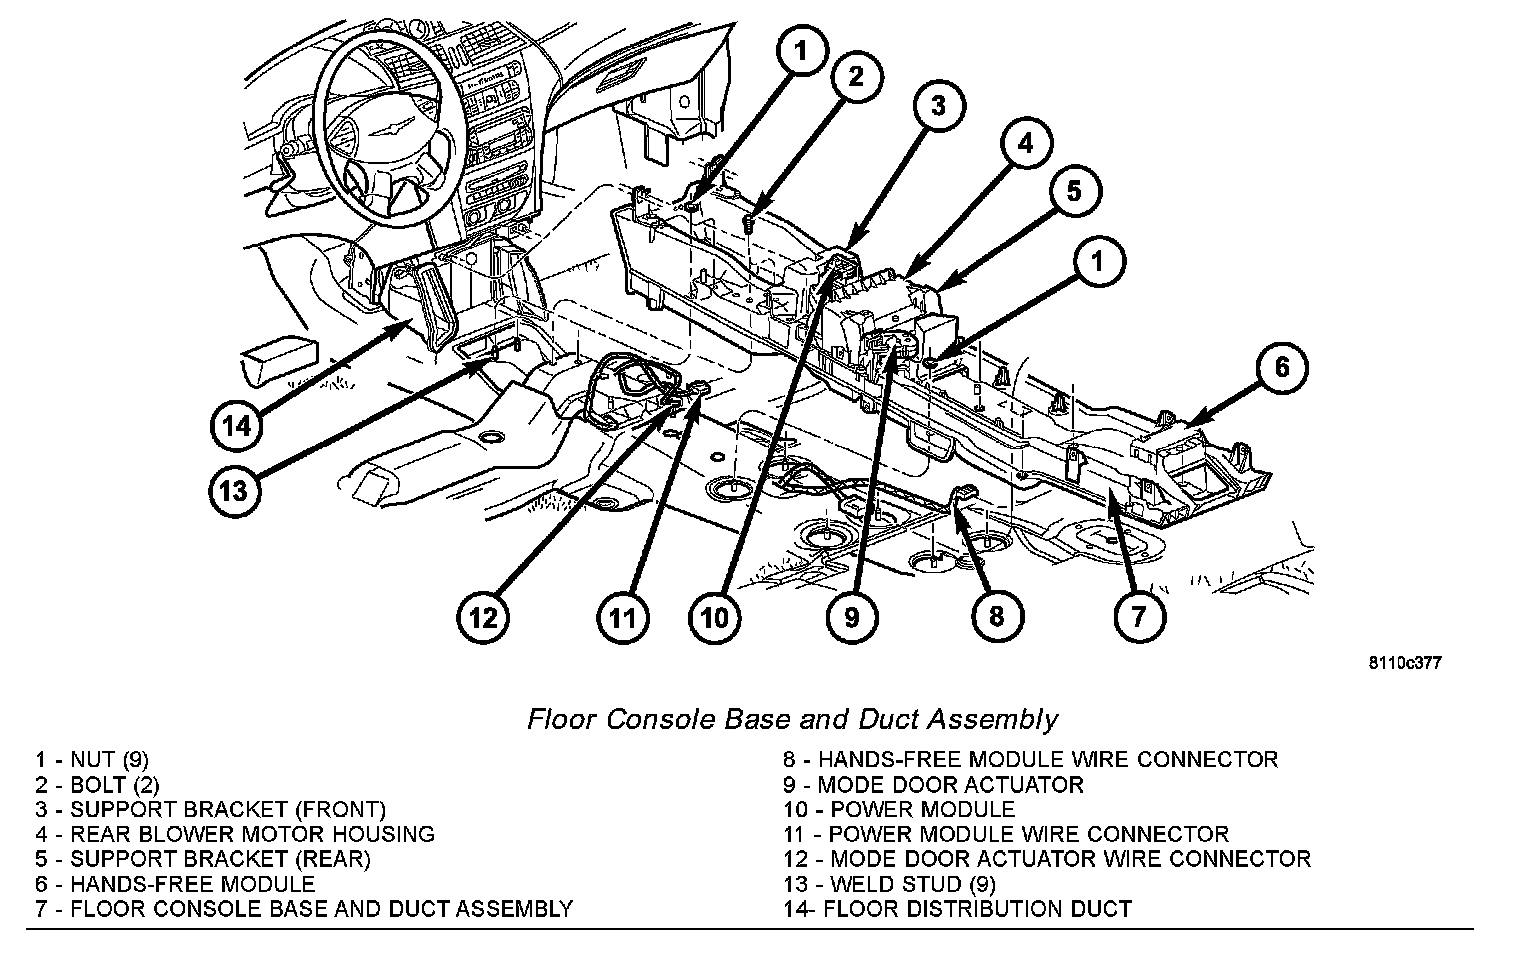
3. Disconnect the body wire harness connectors from the rear blower motor power module, floor console mode door actuator and the hands-free module.
4. Remove the body wire harness bracket from the console support bracket.
5. Remove the gear shift assembly.
6. If necessary, remove the two support brackets, the rear blower motor housing and the hands-free module from the floor console base and duct assembly.
7. Remove the nine nuts and two bolts that secure the floor console base and duct assembly to the floor pan.
8. Remove the floor console base and duct assembly from the vehicle.
INSTALLATION
1. Position the floor console base and duct assembly in the vehicle.
2. Install the nine nuts and two bolts that secure the floor console base and duct assembly to the floor pan. Tighten the nuts and bolts to 5 Nm (45 in. lbs.).
3. If removed, install the two support brackets, the rear blower motor housing and the hands-free module. Tighten the screws to 2 Nm (17 in. lbs.).
4. Install the gear shift assembly.
5. Install the body wire harness bracket onto the console support bracket.
6. Connect the body wire harness connectors to the rear blower motor power module, floor console mode door actuator and the hands-free module.
7. Reconnect the battery negative cable.
8. Install the front and rear center floor console covers.