Instrument Panel Outlets
REMOVAL1. If servicing the right side instrument panel outlet, first remove the center trim panel from the right side of the instrument panel by gently prying the outer perimeter of the trim panel away from the instrument panel using a trim stick or another suitable wide flat-blade tool, until the snap features on the trim panel are released.
2. If servicing the left side instrument panel outlet, first remove the instrument duster bezel.
3. Remove the instrument panel end cover using a trim stick or another suitable wide flat-blade tool, until the snap features on the trim panel are released.
4. Remove the two instrument panel outlet screws from the instrument panel.
Instrument Panel Outlet - Right Side Shown:
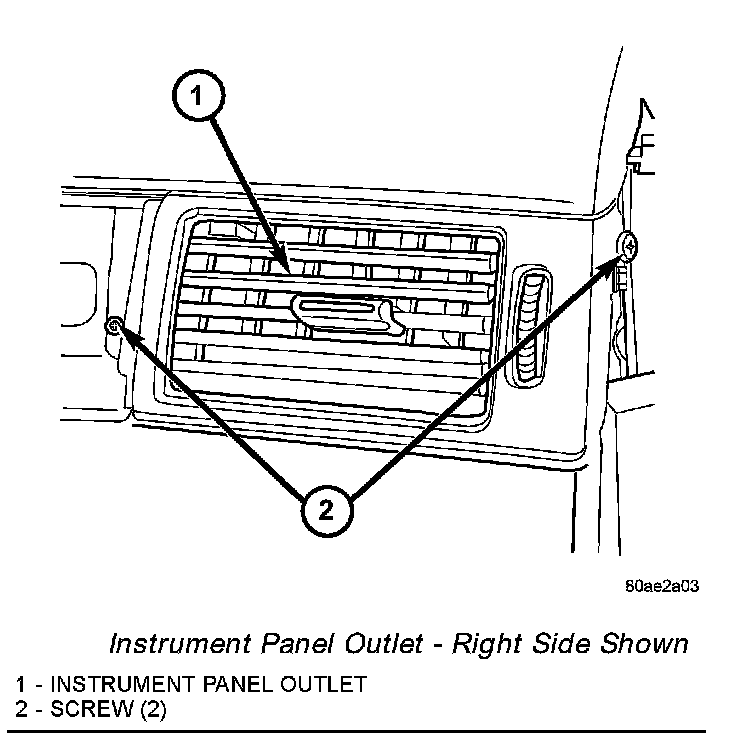
5. Remove the instrument panel outlet from the panel duct opening in the instrument panel.
INSTALLATION
1. Position the instrument panel outlet into the panel duct opening in the instrument panel.
2. Install the two instrument panel outlet screws. Tighten to 2 Nm (17 in. lbs.).
3. Position the instrument panel end cover onto the instrument panel.
4. Using hand pressure, press the instrument panel end cover firmly and evenly into the instrument panel opening until the snap features on the cover are fully engaged.
5. If servicing the left instrument panel outlet, reinstall the instrument cluster bezel.
6. If servicing the right instrument panel outlet, reinstall the right trim panel by pressing the trim panel firmly and evenly into the instrument panel opening until the snap features are fully engaged.