Front
REMOVAL - DISC BRAKE SHOES (FRONT)NOTE: Before proceeding with this procedure, Refer to Service Precautions.
1. Raise vehicle.
NOTE: When removing the center cap from the wheel do not use a sharp or hard tool. Use of such a tool can mar the finish on the wheel and damage the center cap.
Wheel Center Cap Removal:
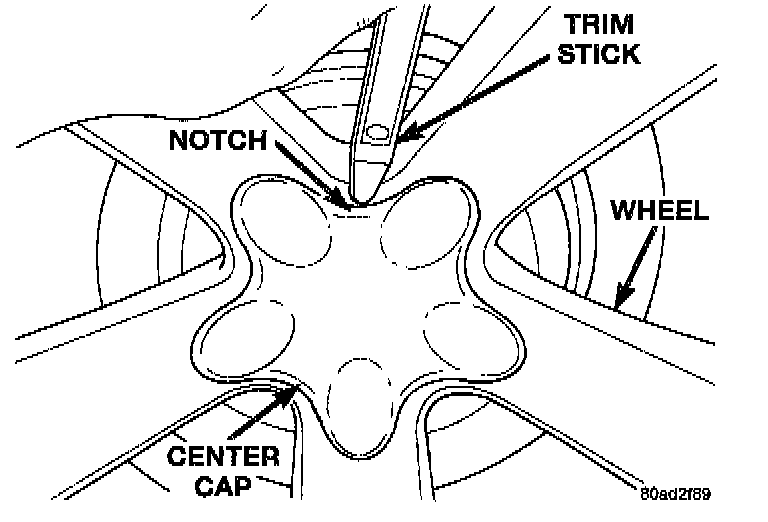
2. Remove the center cap from the wheel. Center cap is removed by inserting a trim stick into the notch on the center cap and prying it off the wheel.
3. Remove wheels and tires .
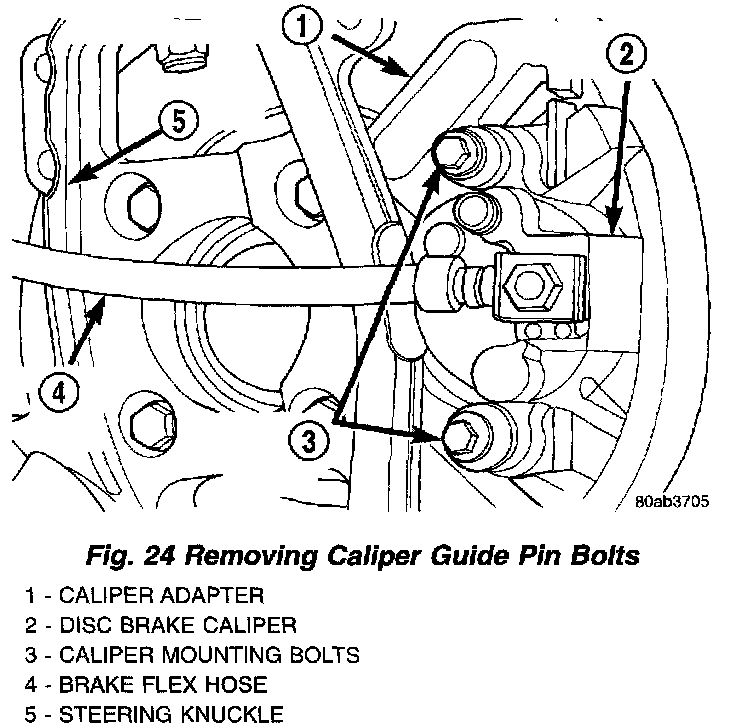
4. Remove the 2 bolts attaching the disc brake caliper to the caliper adapter.
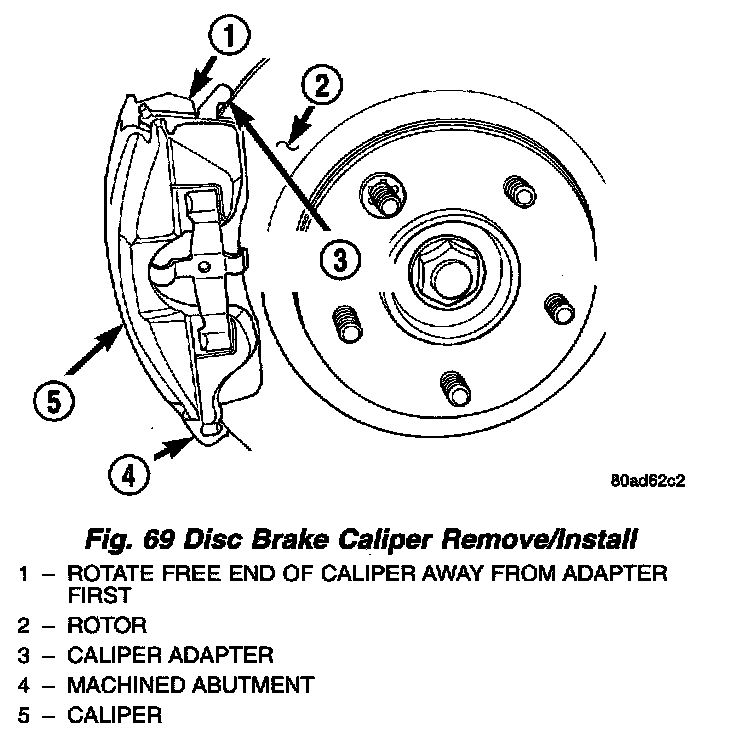
5. Remove the disc brake caliper from the caliper adapter by first rotating free end of caliper away from caliper adapter. Then slide the opposite end of the caliper out from under the machined abutment on the caliper adapter.
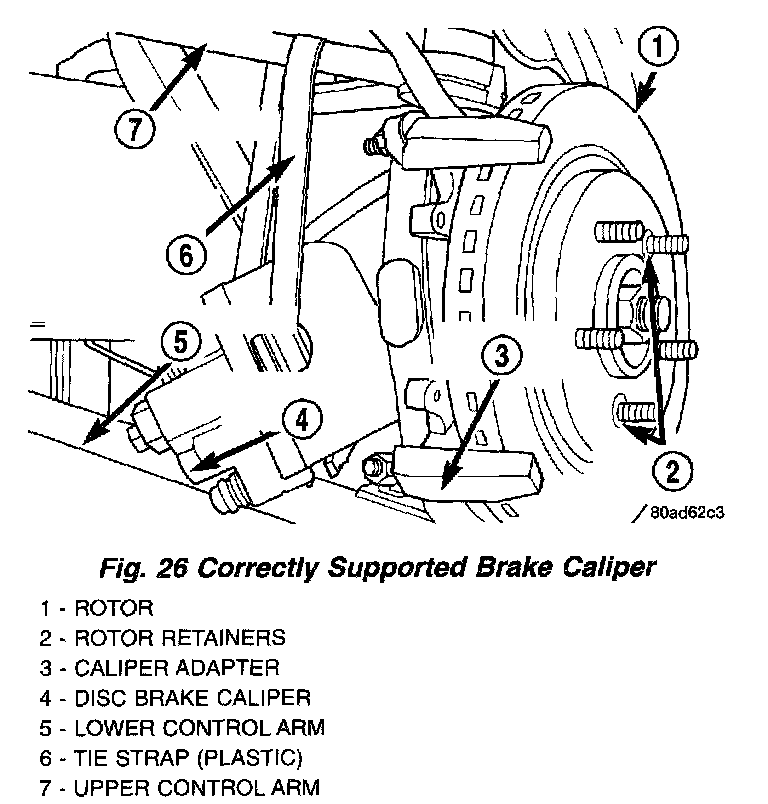
NOTE: The upper control arm on this vehicle has an anodized finish applied to it. When hanging the disc brake caliper from the control arm do not use wire or any similar material that would damage the anodized finish. A plastic tie strap as shown, is a suitable method of supporting the disc brake caliper.
6. Support the disc brake caliper firmly by hanging it from the upper control arm using a plastic tie strap. This is required to prevent the weight of the caliper from being supported by the brake flex hose. Supporting the weight of the caliper by the flex hose can damage the flex hose.
Removing Outboard Brake Shoe:
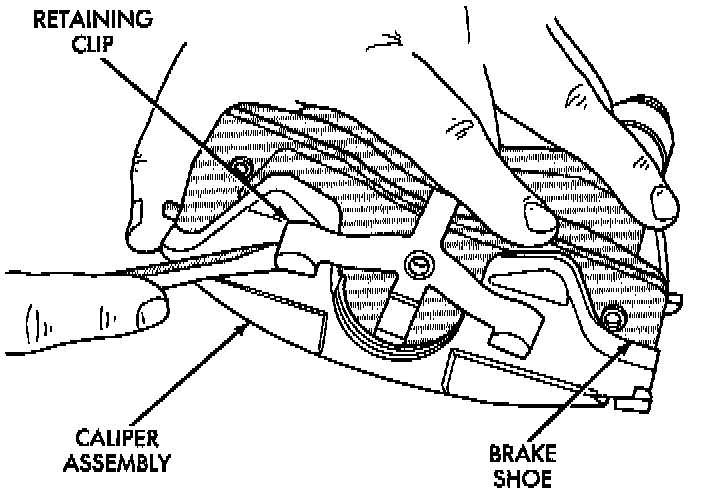
7. Remove the outboard brake shoe from the caliper, by prying the retaining clip over the raised area on the caliper. Then slide the brake shoe down and off the caliper.
Inboard Brake Shoe:
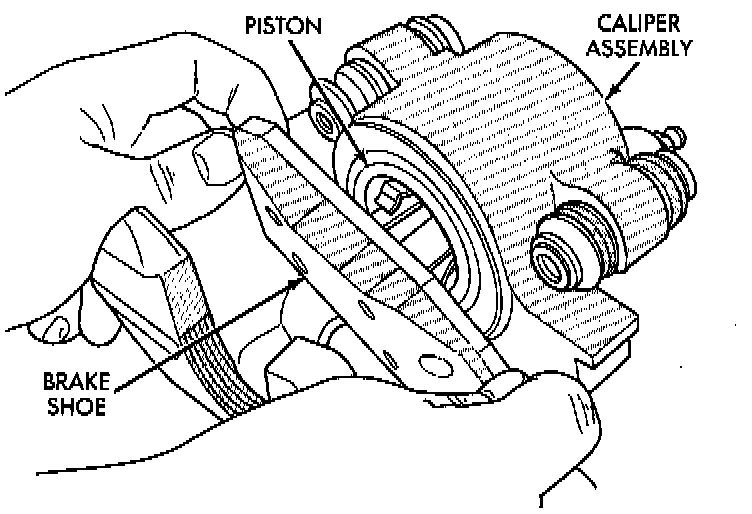
8. Pull inboard brake shoe out of the caliper piston until retaining clip on brake shoe is free from cavity in piston.
INSTALLATION - DISC BRAKE SHOES (FRONT)
1. Push the caliper piston into the piston bore of the caliper until it is fully seated at the bottom of the piston bore. This is required for caliper installation when new brake shoes are installed on the caliper.
2. Remove the protective paper from the noise suppression gasket on both the inner and outer brake shoes (if equipped).
Inboard Brake Shoe:
3. Install the new inboard brake shoe into the caliper piston by firmly pressing it into the piston. Be sure inboard brake shoe is positioned squarely against the face of the caliper piston.
Installing Outboard Brake Shoe:
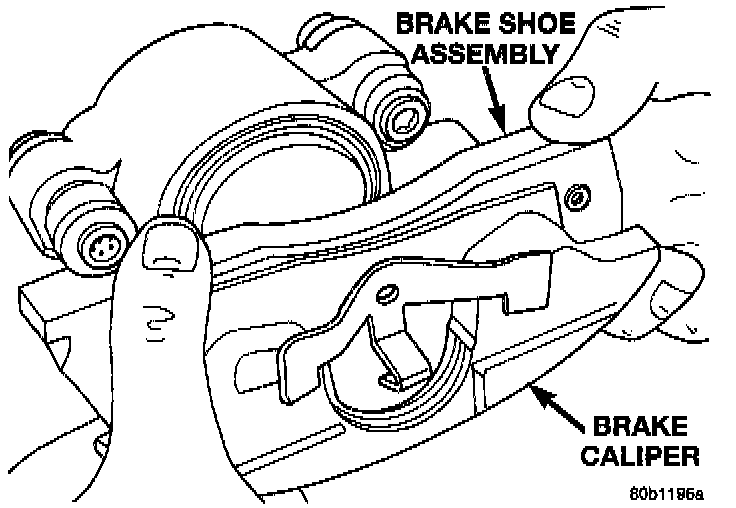
4. Slide the new outboard brake shoe onto the caliper.
5. Lubricate both abutments on the caliper adapter with a liberal amount of Mopar Brake Grease, or an equivalent.
CAUTION: Use care when installing the caliper on the caliper adapter, to ensure the seals on the caliper guide pin bushings do not get damaged.
6. Carefully position the caliper and brake shoes on the caliper adapter by hooking lower or upper end of caliper under the machined abutment on the caliper adapter. Then rotate the caliper into position at the opposite end of the caliper adapter.
CAUTION: Extreme caution should be taken not to cross thread the caliper guide pin bolts.
7. Install the caliper guide pin bolts and tighten to a torque of 27 Nm (20 ft. lbs.).
8. Install the wheel and tire.
9. Using a torque wrench, tighten the wheel mounting stud nuts in the proper sequence until all nuts are torqued to half the specified torque. Then repeat the tightening sequence to the full specified torque of 135 Nm (100 ft. lbs.).
10. Install the center cap on the wheel
11. Lower vehicle.
12. Before moving vehicle, pump the brake pedal several times to ensure the vehicle has a firm brake pedal.