Evaporator Hose Assembly Replacement
EVAPORATOR HOSE ASSEMBLY REPLACEMENTTOOLS REQUIRED
J 39400-A Halogen Leak Detector
REMOVAL PROCEDURE
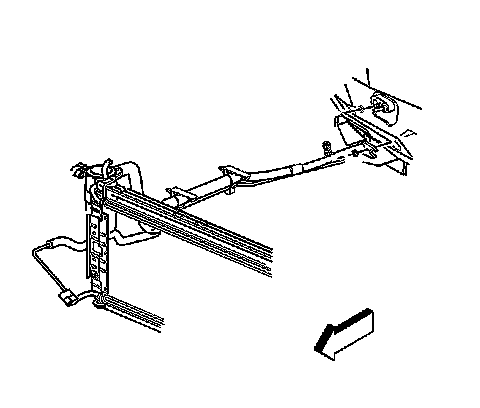
1. Recover the refrigerant. Refer to Refrigerant Recovery and Recharging.
2. Remove the right front fender liner.
3. Disconnect the evaporator hose assembly from the evaporator.
4. Remove and discard the seal washer.
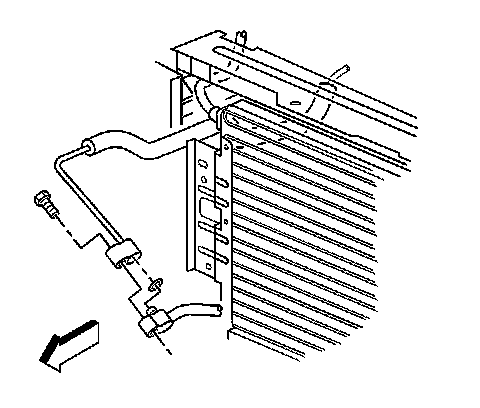
5. Remove the bolt holding the evaporator hose assembly to the condenser.
6. Remove the evaporator hose assembly from the condenser.
7. Remove and discard the seal washer.
8. Unfasten the two clips holding the evaporator hose assembly.
9. Remove the evaporator hose assembly.
INSTALLATION PROCEDURE
1. Reposition the evaporator hose assembly.
2. Fasten the 2 clips holding the evaporator hose assembly.
3. Install the new seal washer to the condenser end of the compressor hose.
4. Connect the evaporator hose assembly to the evaporator.
NOTE: Refer to Fastener Notice in Service Precautions.
5. Install nut to evaporator hose assembly.
Tighten the nut to 25 N.m (18 lb ft).
6. Install a new seal washer on condenser end of the evaporator hose assembly.
7. Install the evaporator hose and bolt to the condenser.
Tighten the fitting bolt to 25 N.m (18 lb ft).
8. Install the right front fender liner.
9. Lower the vehicle.
10. Evacuate and charge the refrigerant system. Refer to Refrigerant Recovery and Recharging.
11. Leak test the fittings of the component using the J 39400-A.