Shift Linkage: Service and Repair
Shift Control Linkage Replacement D16 Transmission
Removal Procedure
Caution: Unless directed otherwise, the ignition and start switch must be in the OFF or LOCK position, and all electrical loads must be OFF before servicing any electrical component. Disconnect the negative battery cable to prevent an electrical spark should a tool or equipment come in contact with an exposed electrical terminal. Failure to follow these precautions may result in personal injury and/or damage to the vehicle or its components.
For Vehicles equipped with OnStar� (UE1) with Back Up Battery:
- The Back Up Battery is a redundant power supply to allow limited OnStar� functionality in the event of a main vehicle battery power disruption to the VCIM (OnStar�module). Do not disconnect the main vehicle battery or remove the OnStar� fuse with the ignition key in any position other than OFF. Retained accessory power (RAP) should be allowed to time out or be disabled (simply opening the driver door should disable RAP) before disconnecting power. Disconnecting power to the OnStar� module in any way while the ignition is On or with RAP activated may cause activation of the OnStar� Back-Up Battery (BUB) system and will discharge and permanently damage the back-up battery. Once the Back-Up Battery is activated it will stay on until it has completely discharged. The BUB is not rechargeable and once activated the BUB must be replaced.
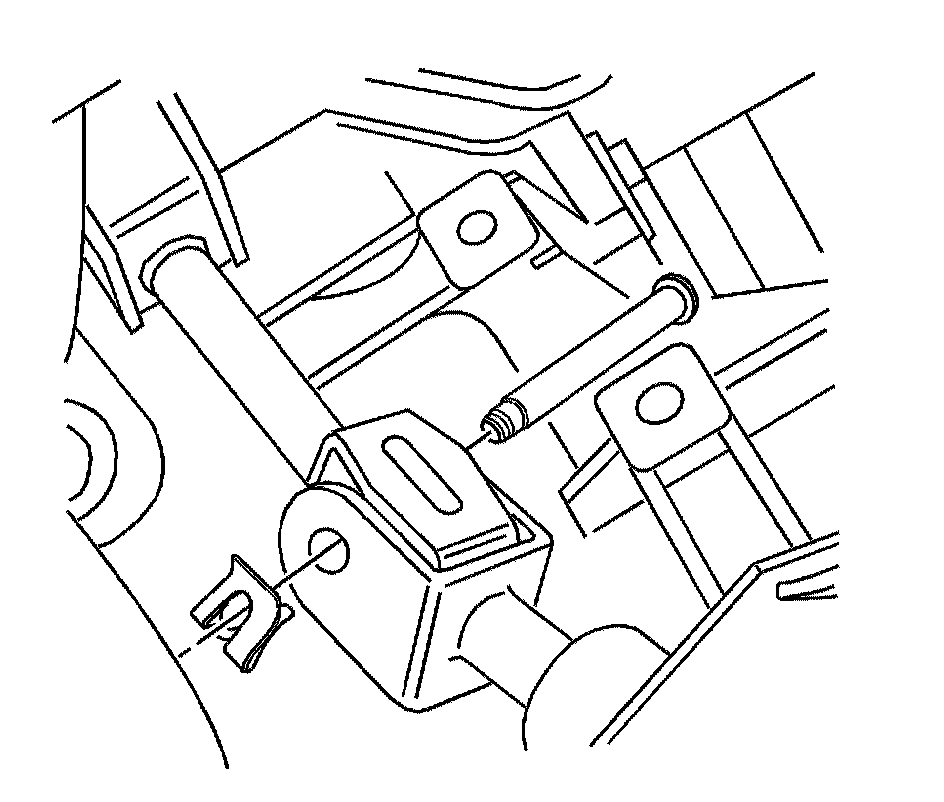
1. Disconnect the negative battery cable.
2. Remove the rod clamp.
3. Remove the clip and the bolt from the universal joint.
4. Separate the universal joint from the transaxle.
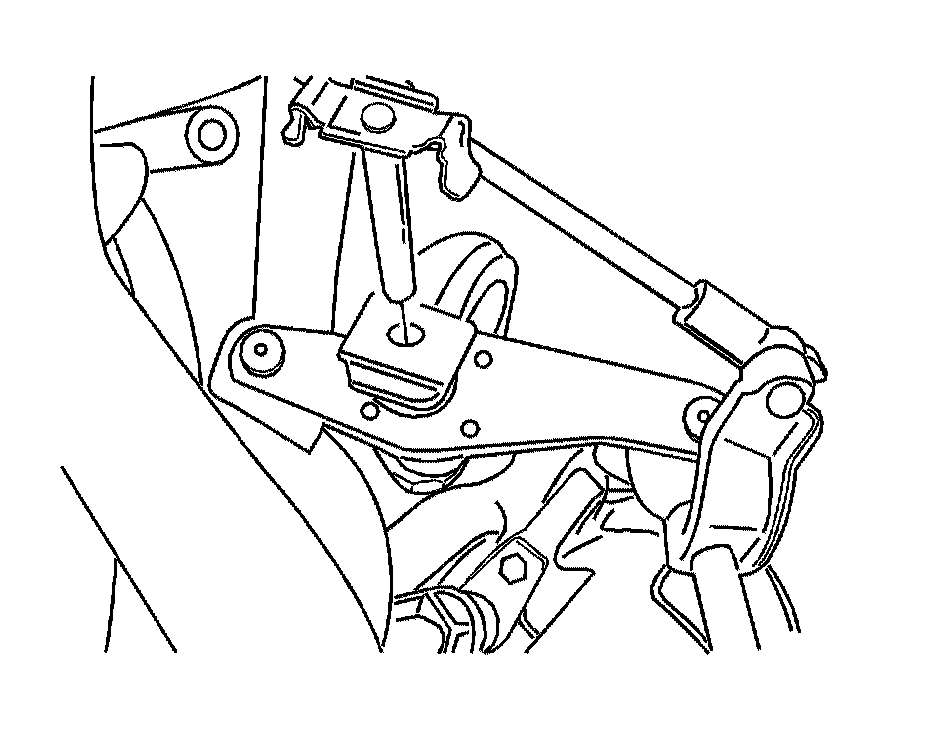
5. Remove the fixing shaft pin and separate the linkage connection part from the transaxle rear mounting bracket.
6. Remove the shift linkage assembly.
Installation Procedure
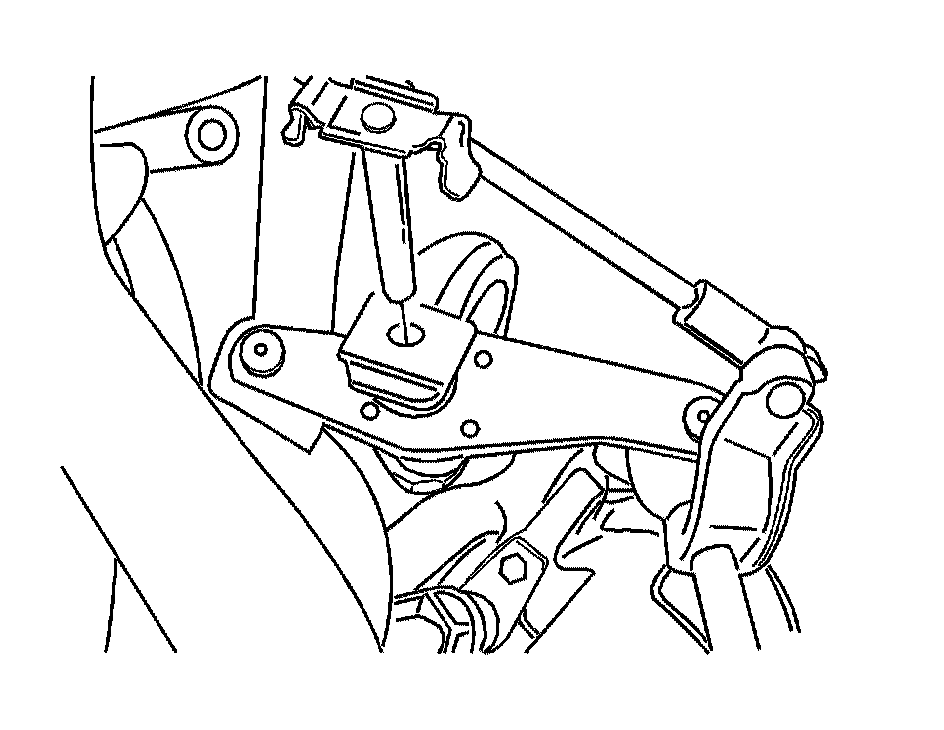
1. Install the shift linkage assembly.
2. Install the fixing shaft pin and connect the linkage connection part to the transaxle rear mounting bracket.
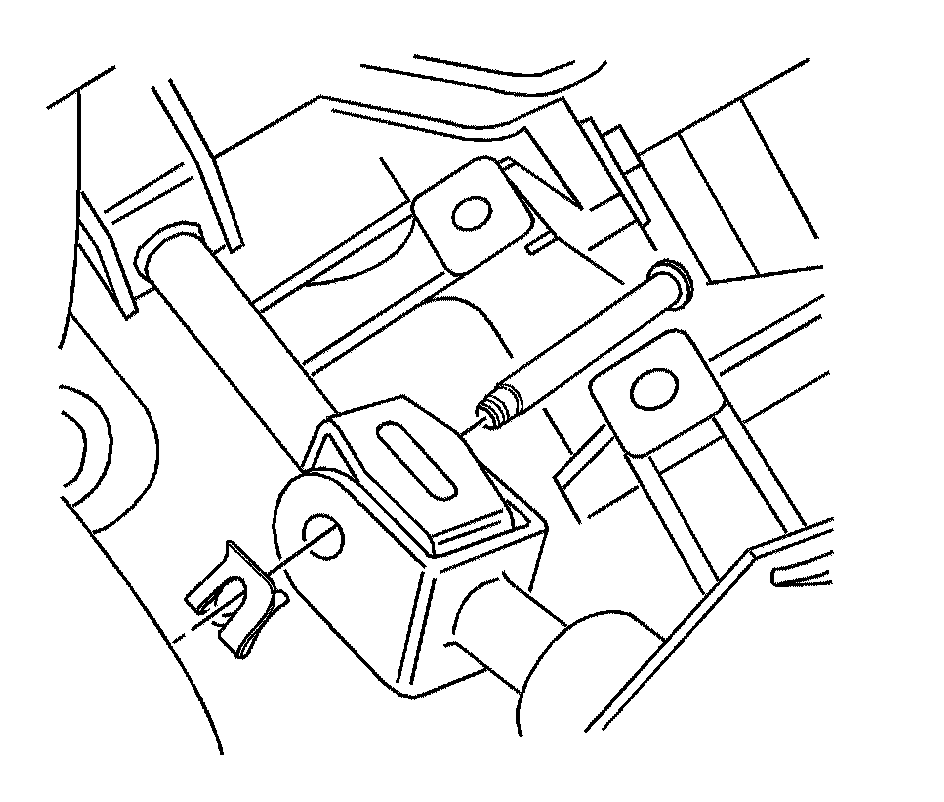
3. Install the universal joint to the transaxle.
4. Install the clip and the bolt from the universal joint.
5. Install the rod clamp.
6. Adjust the shift linkage.
7. Connect the negative battery cable.