Installation Procedure (Right)
Caution:
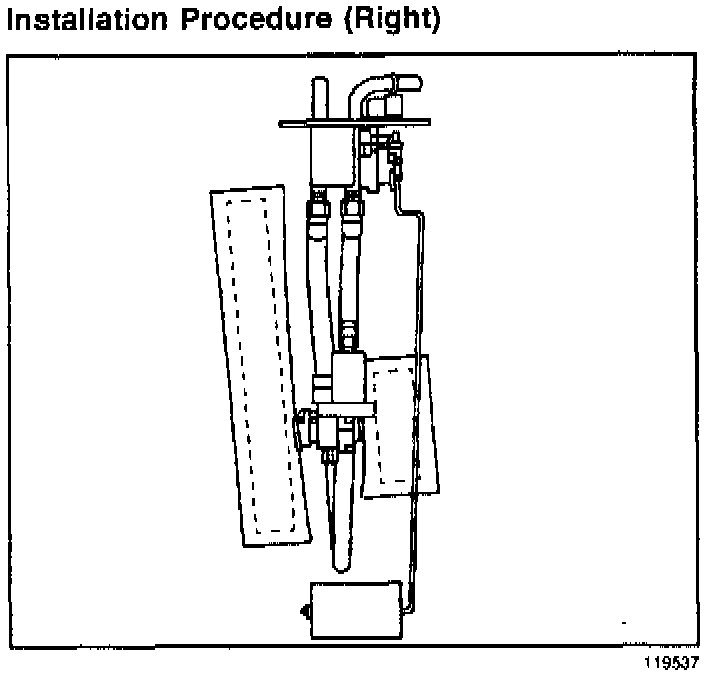
In order to reduce the risk of fire and personal injury that may result from a fuel leak, always replace the fuel sender gasket and the fuel sender attaching bolts when reinstalling the fuel sender assembly.
1. Install a new fuel sender gasket on the fuel sender.
2. Fold the long strainer in half over itself and hold the strainer in this position.
3. Pinch both strainers upward toward each other.
Important:
Do not bend or twist the float arm.
4. Insert the float arm through the fuel tank opening followed by the folded strainers.
5. Release the strainers once the strainers are in the fuel tank. The strainers will spring back to their full position.
6. Continue inserting the fuel sender through the fuel tank opening. It may be necessary to rotate the fuel sender in order to facilitate the installation.
6.1. Look through the fuel tank opening to ensure that the long strainer is visible.
6.2. If the strainer is not visible, rotate the fuel sender clockwise and counterclockwise about 90 degrees. Rotating the fuel sender will free up the strainer. The strainer should become visible at the tank opening.
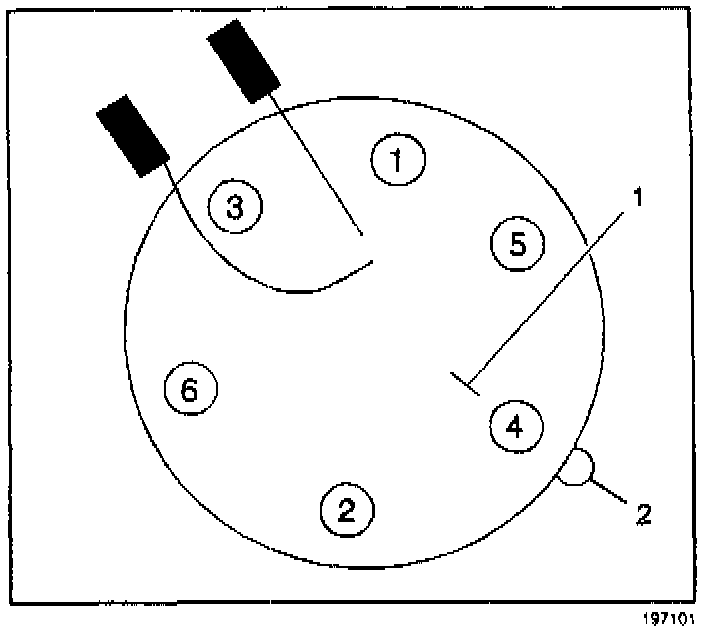
7. Align the fuel sender gasket tab (2) with the fuel sender cover mark (1).
8. Align the fuel sender cover mark (1) with the fuel tank mark.
Notice:
Refer to the Fastener Notice in Cautions and Notices.
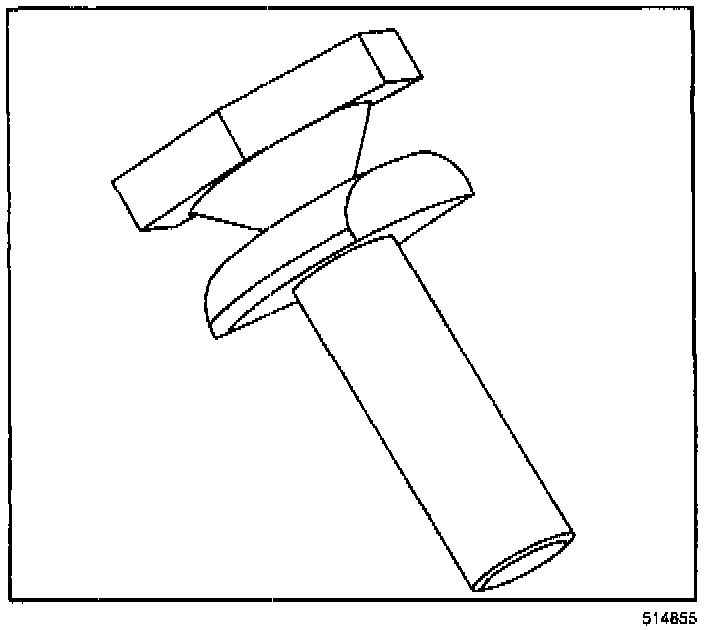
9. Hand tighten the new "break-away head" fuel sender attaching bolts until finger tight.
Important:
The upper hex head portion of the fuel sender attaching bolts is designed to shear off of the lower section of the bolt when the proper torque is reached. Do not tighten the bolts after the bolt heads have sheared off. A torque wrench or other special tool(s) are not required. Do not use thread locking or other types of sealers or lubricants when installing these bolts and gasket.
10. Tighten the new "break-away head" fuel sender assembly attaching bolts in sequence until the upper hex head portion of the bolts shear off of the lower section.
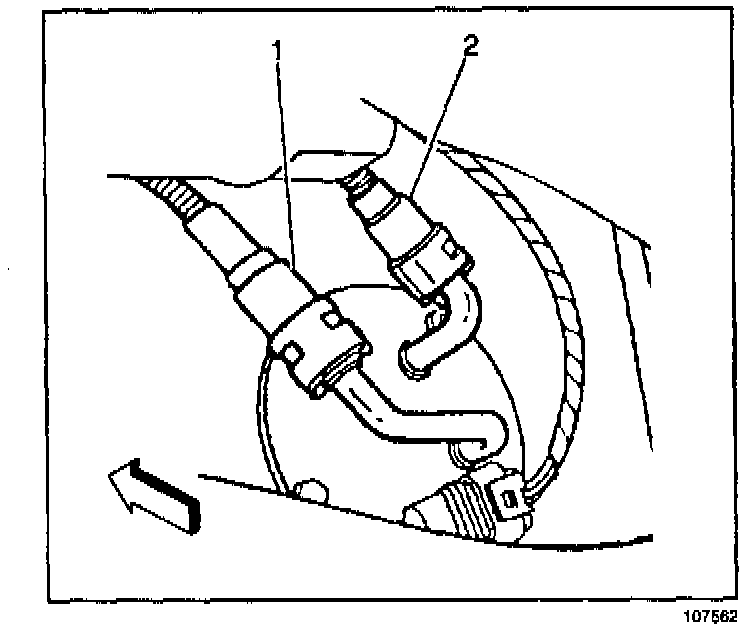
11. Connect the fuel sender fuel feed pipe (1) (jet pump to left tank) and the fuel feed rear crossover pipe (2) (left tank to jet pump). Refer to Servicing Quick Connect Fittings (Metal Collar) or Servicing Quick Connect Fittings (Plastic Collar).
12. Connect the fuel sender electrical connector.
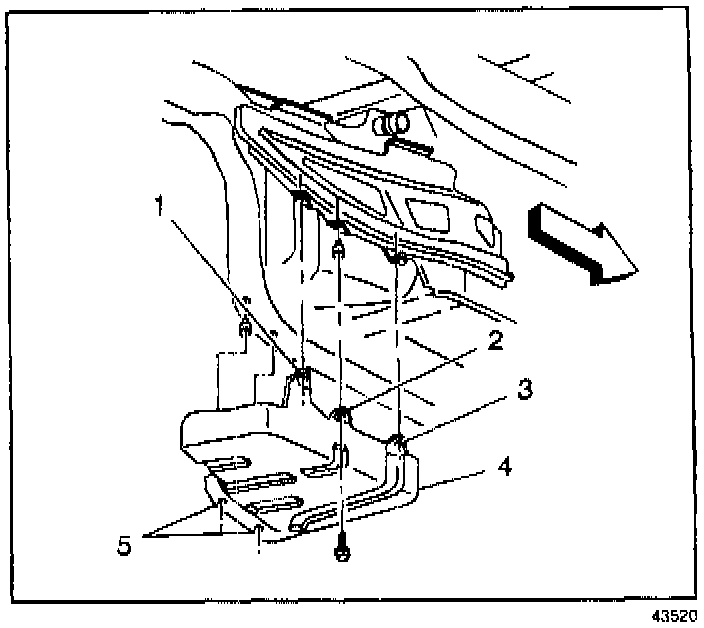
13. Install the fuel tank strap/shield.
14. Install the fuel tank strap/shield bolts.
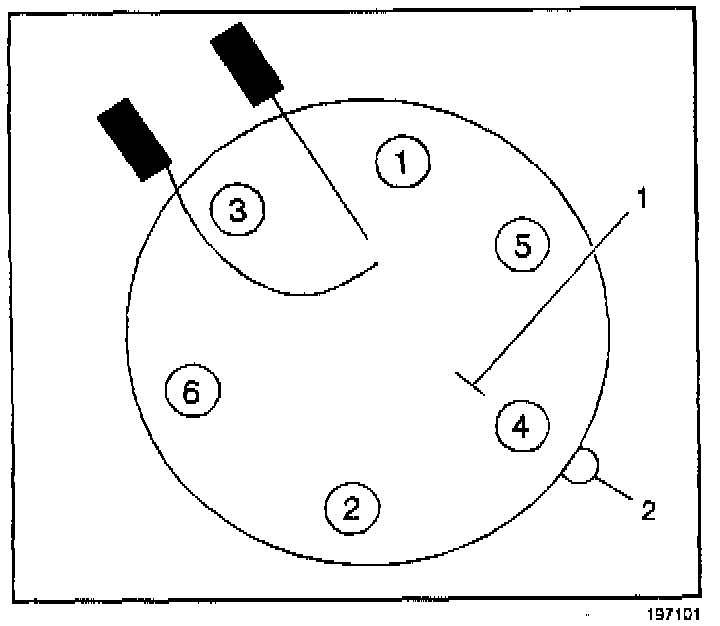
14.1. Install the net hole bolt (3).
14.2. Install the slot location bolt (1).
14.3. Install the remaining bolts (2 and 5).
Tighten
Tighten the fuel tank strap/shield bolts to
25.5 N.m (19 lb ft).
15. Install the rear wheel and tire assembly. Refer to Wheel Removal in Tires and Wheels.
16. Lower the vehicle.
17. Refill the fuel system.
18. Install the fuel filler cap.
19. Connect the negative battery cable.
20. Inspect for leaks.
20.1. Turn the ignition switch ON for 2 seconds.
20.2. Turn the ignition switch OFF for 10 seconds.
20.3. Turn the ignition switch ON.
20.4. Check for fuel leaks.
21. Program the transmitters. Refer to Transmitter Programming/Synchronization in Keyless Entry.
22. Perform the idle learn procedure. Refer to PCM Idle Learn Procedure.