Front Suspension
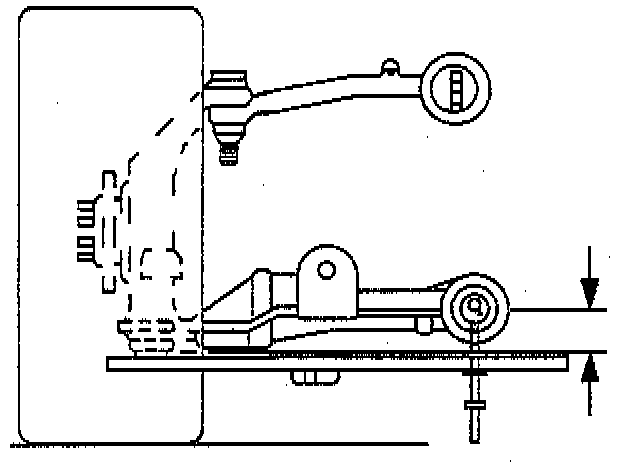
^ Tools Required:
- J 42743 Trim Height Adjustment Tool
- J 42854 Trim Height Adjustment Gauge
Important: When adjusting either the right or left front trim height the opposite side trim height will be affected.
Trim height should be measured with a full tank of gas and no passengers or cargo.
An alignment hoist should be checked periodically to assure that both runners are the same height off the ground; side-to-side and front-to-rear.
1. Place vehicle on an alignment rack.
2. Set the tire air pressure to the proper pressure.
3. Manually lift the front of the vehicle up approximately 38 mm (1 1/2 inch) then, gently remove hands and let the vehicle settle.
4. Repeat the above step two more times for a total of three times.
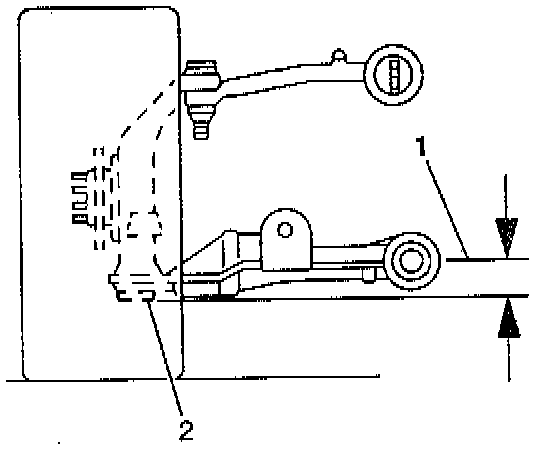
5. Use J 42854 to measure the distance between the lowest point of the ball joint (2) and the center of the front side of the lower control arm mounting bolt (1).
6. Manually push the rear of the vehicle down approximately 38 mm (14/2 in) then, gently remove hands and let the vehicle settle.
7. Repeat the above step two more times for a total of three times.
- Measure both the right and left sides of the vehicle.
- The true Z trim height on each side is the average of the high and low measurements. Refer to TRIM HEIGHT SPECIFICATIONS in WHEEL ALIGNMENT.
Important: When adjusting the spring adjuster bolt J 42743 must be used in order to prevent damage to the rubber shear pad on the end of the bolt.
One complete turn of the spring adjuster bolt is equal to 2 mm (5/64 inch).
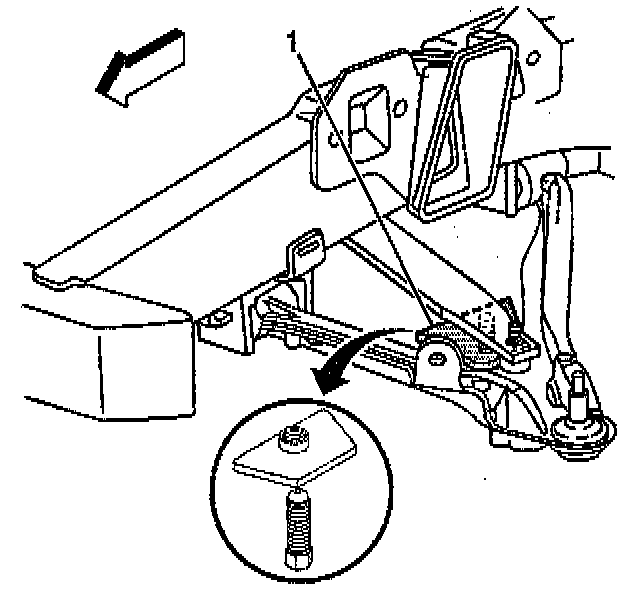
8. Using J 42854, adjust the Z trim height by turning the spring adjuster bolt.
9. Lower the transverse spring back onto the lower control arm and remove J 42743.
10. Perform the jounce procedure again and remeasure the Z trim height.
Important: Do not exceed the maximum difference between the right and left spring adjuster bolt gaps.
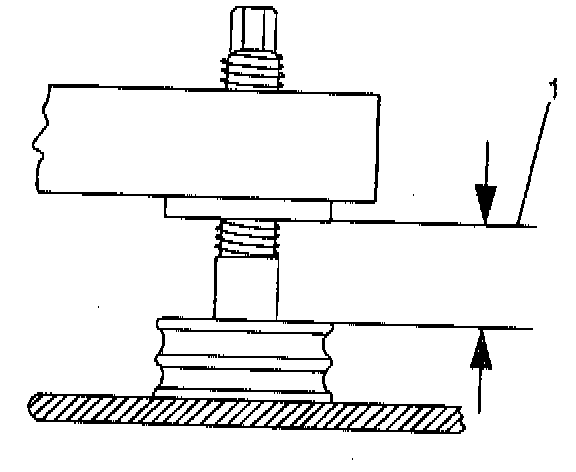
11. Measure the front spring adjuster bolt gaps (1). Refer to GENERAL SPECIFICATIONS.