Replacement (Lower)
This article has been updated with bulletin No.: 77-61-18.
LOWER INTAKE MANIFOLD
REMOVE OR DISCONNECT
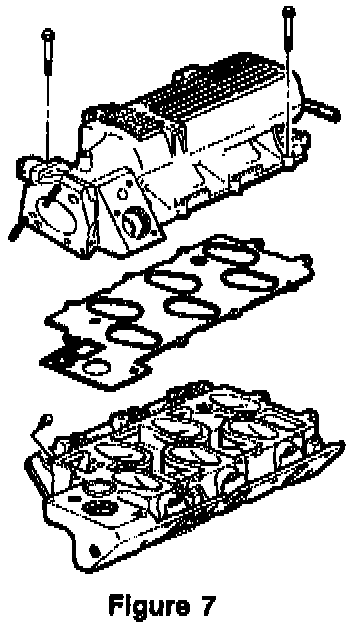
1. Upper intake manifold.
2. Valve rocker arm covers.
3. Engine Coolant Temperature (ECT) Sensor.
4. Lower intake manifold and bolts/screws.
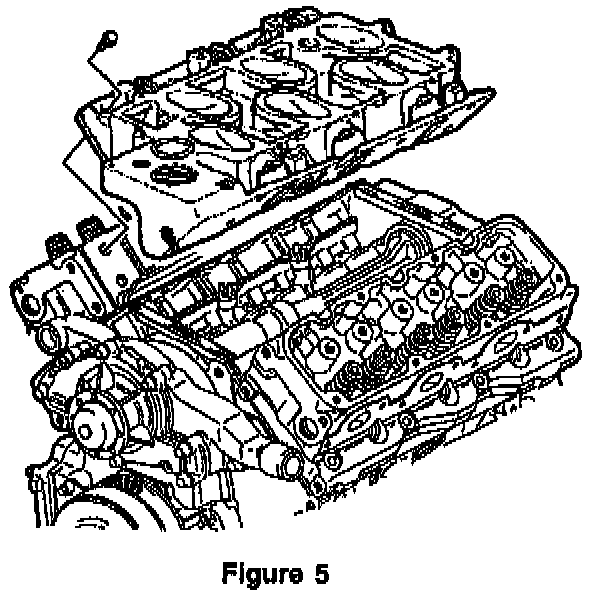
5. Lower intake manifold gaskets and seals.
INSTALL OR CONNECT
IMPORTANT:
- The two lower intake manifold bolts are located under the upper intake manifold. They must be installed before the upper intake manifold.
- Apply GM P/N 12345493 or equivalent thread lock compound to the bolt threads before installing.
1. Install the lower intake manifold gasket.
2. Install the lower intake manifold.
3. Apply GM P/N 12345382 threadlocker or equivalent on the bolt threads.
Tightening Sequence:
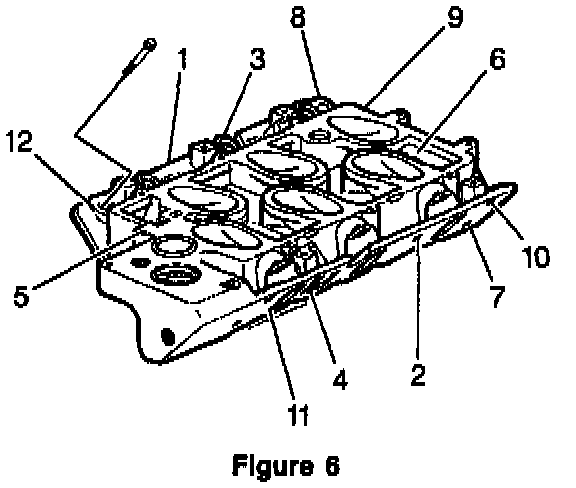
4. Install the lower intake manifold bolts. Torque in sequence to 15 Nm (11 lb ft).
5. Engine Coolant Temperature (ECT) Sensor.
6. Valve rocker arm covers.
7. Upper intake manifold.
UPPER INTAKE MANIFOLD
INSTALLATION PROCEDURE
1. Install the upper intake manifold gasket.
2. Install the upper intake manifold.
3. Install the water outlet.
Tightening Sequence:
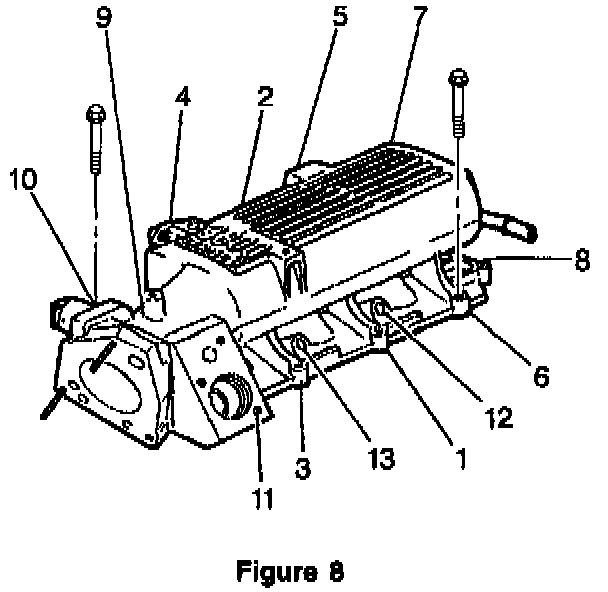
4. Install the upper intake manifold bolts. Torque in sequence to:
- Tighten the vertical bolts in sequence to 15 Nm (11 lb ft).
- Tighten the water outlet bolts in sequence to 27 Nm (20 lb ft).
- Tighten side bolts in sequence to 30 Nm (22 lb ft).